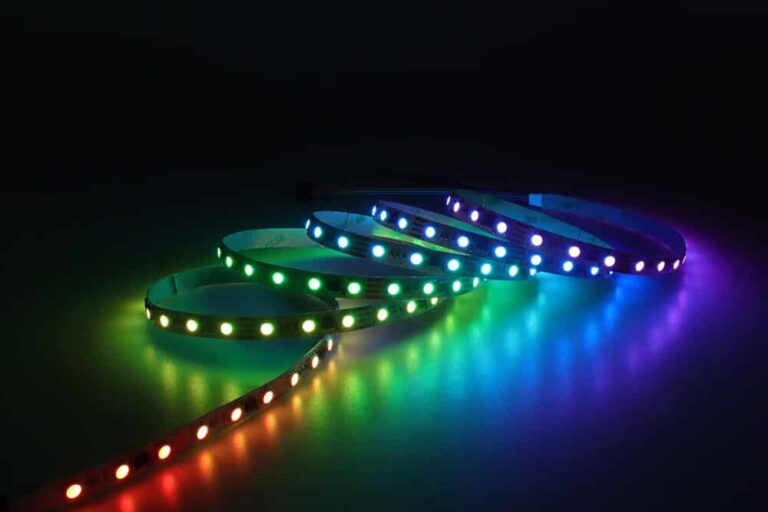
LED neon flex lights have become incredibly popular and adaptable in the current market. Their versatility knows no bounds, making them an ideal choice for various settings. These lights have covered you whether you want to add a warm ambiance to your personal space or illuminate a commercial area. However, deciding where to begin can be daunting, given the variety of types, colors, and styles available. To assist you in making the best selection, this comprehensive guide will provide you with all the information to find the perfect LED neon flex lights that cater to your specific requirements.
What are Traditional Neon Lights?
Traditional neon lights refer to the luminous glass tubes or bulbs that radiate vibrant light when electrified. These lights are classified as cold cathode gas discharge lamps and are typically filled with rare gases like neon or other uncommon gases. Each neon tube is a sealed glass structure containing electrodes at both ends filled with low-pressure gas. When a high voltage of several thousand volts is applied to the electrodes, the gas within the tube becomes ionized, leading to light emission. The specific color of the light emitted depends on the type of gas present in the tube. Neon, for instance, is responsible for producing the well-known orange-red glow, from which the term “neon” is derived. However, various other gases can generate different hues, such as hydrogen (red), helium (pink), carbon dioxide (white), mercury vapor (blue), and so on.
What are the features of LED Neon Flex lights?
- Low working voltage: LED Neon Flex Lights operate at a low voltage due to the LED light source. This results in minimal power consumption, making them energy-saving. They can perform well even at 24Vdc, typically consuming less than 15W per meter.
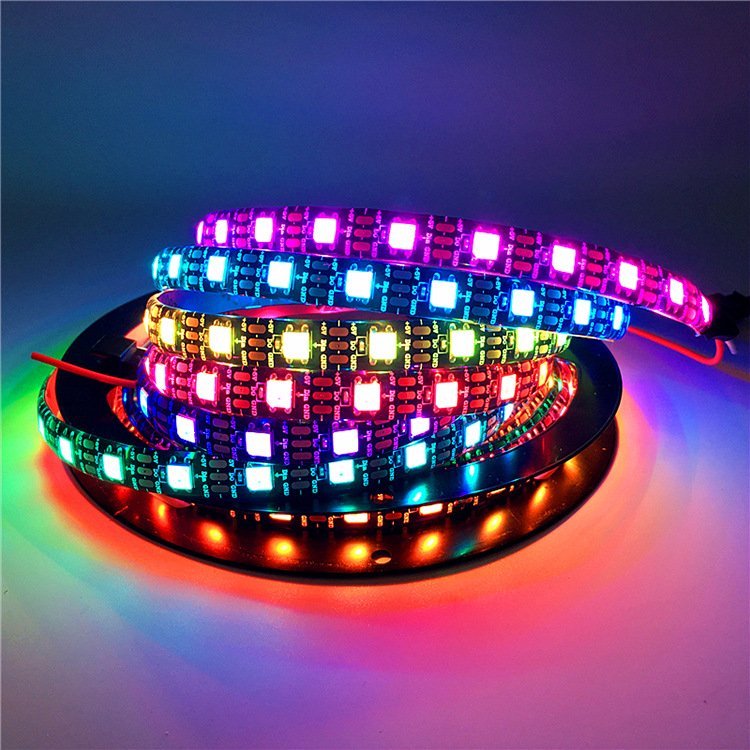
- High brightness: The light source consists of ultra-high brightness SMD LEDs, with a density of 120 LEDs per meter. This ensures exceptional brightness and an overall uniform luminous effect.
- Durability and long life: The LED Neon Flex Lights have a prolonged lifespan of up to 50,000 hours. They are constructed using LEDs, eliminating the issues of fragility commonly associated with traditional glass neon lights.
- Flexibility: These lights are highly flexible and can be bent to a minimum diameter of 5CM. They can also be easily cut into desired lengths.
- Safety: Unlike traditional glass neon lights that require high voltage, LED Neon Flex Lights operate at a safe voltage of 12V or 24V. They are designed to be unbreakable and have low heat dissipation.
- Simple installation and transportation: LED Neon Flex Lights are straightforward to install and transport. The LED light source and the PVC/Silicone/PU casing are resilient during transportation. To install, you only need to secure the mounting clips or channels first and then insert the LED flexible neon into them.
What are the advantages of LED Neon Flex Lights compared to Traditional Neon Lights?
- Traditional neon lights can be expensive, complex, and inconvenient because they use glass tubes, high-voltage electricity, and inert gas. LED neon flex lights, on the other hand, utilize LED technology and a new structural design. They feature a housing made of PVC, silicone, or PU wrapped around the LED light source. These lights employ unique optical design technology and a special housing design that enhances the light intensity and uniformity. LED neon flex lights are easy to manufacture and highly efficient.
- LED neon flex lights offer more excellent brightness compared to traditional neon lights.
- LED neon flex lights have a longer lifespan and are more durable. With LED as the light source and PVC/silicone/PU housing, the LED neon flex lights can last up to 30,000 hours.
- LED neon flex lights are more energy-efficient, consuming less power. They typically require less than 5W per meter, whereas traditional glass neon lights generally consume over 20W per meter.
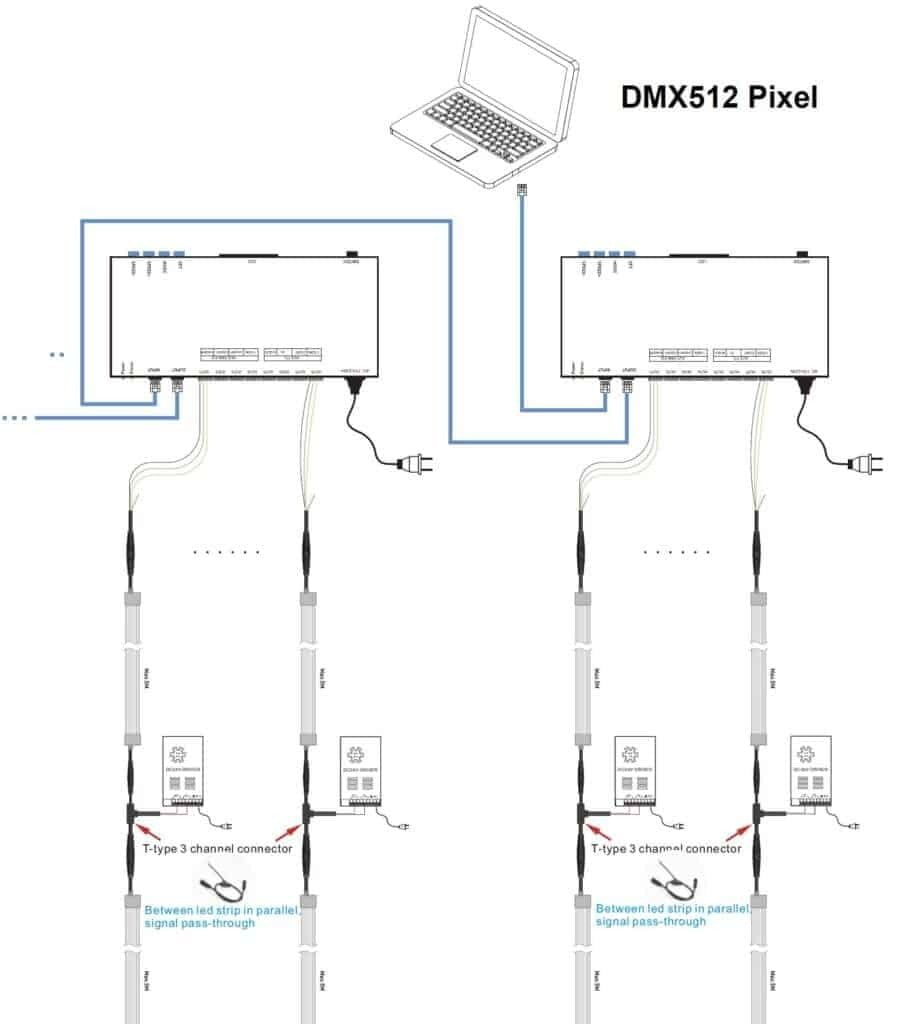
- Unlike traditional neon lights that rely on transformers to increase the voltage and excite the inert gas in glass tubes, LED neon flex lights provide more flexibility. They can be bent and cut on-site, offering various color options, including white, tunable white, RGB, RGBW, DMX512 Pixel, and more. Traditional neon lights require multiple sets of glass tubes to emit different colors, and their shapes need to be predetermined during factory production, unable to be changed later.
- LED neon flex lights prioritize safety as they operate on low voltages of 12V or 24V. They are shockproof, dissipate low heat, and are safe to use.
- Conventional neon lights can only function at average room temperature and require voltage boosting during use. This not only adds to the cost but also shortens their service life. LED neon flex lights, however, utilize LEDs as cold light sources, generating less heat and consuming less power. They are also shockproof and heat resistant.
- LED neon flex lights are more environmentally friendly. Unlike traditional neon lights that contain heavy metals and contribute to pollution, LED neon flex lights do not contain heavy metals or other harmful substances.
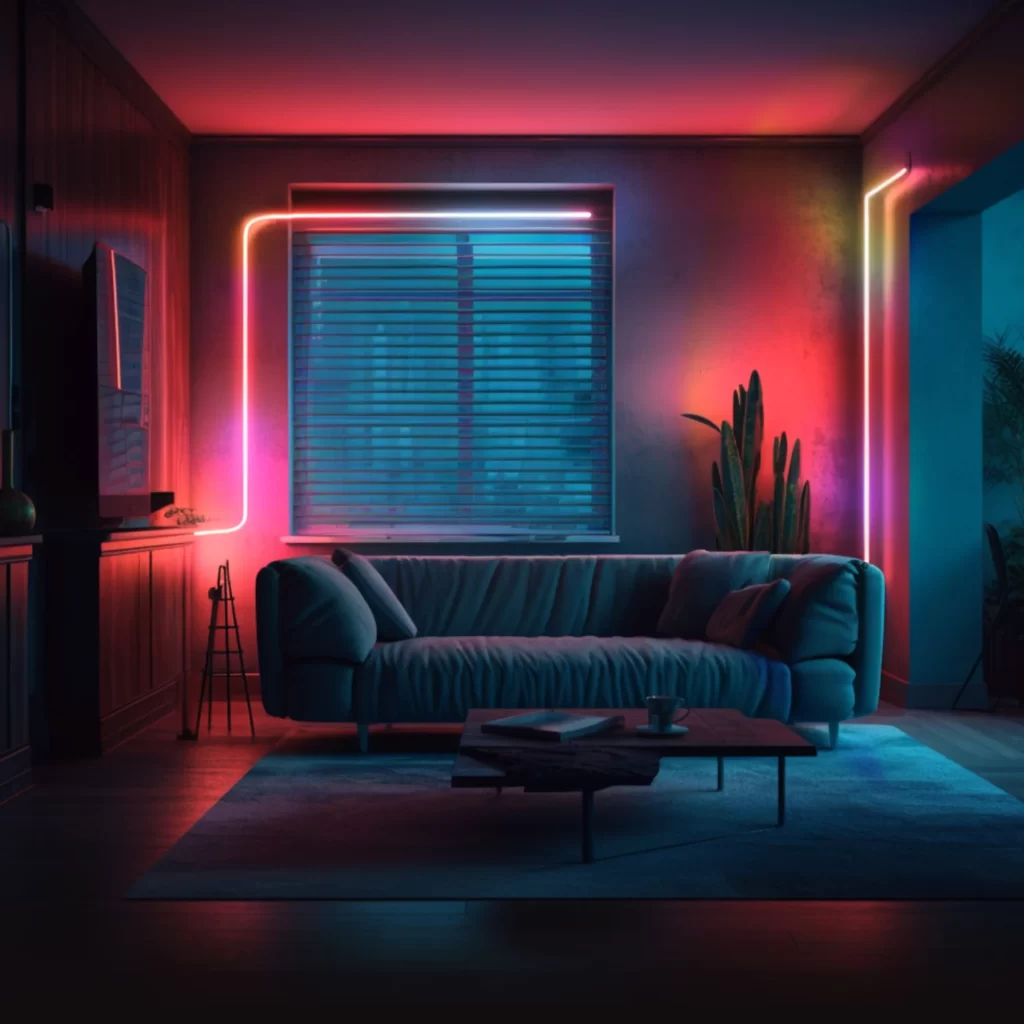
Applications of LED Neon Flex Lights: Exploring Their Uses
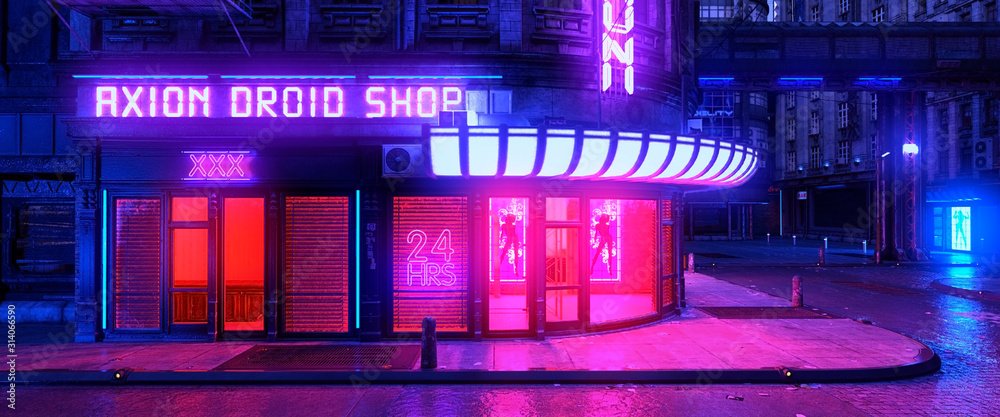
1. Enhancing Signage and Exhibit Lighting

2. Artwork Lighting
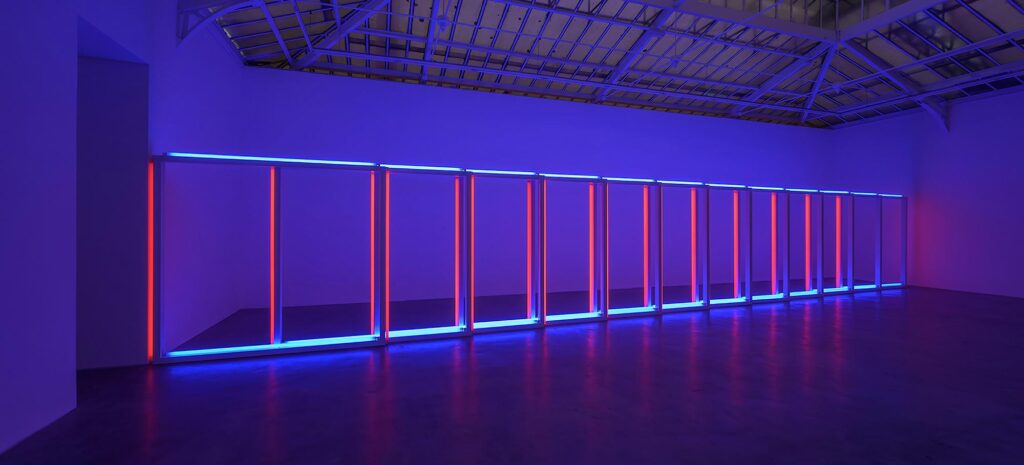
3. Enhancing the Beauty of Buildings
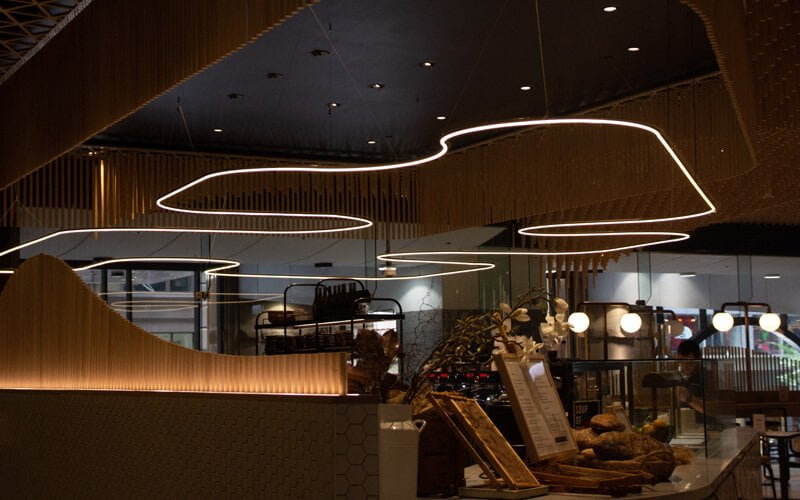
4. Cove lighting
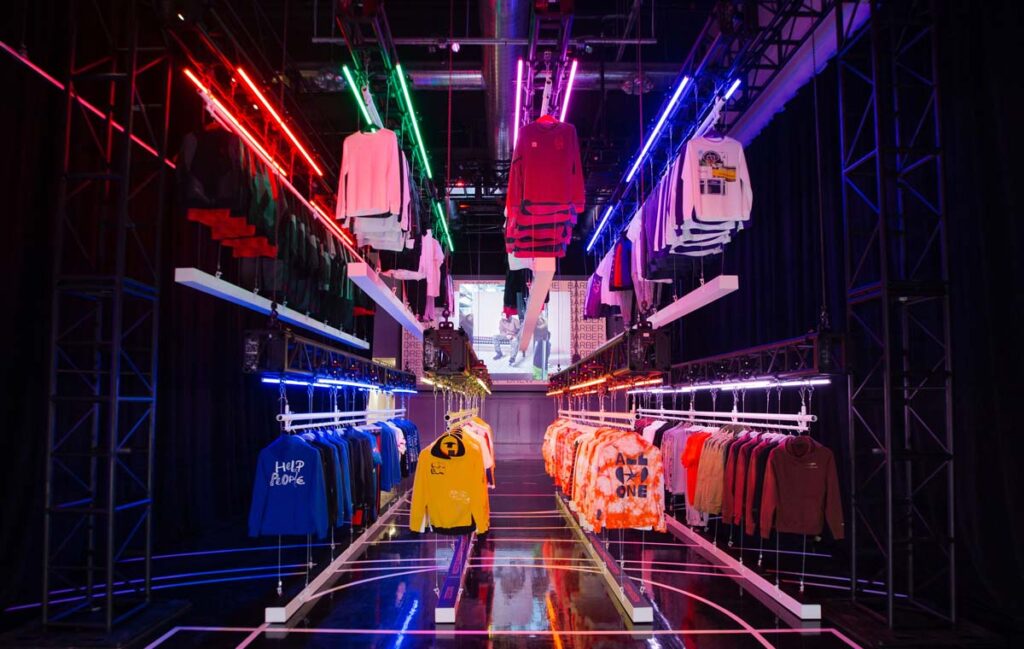
5. Innovative Retail Displays
6. Marine Lighting Environments

7. Home Lighting
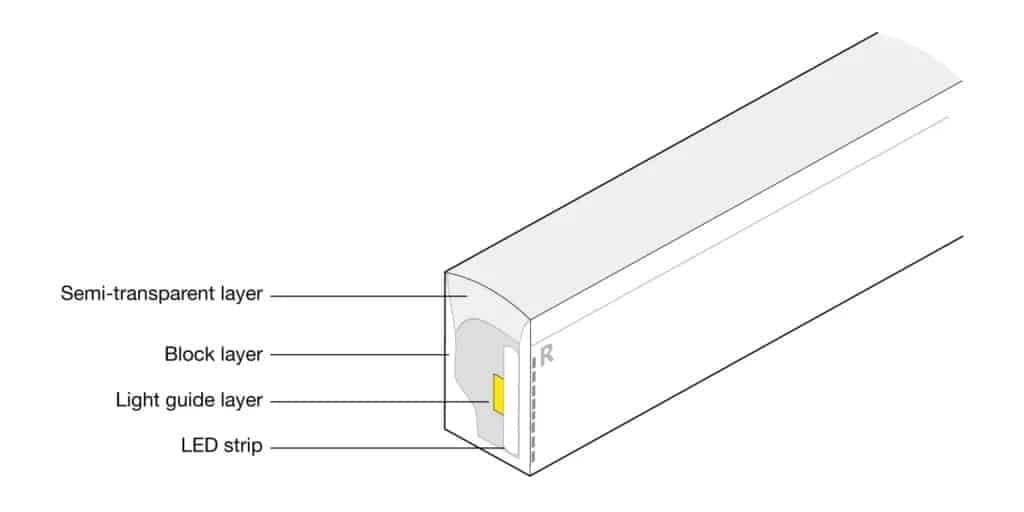
Analyzing the Design of LED Neon Flex Lights
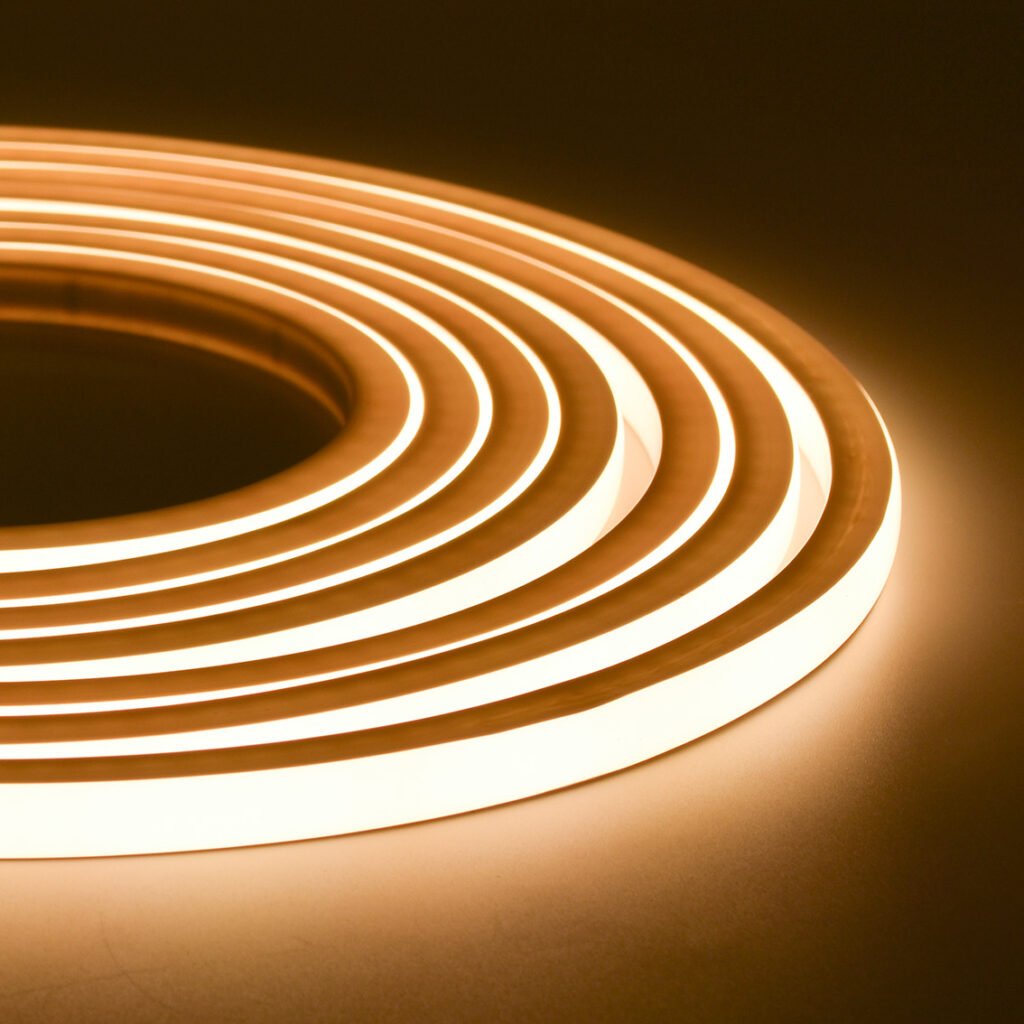
LED Neon Flex Lights are constructed with a flexible LED strip at its core, enveloped by a layer of PVC, silicone, or PU. This outer covering diffuses the light emitted by the LEDs, ensuring consistent and uniform illumination.
Types of LED Neon Flex Lights
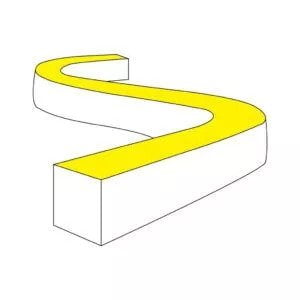
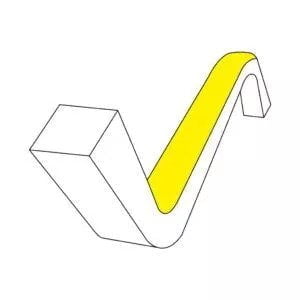
- Bending Direction: Horizontal Bending (Side Bending), Vertical Bending (Top Bending), 3D Bending (Horizontal & Vertical Bending), 360 Degree Round
- Housing Material: PVC, Silicone, PU (Polyurethane)
- Working Voltage: Low Voltage: 12V/24V/36V/48V, High Voltage: 120VAC/220VAC
- Light Color: Monochrome, Tunable White, RGB, RGBW, DMX512 Pixel RGB, SPI Pixel RGB


Producing LED Neon Flex Lights: A Step-by-Step Guide
The manufacturing process of LED Neon Flex Lights involves two primary stages.
In the initial phase, the LED flexible strip is created as the fundamental component of the neon lights. Please refer to the provided blog if you require a detailed explanation of the LED strip production process.
The subsequent phase entails applying a silicone shell to the LED strip. There are two primary methods for achieving this. The first approach involves an integrated extrusion process, combining the LED strip and silicone. Alternatively, the second method entails separately manufacturing a silicone tube and manually inserting the LED strip.
Integrating LED Strip and Silicone: An Extrusion Process
Procedure:
- Silicone Mixing
Silicone, which comes in two types for neon lights, is initially in a solid form. The first type is milky white, used for light diffusion, while the second type is white and is used to block light. MyLiKeLed’s neon lights are more advanced as they utilize three silicone colors, with an additional transparent color used explicitly for marking cutting positions, making them more visible.
Although the raw material is the same for all silicone, achieving different colors requires the addition of diffusion powder in specific proportions. The amount of diffusion powder determines the whiteness of the silicone and the extent of light transmission.
- Extrusion Process
The extrusion process commences by installing rolling LED strips onto the payoff frame. These LED strips are carefully adjusted and arranged on an adjustment table.
- Silicone Coating
Next, the LED strip and silicone pass through pre-assembled dies, with the operator activating the electronic control box’s operating button. This initiates the machine, causing it to wrap the silicone coating around the LED strip.
- Vulcanization and Shaping
The machine extrudes the silicone-coated LED strip, which then goes through a vulcanizing oven. In this oven, the product undergoes gradual vulcanization and takes shape. The oven maintains a moderate temperature to prevent damage to the LED beads, ensuring they are not burnt. Once vulcanization is complete, a tractor removes the LED neon from the oven.
Manual way
Step 1: Utilize silicone extrusion machines to manufacture or procure silicone neon sleeves from other factories. The production process for silicone neon sleeving resembles the integrated extrusion process of LED strips and silicone described earlier. However, unlike LED strips, the silicone neon sleeves do not contain any LEDs inside; instead, they have a wire running through them.
Step 2: Add the prepared LED strip to the silicone neon tube using the wire. Then, pull the wire from the other end of the silicone neon tube to draw the LED strip inside.
Comparison: Silicone Integrated Extrusion vs. Manual Way
- In the silicone extrusion method, the LED strip and silicone are extruded together as a single unit, creating longer silicone neon tubes. Theoretically, they can be made infinitely long. However, due to voltage drop and transportation constraints, it is generally recommended not to exceed 50 meters for LED strips. On the other hand, the manual method usually has a maximum length of 5 meters. If the length exceeds 5 meters, the friction between the LED strip and the silicone neon tube makes it impossible to insert the strip manually.
- With silicone-integrated extrusion, the silicone neon tube tightly adheres to the LED strip, ensuring a secure fit and higher product quality. In contrast, using the manual method may result in relative movement between the LED strip and the silicone neon tube.
- The efficiency of the silicone-integrated extrusion process is significantly higher than the manual method.
- However, for small quantities such as 1-meter samples, the one-piece silicone extrusion method can be expensive and time-consuming to set up due to the machinery involved. In such cases, the manual method is more convenient, requiring only the manual insertion of the LED strip into the readily available silicone neon tube.
Steps to Guarantee the Quality of LED Neon Flex Lights:
- Confirm that the LED strip light source incorporates brand-name or quality-assured LEDs, resistors, and IC components.
- Request the LM80 test report for the LEDs from the manufacturer. Check the predicted lifespan of the LEDs in this report – high-quality LEDs should have an L80 lifespan of up to 50,000 hours.
- Check that the PCB utilized for the LED strip light source is constructed from pure copper and is a double-sided PCB with a thickness of 2oz or 3oz.
- Ensure that the housing for the LED silicone neon light is crafted from high-quality silicone that complies with RoHS regulations and is UV-resistant, flame-retardant, and corrosion-resistant.
- Verify that the LED silicone neon has achieved the necessary product certifications, such as CE, RoHS, UL, etc.
- Confirm that the color temperature range of the final silicone neon light product is as narrow as possible. Typically, our MyLiKeLed products have a color temperature range of plus or minus 100K.
- Ensure the color rendering index of the silicone neon light. A higher color rendering index indicates a better quality of light! For instance, our MyLiKeLed silicone neon lights boast a color rendering index of more than 90.
- Ensure that the LED silicone neon comes with a broad selection of accessories. This could include solder-free plugs, integrated injection plugs designed for different wire outlet directions, mounting clips, and mounting aluminum lights.
- Lastly, confirm that the LED silicone neon offers options for customization, OEM, and ODM.”
Steps for Cutting, Soldering, and Powering LED Neon Flex Lights
- Begin by measuring the length.
- Identify the precise position for cutting on the LED Neon Flex.
- Carefully cut the LED Neon Flex at the designated location.
- Trim away excess silicone from the LED Neon Flex.
- Use an electric iron to solder the cable to the LED Neon Flex.
- Fill the LED Neon Flex and endcap with silicone.
- Illuminate the LED Neon Flex to conduct a test.
- Allow sufficient time for the silicone to dry and solidify.
Discover the steps to effortlessly cut, connect, and power LED Neon Flex Lights using hassle-free solderless connectors.
- Begin by measuring the length.
- Determine the precise cutting position on the LED Neon Flex.
- Carefully cut the LED Neon Flex.
- Attach the connectors to the LED Neon.
- Connect the power plug to the LED Neon.
- Illuminate the LED neon to conduct a test and ensure functionality.
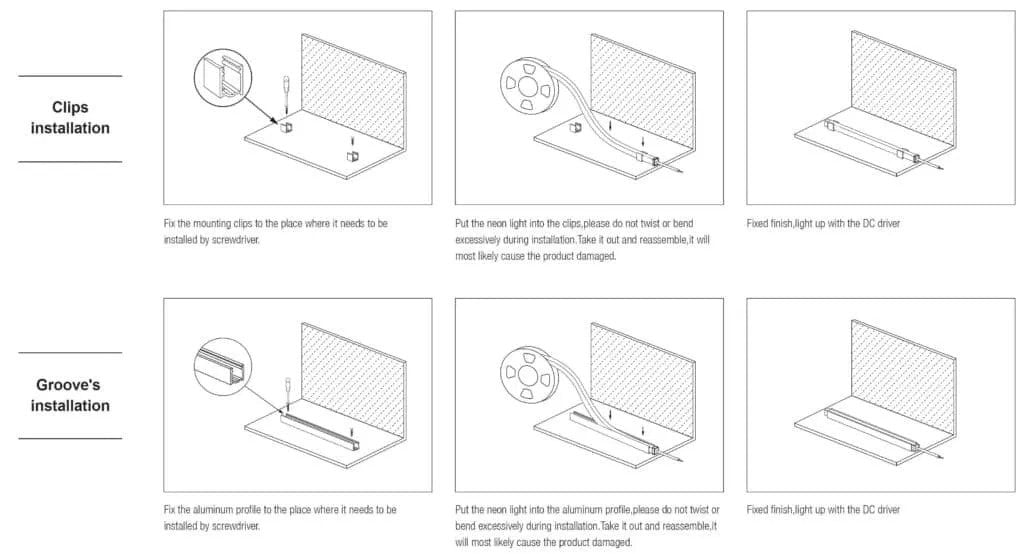
Installing LED Neon Flex Lights: A Step-by-Step Guide
Step 1: Measuring the Length Begin by measuring the desired length of the LED Neon Flex lights.
Step 2: Locating the Cut Position Identify the appropriate position on the LED Neon Flex where you need to cut.
Step 3: Cutting the LED Neon Flex Carefully cut the LED Neon Flex to the required size at the designated cut position.
Step 4: Attaching Connectors The LED Neon Connectors must be attached to the LED Neon Flex. Ensure a secure and proper connection.
Step 5: Connecting the Power Plug to the LED Neon Connect the power plug to the LED Neon Flex, ensuring a reliable electrical connection.
Step 6: Mounting the Clips or Channels Choose the desired installation location and use screws to secure the mounting clip or mounting channel in place.
Step 7: Insert the LED Neon into the Mounting Clip or Channel Gently press the LED Neon Flex light into the mounting clip or channel until it is securely held in place.
Step 8: Testing the LED Neon Lights Switch on the power supply to light up the LED Neon Flex lights and verify that they function correctly.
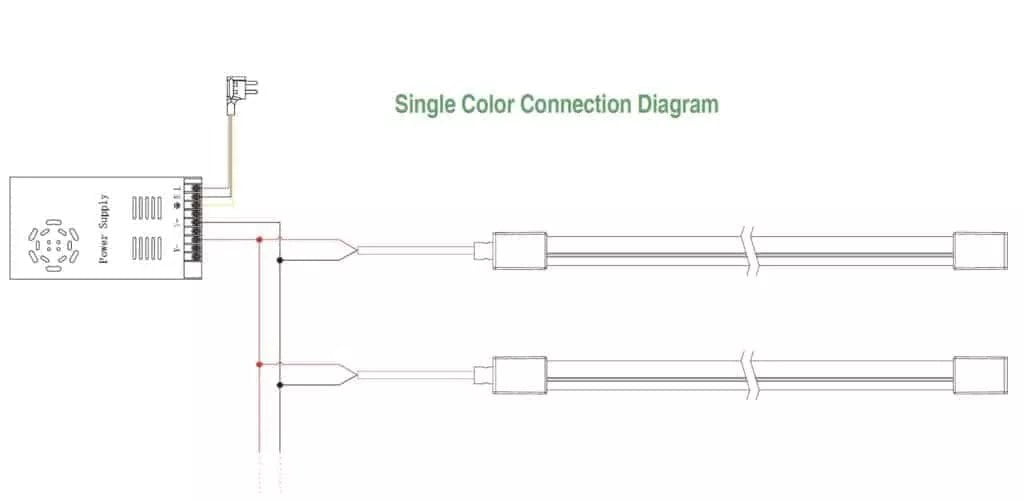
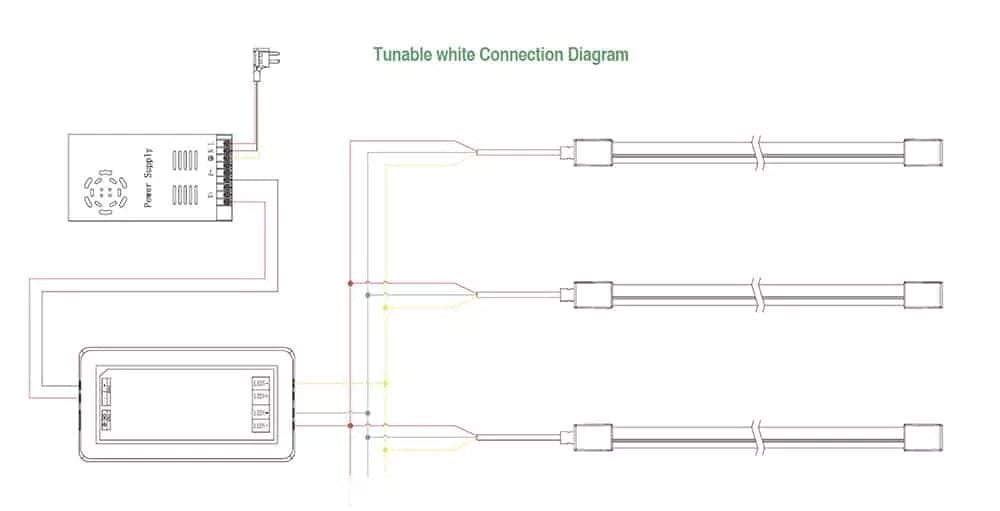
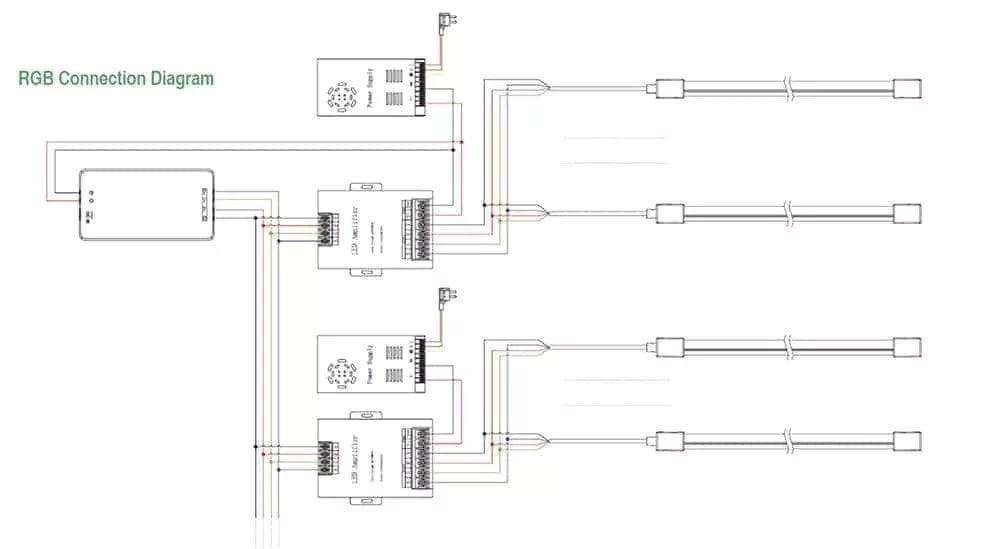
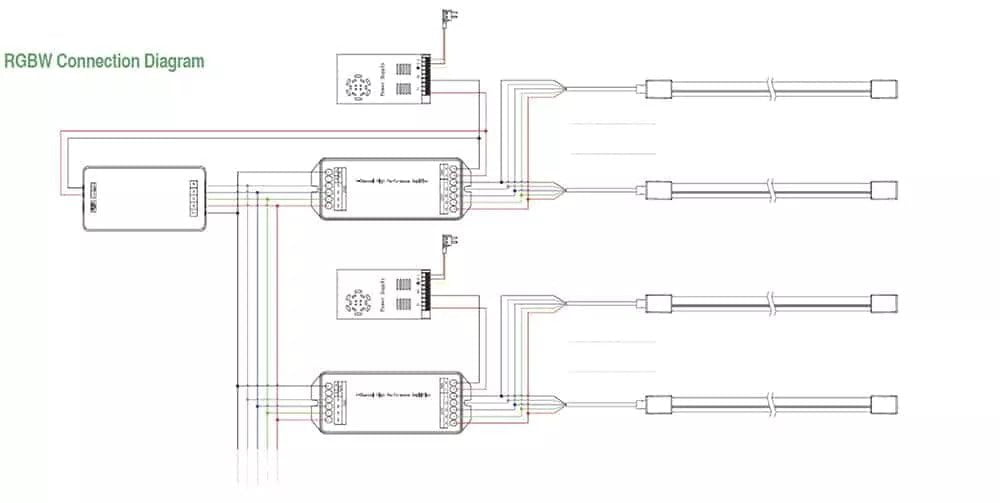
How to connect LED Neon Flex Lights to the power supply?
Step 1: Check the working voltage of the LED Neon Flex
Step 2: Find a compatible power supply and controllers if need
Step 3: Install the LED Neon Flex in the place you’re desired
Step 4: Install the power supply and controllers
Step 5: Connect the LED Neon Flex to the power supply or controllers
Step 6: Light it up
Please check the wiring diagram below:
Conclusion
To summarize, Neon Flex offers numerous advantages, making it an excellent choice for projects of any scale. Its durability, cost-effectiveness, and wide range of color options, lengths, and styles contribute to its appeal. In addition, Neon Flex surpasses traditional neon tubing in terms of energy efficiency and convenience. These qualities make it particularly suitable for permanent installations and custom designs. With its combination of benefits, Neon Flex emerges as the ideal solution for those seeking visually striking and distinctive creations.
MyLiKeLed specializes in the production of top-notch LED strips and LED neon flex. Our products undergo rigorous testing in state-of-the-art laboratories to ensure unparalleled quality. Furthermore, we offer customizable options for our LED strips and neon flex. For premium LED strips and LED neon flex, don’t hesitate to contact MyLiKeLed immediately!

Hi, I’m Xylia Xiong, a sales professional with 14 years of experience in the LED strip light industry. I specialize in providing tailored solutions, leveraging my expertise in LED products and the latest industry trends. Known for effective communication and problem-solving, I’m dedicated to helping lighting manufacturers, importers, and distributors achieve their goals.
Let’s work together to create customized solutions that exceed expectations.