Downlights are rapidly gaining popularity for both residential and commercial illumination. However, not every downlight is suitable for all ceiling types. For instance, a non-IC-rated downlight installed on an insulated ceiling can pose a safety hazard. Thus, it’s crucial to select appropriate downlights.
Installed into the ceiling, downlights cast light downwards, serving purposes such as general illumination, task lighting, or aesthetic enhancement. When selecting downlights, various factors should be considered: ceiling height, beam angle, downlight spacing, and IC & IP ratings, among others. Furthermore, the downlight installation method is unique because they attach directly to the ceiling.
Fear not, as this article will guide you through understanding downlights, their variants, and how to choose the most suitable one. Here, you’ll also find straightforward installation and maintenance guidelines. So, let’s jump into the discussion without further ado.
What are the Downlights?
Designed to emit light downwards, downlights, also known as canister lights, are embedded into the ceiling, casting even light across space. Typically small-sized, when multiple downlights are installed in a ceiling, they yield excellent ambient lighting. Furthermore, downlights serve well for accent or task lighting. Available in diverse varieties and styles, these lights add a modern touch to your illumination strategy, increasing their popularity in residential and commercial settings.
Downlight Types
Downlights can be categorized based on two factors: their mechanism and their installation process. Here are the types of downlights according to these criteria:
Based On Mechanism
Depending on their lighting pattern and mechanism, downlights can be of three types:
1. Fixed Downlight
Fixed downlights, the most affordable and common type, are directly installed into the ceiling, projecting light downwards. The brightness of these lights is determined by the bulb within the fixture. The narrower the beam angle, the greater the light intensity. For instance, a fixed downlight with a 40° beam angle emits a brightness of 37fc. But if the beam angle is increased to 120°, the brightness reduces to 17fc while the illuminated area expands. Professionals often recommend installing multiple downlights at a 40° angle for adequate ambient lighting.
2. Adjustable Downlight
These lights offer a high degree of functionality because their angles can be adjusted. They can be moved in various directions according to your lighting needs. However, the range of angle adjustability differs among brands. These lights are an excellent choice if you require focused lights to highlight a specific area in your house. Their versatility makes adjustable downlights increasingly popular.
3. Dimmable Downlight
Different sections of your room and times of the day or tasks may require varying light intensity levels. Dimmable downlights allow you to adjust the light’s intensity to suit your needs and mood.
Based On the Installation Process
Downlights can be categorized into three main types based on their installation process:
1. Recessed
Recessed downlights attach directly to the ceiling and are specifically designed for false ceilings, where holes can be made for fixture insertion. There are two types of recessed lighting based on the installation area- IC and non-IC rated. This rating is crucial when purchasing recessed lights, particularly for insulated homes. LED recessed lights are excellent energy-efficient options that can be mounted on the ceiling with spring or compressor clips.
2. Surface Mounted
Installed onto concrete ceilings, surface-mounted downlights are fixed using the supplied brackets, avoiding the need to drill holes in the ceiling. They’re available in different sizes and are excellent for ambient lighting.
3. Suspended
Suspended downlights hang from the ceiling, adding an extra visual effect to your lighting. They suit living areas, hallways, reading rooms, and more. These lights are also ideal for restaurant lighting.
Downlight Applications
Downlights serve as a modern alternative to traditional bulky light fixtures. Compact, lightweight, and versatile, they can be used for primary lighting purposes, such as:
Ambient Lighting
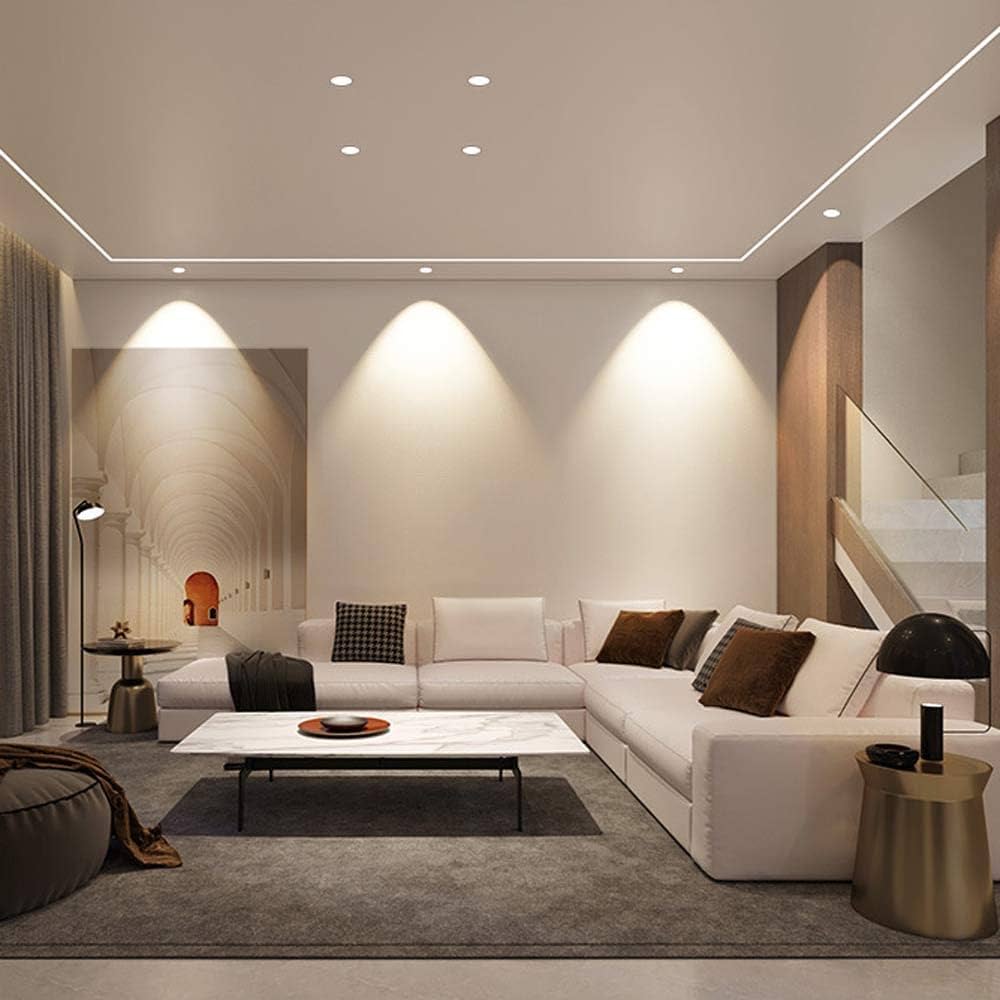
Ambient lighting is general room lighting. LED strips, tubes, and bulbs are typically used for this purpose, but downlights offer a contemporary alternative. However, due to their small size, multiple fixtures must be installed on the ceiling for proper ambiance. They create a soft, cozy glow in your room without direct glaring, making them perfect for ambiance lighting in bedrooms, hall rooms, shopping malls, hotels, receptions, etc. To install downlights for ambient or general lighting, follow these measurements:
| Ceiling Height | Beam Angle | Downlight spacing |
| 3 meters | 60° to 120° | 1.5m to 3m |
Highlighted Lighting
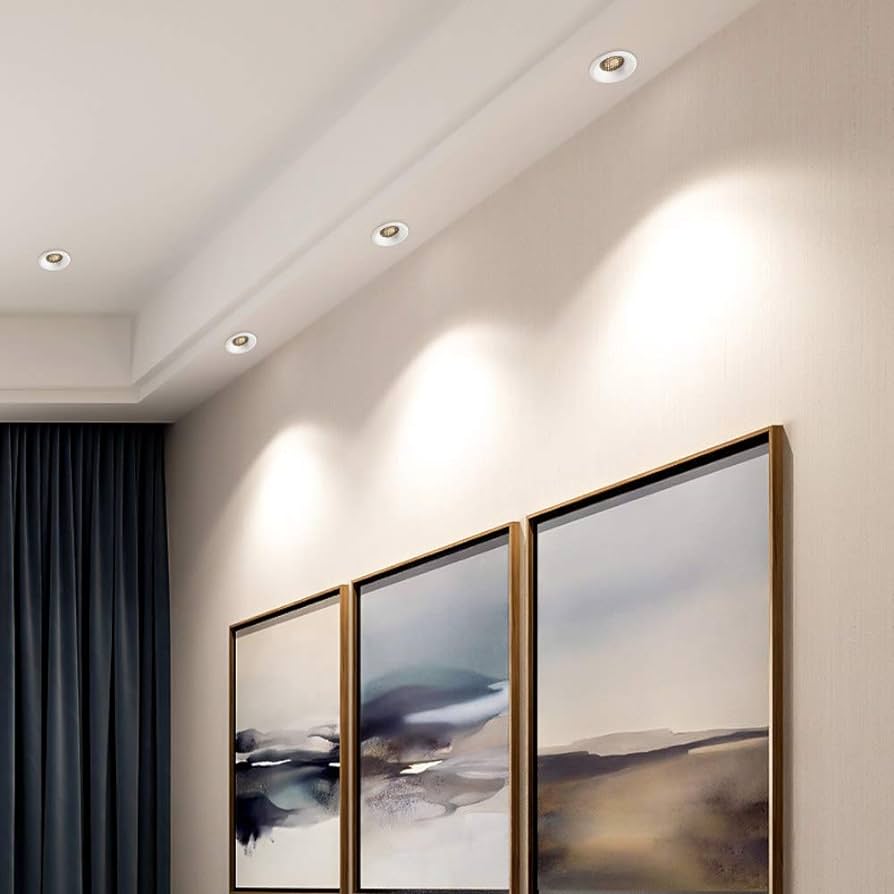
Utilizing downlights as highlighted illumination can accentuate specific objects or areas. Suppose you want to accent special textures on your walls; downlights can be your go-to option. These lighting fixtures are equally beneficial for showcasing artworks or architectural details of your home, thereby enhancing your overall ambiance.
Task Lighting
Downlights often serve as purposeful or task lighting, focusing on distinct areas. A popular instance of this application is kitchen lighting, where downlights are typically installed in the kitchen station or beneath the cabinets to offer ample lighting for the workstation. Here are some suggested brightness levels for downlights according to their varied uses-
| Task Lighting With Downlight | Recommended Illuminance |
| Canteen & entrance hallways | 160 lux |
| Food preparation | 240 lux |
| Reading & Office Task | 320 – 400 lux |
| Inspection Task | 600 lux |
| Hand tailoring & graphic art inspection | 1200 lux |
Decorative Lighting
Suspended downlights are frequently chosen for ornamental lighting, adding an extra layer to your decor. Wall washers also work well for this purpose. You can even explore vibrant downlights to create a decorative lighting effect in your space.
Key Aspects to Consider Before Selecting a Downlight
It’s vital to select the right fixture before installing any downlight. Here are the key aspects to consider before choosing a downlight-
1. Ceiling Height
The ceiling’s height is an essential factor when setting up a downlight. It dictates the bulb’s intensity, beam angle, and the number of lights needed, all about the ceiling’s height. For instance, the recommended spacing for task lighting with a ceiling height of 4 meters is between 2.5m and 3.5m. If the ceiling height is 8 meters, a 3.5m to 5.5m spacing between the lights is ideal.
2. Light Quantity Requirement
Since downlights are relatively small, one fixture cannot light up an entire room. Hence, determining the number of downlights needed for your space is crucial. However, this quantity depends on three main factors:
- The room’s area
- The downlights’ intensity
- The desired lighting effect (general or task lighting)
For instance, a larger room requires more lights for appropriate illumination. The quantity of light also depends on the light intensity and your lighting objective. Here’s an example: a 12 sq.m kitchen typically requires 150 – 200 lux for general lighting.
To calculate the needed lights, the lux requirement for a 12 sq.m kitchen would be 2400 lumens (12 sq.m * 200 lux). If you have downlights emitting 400 lumens,
The required number of lights= 2400 lumens / 400 lumens = 6
So, six downlights should be installed to illuminate your kitchen for task lighting properly.
3. Downlight Positioning
Downlight positioning refers to the distance between the light fixtures. This factor is crucial as it significantly influences the lighting output intensity. Generally, interior designers follow the 1m rule for spacing downlights. However, the most professional approach to determining the necessary spacing is dividing the ceiling height by 2.
Downlight Spacing = Ceiling height ÷ 2
Below are some suggestions for downlight spacing for various ceiling heights-
| Ceiling Height | Downlight Spacing |
| 3 meters | 1.5m to 2m |
| 4 meters | 2.5m to 3.5m |
| 5 meters | 3m to 4.5m |
| 6 meters | 4m to 5.5m |
| 7 meters | 3m to 5m |
| 8 meters | 3.5 to 5.5m |
| 9 meters | 4m to 6.5m |
| 10 meters | 4.5m to 7m |
4. Lumens to Wattage Ratio
Before purchasing any downlight, energy efficiency is a significant aspect to consider. The lumen-to-wattage ratio provides insight into a downlight’s efficiency. LED downlights are a popular choice in this respect. They consume less energy but produce brightness equivalent to conventional downlights. The following chart illustrates the lumen per watt comparison between LED downlights and incandescent lights.
| Lumens | Incandescent Downlight | LED Downlight |
| 450lm | 40 W | 6-9 W |
| 800lm | 60 W | 8 – 12 W |
| 1100lm | 75 W | 9 – 13 W |
| 1600lm | 100 W | 16 – 20 W |
| 2600lm | 150 W | 25 – 28 W |
LED downlights stand out in energy efficiency as per the above chart. Hence, LEDs should be your pick if you’re in the market for downlights.
5. Beam Spread
The beam spread, measured in degrees, signifies the area covered by the light spread. A wider beam spread lights up a larger portion of the room, although the light intensity decreases with increased beam spread. That’s why a smaller beam spread is preferred for task lighting to concentrate light on a specific area.
Wide beam spread = 60 degrees or more.
Narrow beam spread = Less than 60 degrees
The beam spread requirement varies with the lighting needs. For instance, 60 degrees is appropriate for general lighting in your living room, providing a soft and diffused glow. However, this spread won’t work for the kitchen.
The kitchen needs downlights with a smaller beam spread for task lighting, where concentrated lighting is needed for activities like washing dishes, cooking, or cutting. In this case, downlights with a 25 degrees beam spread will be effective.
However, if you’re unsure about the beam spread, choosing a spread between 60° to 120° is usually suitable for the general lighting of your room.
6. Color Temperature
Downlights are fantastic for interior decoration, and their color largely depends on the color temperature. Higher color temperatures yield cooler tones. The chart below provides a range of color temperatures for different light colors.
| Color Temperature | Light Color |
| 2700 K – 3300 K | Warm White |
| 3300 K – 5300 K | Cool White |
| 6500 K | Daylight |
Warmer tone downlights are perfect for bedrooms, living, and drawing rooms, creating a cozy and comfortable atmosphere. On the other hand, cool tone downlights are ideal for task lighting in kitchens and reading rooms. However, color preference is subjective. Choose what best fits your taste.
7. Color Rendering Index (CRI)
CRI measures the color accuracy of artificial lighting compared to natural light, ranging from 0 – 100. A higher rating delivers better color accuracy. Therefore, when selecting downlights, this factor should be taken into account. Kitchens, vanity lighting, restaurants, and showrooms require higher CRIs. At least a CRI>80 is recommended.
8. IC Rating
Checking for an IC rating is vital when buying recessed or can lights. IC stands for ‘Insulation Contact.’ Downlights with an IC rating are safe to install on insulated surfaces, which is critical as these materials are flammable and can easily catch fire. Installing a non-IC-rated downlight can pose a fire risk, so always verify the IC rating before purchasing a downlight for your home.
9. IP Rating
IP stands for Ingress Progress; this two-digit number indicates the degree of protection against liquid and solid ingress. Higher ratings imply better protection. Here are some IP rating recommendations for different areas of your house.
| IP Rating | Area |
| Bedroom | IP20 |
| Kitchen | IP44 |
| Bathroom | IP65 |
Bedroom lighting doesn’t usually contact water, so IP20 is ideal. For areas exposed to high moisture, like kitchens, IP44 is suitable. You might consider IP65 for light fixtures facing water jets near the sink area. Bathroom downlights can use IP65 or higher. However, different bathroom zones have specific IP requirements. Check out IP Rating: The Definitive Guide to learn more about this.
10. Warranty
The warranty, directly and indirectly, indicates the quality of a fixture. So, considering the warranty of the downlights is crucial. LED downlights usually come with a warranty ranging from 2 – 5 years, though the warranty terms differ from brand to brand.
Comparing LED and Halogen Downlights
LED downlights are often considered the preferred choice for downlight categories, while halogen lights tend to represent the conventional options. The contrast between these two downlight types can be identified in several key areas:
- Energy Efficiency: Energy consumption for lighting is quantified in watts per hour. LED downlights typically utilize 7 – 20 watts/hour, whereas halogen downlights may consume 35 – 500 watts/hour to produce an equivalent amount of light. This means halogen lights consume up to nine times more electricity than LEDs. Therefore, LED downlights are superior in energy efficiency, potentially significantly reducing your electricity bills.
- Longevity: The initial expense of an LED downlight may be three to four times higher than a halogen downlight, but its durability makes them more cost-effective in the long run. An LED downlight lasts about 50,000 hours and usually has better warranty policies. On the other hand, halogen lights only last for around 1000 – 2000 hours. Therefore, in terms of lifespan, LED downlights surpass halogen downlights.
- Safety & Quality: Unlike halogen lights that quickly heat up due to their filaments, LED downlights remain cool during operation, making them suitable for all applications. Additionally, these downlights possess advanced features absent in traditional bulbs and excel at focusing light on specific areas. Hence, LED lights stand out over halogen bulbs regarding quality and safety.
How To Set Up Downlights?
Setting up downlights, which are usually installed directly into the ceiling, might seem complicated, but it’s manageable with the following steps:
Step 1: Ceiling Marking for Installation
First, you should determine and mark the spots where the downlights will be installed. This decision should consider ceiling height, light brightness, and spacing between the downlights.
Step 2: Cutting Holes for the Downlights
After marking the spots, cut or drill holes at those points. This process is often easier with false ceilings designed to accommodate downlights. Ensure the hole’s diameter aligns with the size of the downlight fixture.
Step 3: Electrical Wiring
Downlights are wired in a radial circuit pattern. The wiring runs from the primary switch to the first light and then to the circuit’s other lights. Given the complexity of wiring downlights, seeking professional assistance is recommended.
Step 4: Fitting Downlights into the Ceiling
Downlights often have springs attached to their sides. Simply squeeze the back part of the light into the cut hole. The spring will adjust to the hole and secure the downlight. After installation, switch on the lights to ensure they are functioning correctly. If any flickering occurs, examine the wiring.
Following these steps, you can successfully install downlights.
Downlight Maintenance
To maintain the optimal performance of your downlights, adhere to these tips:
- Dry Cleaning: Always use a dry cloth to clean your downlights. Avoid using water or other liquids that could damage the fixture’s electrical components. If necessary, use a damp cloth, ensuring the light is off and completely dry before turning it back on. Do not clean the fixture while it is operating.
- Minimize Switching: Avoid frequently turning the lights on and off, as this can negatively impact the fixture’s performance and lifespan, even with the superior durability of LED downlights.
- Proper Lamp Assembly: After cleaning, ensure all parts of the downlight are properly reassembled. Avoid replacing lamps unless necessary.
- Moisture Control: Downlights can be susceptible to moisture condensation. If your downlights are installed in damp areas like bathrooms or kitchens, ensure they are moisture-proof. Opt for fixtures with a higher IP rating for better protection.
Why Are Downlights Preferred for Indoor Lighting?
Downlights have gained popularity for indoor lighting due to their versatility and aesthetic appeal. Here are the reasons behind their growing demand:
- Space Illusion: Recessed downlights can make small rooms or narrow areas like hallways appear wider by creating a diffused and soft glow, thereby enhancing the perceived space.
- Versatile Design: Available in various designs, downlights can serve multiple functions. They can provide general room and task lighting or decorative lighting, adding a modern and sleek aesthetic to your space.
- Highlighting: Downlights with a narrow beam angle can focus on specific features like artwork or unique wall textures, drawing attention to these elements. They can also act as wall washers to accentuate your walls.
- Sophisticated Outlook: Replacing traditional tube lights with downlights can give your area a sophisticated look. These fixtures are suitable for bedrooms, living rooms, or bathrooms and are widely used in commercial spaces.
Common Downlight Issues & Their Remedies
Despite their benefits, downlights can occasionally present some common problems. Here are potential solutions to these issues:
Downlight Flickering
Flickering is a frequent issue with downlights. The causes and solutions include:
Causes:
- Loose Wiring: Overuse or improper installation can cause downlights’ wiring to loosen, leading to flickering.
- Incompatible Dimmer Switches: Flickering can occur if the dimmer is not compatible with the downlights.
- Poorly Manufactured LEDs: Low-quality LEDs from the manufacturer can cause flickering.
- Power Surges: An abrupt increase in voltage, or power surge, can damage the fixture and cause flickering.
- Outdated Electrical Panels: If you live in an older house with outdated electrical panels that can’t meet the power requirements of modern electronics, it can cause flickering.
Solutions:
- Check the wiring and seek professional help if necessary.
- Substitute the incompatible dimmer with a regular switch.
- Replace problematic bulbs with new ones.
- Install a surge protector.
- Upgrade old electrical panels.
- Consult an electrician if the reason for flickering remains unclear.
Unexpected Shutdown or Fire Hazard:
Downlights may sometimes shut down unexpectedly or pose a fire risk. Here are the causes and solutions for such problems:
Causes:
- Non-IC Rated Downlights: Non-IC-rated downlights can overheat quickly, especially when in contact with insulation, leading to a potential fire hazard.
- Incorrect Wattage: Installing a bulb with a wattage higher than the fixture can cause overheating. Excessive heat triggers the fixture’s thermal protection, resulting in an automatic shutdown.
Solutions:
- Use the correct wattage for your downlight.
- Ensure that downlights installed in insulated areas are IC rated.
- For non-IC-rated downlights, maintain at least a 3-inch gap between the fixture and insulation. Consider covering the bulb with a heat-protected cover for added safety.
Final Thoughts
Downlights are experiencing a surge in popularity for indoor illumination purposes. They add an elegant touch to any space. Their distinct characteristics and installation methods vary, providing options for diverse needs. Downlights serve as general lighting and are superb for task-specific lighting. They’re perfect for installation in bedrooms, kitchens, bathrooms, or reading corners. Moreover, in constrained or narrow areas of your home, these fixtures can effectively give the impression of a larger space.
However, setting up downlights involves careful consideration of numerous aspects. The number of lights required hinges on factors such as ceiling height and bulb brightness, while waterproof features are crucial for places like bathrooms. Furthermore, if your home is insulated, the Insulation Contact (IC) rating becomes vital in choosing the right downlight. Therefore, ensure you consider all these variables when selecting an appropriate downlight for your space.
MyLikeLed is a renowned manufacturer of superior-quality LED strips and LED neon flex. Our products are subject to rigorous testing in advanced labs to maintain the highest quality standard. Additionally, we provide customization options for our LED strips and neon flex. Contact MyLikeLed today for your premium LED strip and LED neon flex needs!

Hi, I’m Xylia Xiong, a sales professional with 14 years of experience in the LED strip light industry. I specialize in providing tailored solutions, leveraging my expertise in LED products and the latest industry trends. Known for effective communication and problem-solving, I’m dedicated to helping lighting manufacturers, importers, and distributors achieve their goals.
Let’s work together to create customized solutions that exceed expectations.