How to Install Mirror LED Strips: DIY Guide
Table of Contents
LED mirror lighting has become a rapidly growing trend in modern interior design, revolutionizing how we illuminate and enhance our living spaces. Whether for bathrooms, vanity mirrors, or decorative pieces in bedrooms and hallways, installing LED strips around mirrors provides functional lighting and adds a sleek, contemporary aesthetic. The trend is fueled by LED lights’ versatility, energy efficiency, and ambiance, making them a popular choice for homeowners and designers alike.
One of the main reasons LED mirror lighting is gaining popularity is the balance it strikes between practicality and style. The soft, even light emitted by LED strips offers ideal illumination for tasks such as makeup application, shaving, or skincare routines while creating an inviting and luxurious atmosphere. Moreover, LED strips come in various color temperatures and brightness levels, allowing you to customize your lighting setup to suit your space and personal preferences.
With energy-efficient technology, LEDs last longer than traditional bulbs and help reduce energy consumption, making them an eco-friendly choice. Installing LED strips around mirrors is a straightforward DIY project that can be completed with minimal tools and experience, allowing you to achieve a designer look without professional installation costs.
In this guide, we’ll walk you through a step-by-step process of installing mirror LED strips, ensuring your space is stylish and well-lit. MyLikeLed offers high-quality LED strip solutions that are perfect for enhancing your mirrors, giving your home a modern touch with long-lasting, efficient lighting.
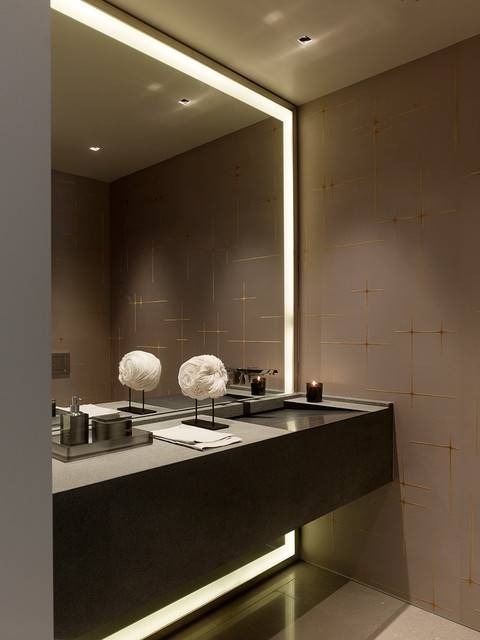
Why Choose LED Strips for Mirrors?
Choosing LED strips for mirrors is an innovative, stylish, and energy-efficient solution that enhances both functionality and aesthetics in your home or business. As LED technology continues to evolve, these flexible lighting options have become increasingly popular for various applications, especially when illuminating mirrors. Here are some compelling reasons why LED strips are the perfect choice for your mirror lighting needs:
1. Energy Efficiency
One of the main advantages of LED strips is their energy efficiency. LED lights use significantly less power than traditional incandescent or fluorescent bulbs, helping reduce energy consumption and lower electricity bills. This makes them an eco-friendly option that benefits the environment and offers long-term cost savings. For mirrors that require daily use, such as in bathrooms or vanity setups, the energy-efficient nature of LED strips ensures you can enjoy well-lit spaces without worrying about high power usage.
2. Enhanced Visibility and Functionality
Lighting is essential for performing tasks like grooming, applying makeup, or shaving on mirrors. LED strips provide bright, even illumination that eliminates shadows and ensures clear visibility across the entire surface of the mirror. This makes them ideal for precision tasks that require good lighting. Unlike traditional bulbs, which can create harsh or uneven light, LED strips offer consistent brightness, enhancing functionality and aesthetics.
3. Customizable Color Temperature and Brightness
LED strips offer great flexibility when it comes to customization. With options ranging from warm, soft light (around 3000K) to cool, crisp daylight (up to 6000K), you can tailor the color temperature to suit the mood and function of your space. Warm lighting works well for relaxing areas like bedrooms, while cooler tones are ideal for bathrooms and vanity mirrors where clarity is essential. Additionally, many LED strip options come with adjustable brightness levels, allowing you to create the perfect ambiance or adjust the lighting based on the time of day.
4. Aesthetic Appeal
LED strips are incredibly versatile in design, adding a sleek, modern aesthetic to any room. Whether installed behind a mirror for a subtle backlit effect or around the mirror’s edges for a more defined look, LED strips can instantly elevate the style of your space. Their slim, flexible design allows for seamless integration, giving your mirror a high-end, custom look without taking up additional space. LED strips’ clean, minimalist appearance makes them an ideal choice for contemporary and luxury interiors.
5. Durability and Longevity
LEDs are known for their long lifespan, often lasting up to 50,000 hours or more. This durability makes LED strips a reliable, long-term solution for mirror lighting. Unlike traditional bulbs that need frequent replacements, LED strips maintain consistent performance over time, reducing the need for maintenance. Their durability also extends to resistance against wear and tear, making them suitable for bathrooms where humidity and moisture are common.
6. Easy Installation and Flexibility
One of the most significant benefits of choosing LED strips for mirror lighting is their ease of installation. LED strips are designed to be user-friendly, making them a perfect DIY project for homeowners. They come with adhesive backing, allowing quick and easy mounting on most surfaces without requiring complex wiring or professional installation. The flexibility of LED strips also means they can be bent and shaped to fit mirrors of various sizes and shapes, making them a versatile option for any room.
7. Cost-Effective Solution
In addition to their energy-saving benefits, LED strips are a cost-effective solution for enhancing your mirrors. The initial investment in LED strips is generally affordable, and their long lifespan means you won’t need to replace them frequently. The reduced energy usage further contributes to long-term savings. With LED strips, you get high-quality, modern lighting without breaking the bank, making them an excellent choice for budget-conscious homeowners.
8. Safe for Home Use
LED strips produce very little heat compared to traditional lighting options, making them safer to use, especially near mirrors or bathrooms. Since they remain cool to the touch, there’s no risk of burns, and they are less likely to cause accidents related to overheating. This makes LED strips particularly suited for spaces where safety is a concern, such as family homes or areas with limited ventilation.
9. Smart Home Integration
Many LED strips are now available with smart home capabilities, allowing you to control the brightness, color, and timing of your mirror lighting through apps or voice commands. Whether you want to set a specific lighting schedule, dim the lights for a relaxing evening, or change the color temperature depending on your needs, intelligent LED strips make it easy to create the perfect atmosphere with a tap or voice command.
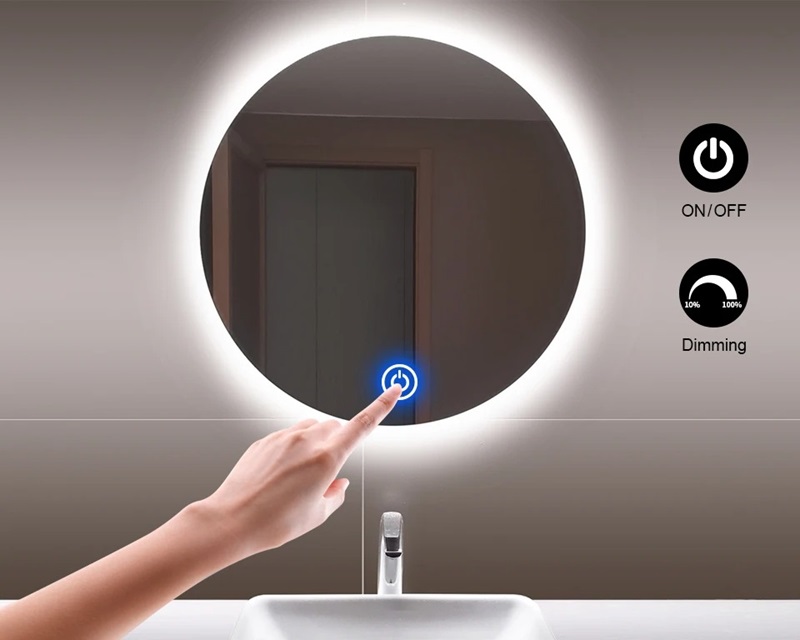
Step-by-Step Guide to Installing Mirror LED Strips
Installing LED strips around your mirror is a simple and rewarding DIY project that can dramatically enhance your space’s functionality and style. Whether you’re looking to improve visibility for grooming tasks or add a modern touch to your bathroom, vanity, or bedroom, LED mirror lighting is a versatile solution. This step-by-step guide will walk you through the process, ensuring a smooth installation and professional-looking results. Let’s get started!
Step 1: Gather Your Materials
Before you begin, ensure you have all the necessary tools and materials for the installation. Here’s a quick list of items you’ll need:
- LED Strip Lights (Make sure they are suitable for mirrors and have the right color temperature, such as those offered by MyLikeLed)
- Power Supply (Make sure it matches the wattage of your LED strip)
- LED Strip Controller (Optional: For dimming or smart home features)
- Scissors or Wire Cutters (For trimming LED strips if necessary)
- Measuring Tape
- Rubbing Alcohol or Glass Cleaner (For prepping the mirror surface)
- Adhesive Strips or Clips (Most LED strips come with adhesive backing, but extra strips or clips may be helpful for added security)
- Electrical Tape (For securing connections)
- Soldering Kit (Optional: If your LED strips need custom fitting)
- Extension Cord (Optional: Depending on your power source location)
Step 2: Measure Your Mirror
The first step in installing your LED strips is to measure the perimeter of your mirror to ensure you have enough LED strip length. Use a measuring tape to measure all four sides (or the parts of the mirror you want to illuminate), and then add a little extra length to account for any corners or curves.
Once you have the total measurement, compare it to the length of your LED strip to ensure a good fit. Many LED strips are flexible and can be trimmed to size, so don’t worry if your strip is longer than you need.

Step 3: Choose the Right LED Strip
Next, choose the correct type of LED strip for your mirror. Consider the following:
- Brightness: For vanity mirrors or bath Strip mirrors, you might want brighter lights (higher lumens), whereas, for decorative or mood lighting, a softer brightness will suffice.
- Color Temperature: Select a color temperature that suits your needs. For example, warm light (3000K) creates a cozy ambiance, while more excellent light (6000K) is ideal for tasks requiring clarity, like applying makeup.
- Waterproofing: If you’re installing the LED strips in a bathroom or any other humid area, ensure they are waterproof (IP65-rated) to avoid damage.
Step 4: Clean and Prepare the Surface
For the LED strips to adhere correctly, you need to clean the surface where they will be installed. If you place the strips directly on the mirror, use rubbing alcohol or a glass cleaner to remove dust, grease, or fingerprints. If you’re attaching them to the frame or wall behind the mirror, ensure the surface is dirt or grime-free.
Allow the surface to dry completely before proceeding with the installation.
Step 5: Cut the LED Strip (If Necessary)
If your LED strip is too long for your mirror, you must cut it to the appropriate length. Most LED strips have designated cutting points, usually marked with a small scissors symbol. Carefully cut along the designated lines with scissors or wire cutters. Never cut the strip anywhere other than these marked points, as doing so could damage or prevent the LEDs from working correctly.

Step 6: Attach the LED Strips to the Mirror
Once the LED strip is the correct length, it’s time to attach it to your mirror or the surface around the mirror.
- For Mirrors with Frames: If you’re placing the LED strip along the frame, peel off the strip’s adhesive backing and carefully press it into place along the edges of the frame. Start from one corner and work around, applying gentle but firm pressure to ensure the adhesive sticks.
- For Frameless Mirrors: If you attach the strip directly to the back of the mirror for a floating effect, ensure the strip is properly aligned. The LEDs should face outward or toward the wall to create a backlit effect. Secure the strip using the adhesive or additional mounting clips if necessary
Step 7: Connect the LED Strip to the Power Supply
Next, connect the LED strip to its power source. Most LED strips come with connectors that make it easy to attach the strip to a power adapter.
DC Adapter: Plug the strip into the DC power adapter, ensuring the positive and negative terminals are aligned correctly.
USB or Plug-in Power Supply: If your strip uses a USB or a standard plug-in power supply, simply connect it to an available outlet.
Ensure the power supply is safely positioned, and cables are neatly tucked away to avoid tripping hazards.
Step 8: Test the LED Strip
Before securing everything in place, plug the LED strip into its power source and test it to ensure its correct functioning. Check that all strip sections light up evenly and that any dimming or color-changing features work as expected.
If you’re using a dimmer or remote control, ensure it is properly synced with the strip to adjust the brightness or color as needed.
Step 9: Final Adjustments and Securing
After confirming that the LED strip is working correctly, make any necessary adjustments to the strip’s positioning. If there are any loose sections, use extra adhesive strips or mounting clips to secure them.
If your installation includes wiring connections, use electrical tape to secure any exposed wires and ensure a neat and safe setup.
Step 10: Enjoy Your New LED Mirror Lighting
Step back and admire your newly illuminated mirror once everything is set up and securely in place. Whether you’ve installed the LED strips for functional task lighting or to create a modern, decorative glow, your space will instantly feel brighter and more stylish.
LED mirror lighting enhances your room’s aesthetic and adds value by improving visibility and creating a more efficient lighting solution. With the high-quality LED strips from MyLikeLed, you can enjoy long-lasting, energy-efficient lighting that transforms any mirror into a focal point.
Tools and Materials Needed
Before starting your DIY LED mirror lighting project, it’s essential to have all the necessary tools and materials prepared. Gathering everything in advance will help you avoid interruptions and ensure a smooth installation process. Below is a comprehensive list of tools and materials you’ll need to install LED strips around your mirror:
1. LED Strip Lights

The star of the project, your LED strip lights, should be carefully chosen based on the purpose of the lighting and the environment. You’ll want to consider factors such as:
- Brightness (Lumens): Ensure the strip provides adequate light for the space. You may want a brighter strip for vanity or task mirrors, while ambient lighting for decorative mirrors can be softer.
- Color Temperature: Depending on your needs, choose between warm (3000K) for a cozy ambiance or cool (6000K) for better clarity and visibility.
- Waterproof Rating: If installing the lights in a bathroom or humid area, opt for waterproof LED strips (IP65 or higher) to ensure longevity.
- Length: Measure your mirror to determine how many LED strips you need. You may need to cut the strip to fit your specific dimensions.
2. Power Supply
A compatible power supply is crucial for powering your LED strip lights. Make sure the power adapter matches the voltage and wattage requirements of your LED strips. If using a long LED strip, ensure the power supply can handle the total wattage to prevent overheating or failure.
- DC Power Adapter: Most LED strips have a DC power adapter connecting to a standard outlet.
- USB Power Adapter: Some strips use USB ports for power, which can be convenient for smaller installations or mobile setups.
3. LED Strip Controller (Optional)
You’ll need an LED strip controller if you want additional control over your lighting, such as dimming, color changing, or integration with a smart home system. These controllers come in various types:
- Dimmer Switch: Allows you to adjust the brightness of the LED strip.
- RGB Controller: If your strip has color-changing capabilities, an RGB controller will enable you to switch between different colors and modes.
- Intelligent Controller: For smart home integration, some LED strips can connect via Wi-Fi or Bluetooth, allowing you to control the lighting with your smartphone or voice assistants like Alexa or Google Assistant.
4. Scissors or Wire Cutters
If your LED strip is too long for the mirror, you’ll need scissors or wire cutters to trim the strip to the correct length. Most LED strips have marked cutting points where you can safely cut without damaging the circuit. Be sure to cut along these designated areas only.
5. Measuring Strip
A measuring tape is essential for ensuring that the LED strip fits perfectly around your mirror. Measure the mirror’s perimeter to determine how many LED strips you need. Accurate measurements will help you avoid overbuying or underestimating the strips required.
6. Rubbing Alcohol or Glass Cleaner
To ensure that the LED strips adhere securely, you’ll need to clean the surface of the mirror or frame. Use rubbing alcohol or a glass cleaner to wipe down the areas where the strips will be installed, removing any dirt, dust, or oils that could affect the adhesive’s ability to stick.
7. Adhesive Strips or Mounting Clips
While most LED strips come with adhesive backing, you may want additional adhesive strips or mounting clips to ensure the strip stays in place, especially if you install it in a high-moisture area like a bathroom.
- Adhesive Strips: If the adhesive backing on your LED strip isn’t strong enough, double-sided adhesive strips can provide extra hold.
- Mounting Clips: These small plastic or metal clips secure the LED strip along the mirror or frame. Mounting clips are helpful if you need extra reinforcement for longer or heavier strips.
8. Electrical Tape
Electrical tape is handy for securing any exposed connections or loose wiring, especially if you’re splicing multiple LED strips together. It provides insulation and protection, ensuring your installation remains safe and neat.
9. Soldering Kit (Optional)
A soldering kit may be required if you need to join two LED strips or repair a section. Soldering allows you to create seamless connections between strips, which is especially useful when working with complex setups or custom installations.
10. Extension Cord (Optional)
Depending on the location of your mirror and the proximity to a power outlet, you may need an extension cord to connect the LED strip power supply. Choose a cord that is long enough to reach the outlet without creating a tripping hazard.
11. Heat Shrink Tubing (Optional)
Use heat shrink tubing to cover and protect any exposed wires or connectors for a more professional and polished look. This material shrinks when heated, providing a snug, secure fit over electrical connections.
12. Drill or Screwdriver (Optional)
If you’re using mounting clips to secure the LED strips, you might need a drill or screwdriver to attach them to the mirror frame or wall behind the mirror. Be sure to use screws appropriate for the surface material (wood, drywall, etc.).
13. Spirit Level (Optional)
For a perfectly aligned LED strip installation, you can use a spirit level to ensure the strip is straight, especially if you’re installing it along the frame of a mirror or behind a frameless mirror for a backlit effect.
Having the right tools and materials ready will ensure Strip your LED strip installation goes smoothly and efficiently. By preparing in advance, you’ll save time and avoid potential pitfalls, allowing you to focus on creating the perfect lighting setup for your mirror. With high-quality LED strip lights from MyLikeLed, you can enjoy hassle-free installation and long-lasting, energy-efficient lighting that enhances your space.
Tips for Achieving a Professional Look
Installing LED strips around your mirror is a simple DIY project, but getting a professional-looking result requires attention to detail. Whether upgrading your bathroom, creating a chic vanity mirror, or adding ambient lighting to a decorative piece, following a few essential tips can help you achieve a clean, polished look that rivals a professional installation. Below are expert tips to ensure your LED strip installation looks seamless and high-end.
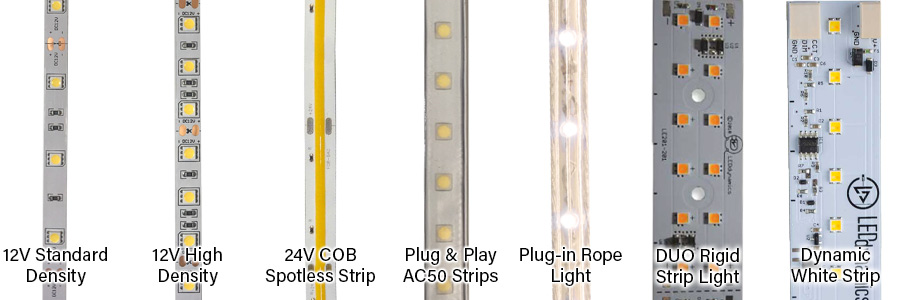
1. Choose the Right LED Strip for Your Space
The type of LED strip you select will play a significant role in the overall appearance of your project. To achieve a professional look, you’ll want to carefully consider factors such as brightness, color temperature, and flexibility:
- Brightness: Make sure the brightness level of the LED strip suits the room’s needs. For mirrors used for tasks like applying makeup or shaving, opt for higher-lumen strips that provide bright, clear light. The softer lighting will suffice for ambient or decorative purposes.
- Color Temperature: For a modern, clean look, cooler color temperatures (around 6000K) are ideal, as they mimic daylight and offer a crisp, professional feel. Warmer tones (3000K) work well in spaces where you want a cozier, more inviting ambiance.
- Waterproofing: For bathroom mirrors, ensure the LED strip is waterproof (IP65 or higher) to ensure durability and prevent moisture damage.
Choosing the right strip for the intended function will make a big difference in achieving a polished result.
2. Clean the Installation Surface Thoroughly
One of the most common mistakes in DIY LED installation is neglecting proper surface preparation. To ensure a smooth, professional finish, it’s essential to clean the surface where you’ll be attaching the LED strip. Whether you’re placing the strip on the mirror, frame, or the surrounding wall, dust, dirt, or oils can interfere with the adhesive and cause the strip to peel or fall over time.
- Use rubbing alcohol or glass Striper to clean the mirror and allow it to dry completely.
- If attaching the strip to a frame or wall, wipe down the surface Strip clean, damp cloth to remove dust and debris, then dry the area thoroughly.
3. Hide Power Cords and Connectors
Visible power cords and connectors can detract from your mirror’s overall aesthetic, so finding ways to conceal them is essential. To achieve a clean, professional look:
- Use Cable Management Systems: Tuck cords behind the mirror, wall, or frame using cable clips or a wire management kit. This will hide the wires and create a tidy, streamlined appearance.
- Drill Holes (If Necessary): In some cases, drilling a small hole in the frame or wall behind the mirror can allow you to route the power cord through a hidden spot, minimizing its visibility.
- Use Heat Shrink Tubing or Electrical Tape: Cover any exposed wires or connectors with heat shrink tubing or electrical tape to prevent them from showing and to secure the connections.
Taking the time to hide the wiring will give your installation a professional, finished appearance.
4. Ensure Even Light Distribution
Uneven light distribution can make your LED installation look patchy or unbalanced, especially around mirrors where even lighting is crucial for tasks like grooming. To avoid this:
- Place the LED Strip Close to the Edge of the Mirror or Frame: Keeping the LED strip close to the edge ensures the light is distributed evenly across the mirror’s surface, avoiding dark spots or shadows.
- Test Before Final Placement: Once you’ve placed the LED strip around the mirror, plug it in and test the light. Check for any uneven spots or gaps where the light may not be reaching. If necessary, adjust the strip to ensure complete coverage.
- Cons of a Diffuser: If you want to soften the light or create a more even glow, consider using a diffuser cover over the LED strip. Diffusers help to spread Strip light more evenly and reduce the harshness of direct LED bulbs.
You can create a balanced and professional lighting effect by paying attention to light placement and ensuring even illumination.
5. Use Corners and Edges Strategically
When installing LED strips around a mirror, handling corners and edges properly is crucial for maintaining a clean, professional look.
- Bend the Strip Carefully: LED strips are flexible, but improper handling can cause damage. When bending around corners, be gentle and avoid sharp angles that could break the internal wiring. Some LED strips come with corner connectors designed explicitly for 90-degree angles, which can help achieve a cleaner look.
- Cut the Strip Precisely: If the strip needs to be trimmed to fit your mirror, always cut along the designated lines (usually marked with scissors symbols). Cutting at the wrong spot can damage the strip’s circuitry and cause the strip to stop working.
- Use Mounting Clips for Extra Stability: Besides the adhesive backing, you can use mounting clips to secure the strip, especially around corners. This ensStripthe strip stays firmly attached and maintains a straight, neat line around the edges.
Taking care with corners and edges ensures thaStrip installation looks neat and professional, without any Stripn or frayed areas.
6. Use a Spirit Level for Accuracy
Using a spirit level can make all the difference in achieving a straight, professional finish, especially on mirrors with frames.
- Mark Your Position: Before applying the LED strip, use a pencil to mark the path where the strip will go. This helps ensure that the placement is straight and even.
- Double-Check Alignment: Place the spirit level along the frame or the mirror’s edge to double-check that the Strip is applied evenly. This extra step will prevent the strip from being crooked, which can detract from the overall look.
Take the time to ensure straight lines and even placement. Make your installation appear more polished and professional. Excess Strip with Precision
If your LED strip is too long for the mirror, trimming it carefully is essential for a seamless look.
- Follow the Cut Marks: LED strips are designed with designated cutting points, usually marked with a small scissors symbol. Always cut along these points to avoid damaging the internal wiring.
- Avoid Cutting Too Short: Measure carefully and leave a bit of extra length if necessary. It’s better to slightly overlap or tuck the strip behind the mirror rather than cutting it too short.
Precise trimming helps ensure the strip fits perfectly around the mirror without gaps or overlaps.
8. Test the Lighting Before FinStripng the Installation
Before securing the strip permanently in place, always test the ligStrip. This allows you to spot issues like uneven lighting or faulty sections before finalizing the installation.
- Plug the Strip In:Strip the strip is in position, connect it to the power supply and turn it on. Check for consistent lighting and ensure all parts of the strip are functioning.
- Adjust if Needed: IStrip notice any daStripots or uneven light distribution, reposition the strip until the lighting is perfect.
Testing before securing the strip saStripime and ensures a flawless result.
9. Use Diffusers for a Softer Glow
If you’re aiming for a more polished, soStript look, using diffusers can elevate the appearance of your LStripstallation.
- Install a Light Diffuser Over the Strip: Diffusers help spread the light more evenly and soften the harshness of direct LED lights. They are ideal for vanity mirrors or bathroom settings where you want a smooth, ambient glow.
- Choose the Right Diffuser: Diffusers come in various materials and styles, such as frosted or clear covers, and can be easily attached to most LED strips.
This extra touch enhances the aesthetic and gives your lighting a high-end, professional feel.
Conclusion
Adding LED strips to your mirror is one of the easiest and most impactful ways to enhance the look and functionality of your space. Whether you’re looking to improve lighting for tasks like makeup application or shaving or want to create a modern, ambient glow, LED strips offer an energy-efficient and customizable solution. Their versatility makes them perfect for any room, whether a bathroom, bedroom, or hallway. The DIY installation process is straightforward, allowing you to transform your mirror without professional help.
Choosing high-quality LED strips is crucial to achieving a long-lasting and polished result. MyLikeLed offers a wide range of LED lighting options, ensuring you get the correct brightness, color temperature, and flexibility for your project. With their energy-efficient, durable, and easy-to-install LED strips, you can achieve the perfect balance of style and functionality in your home. Plus, with options like dimmable and smart-controlled LED strips, MyLikeLed provides solutions that allow you to customize your lighting experience. contact us for the best LED strip!
FAQs
You attach LED strips using the adhesive backing or mounting clips. Clean the mirror’s surface first, then firmly press the strip along the edge or back of the mirror.
Place the LED strips either behind the mirror’s edges for a backlit glow or along the frame for a direct lighting effect, depending on the look you want.
Usually, no wiring is needed. Most mirror LED strips are plug-and-play. However, if your strips require hardwiring, it’s best to consult a professional unless you are comfortable with electrical work.
Yes, you can install LED strips on a bathroom mirror, but make sure the strips are waterproof or rated for damp environments to prevent damage.
You power them by connecting to an outlet, using a battery pack, or hardwiring to a switch, depending on the type of LED strip kit you bought. Always follow the manufacturer’s instructions.

Hi, I’m Xylia Xiong, a sales professional with 14 years of experience in the LED strip light industry. I specialize in providing tailored solutions, leveraging my expertise in LED products and the latest industry trends. Known for effective communication and problem-solving, I’m dedicated to helping lighting manufacturers, importers, and distributors achieve their goals.
Let’s work together to create customized solutions that exceed expectations.
Related Posts
Types Of Lighting And Their Applications – Expert Guide
How To Make LED Strip Lights Brighter?

- Call Us: +86-15920391130
- Email: info@mylikeled.com
- Office Address: No. 4 Keying road, Beitai road, Baiyun district, Guangzhou, China
- Factory: Building 12, Liandong U Valley, Guangqing Industrial Park, Shijiao Town, Qingcheng District, Qingyuan City, Guangdong, China
Copyright © 2025 – My Like Led All rights reserved.


