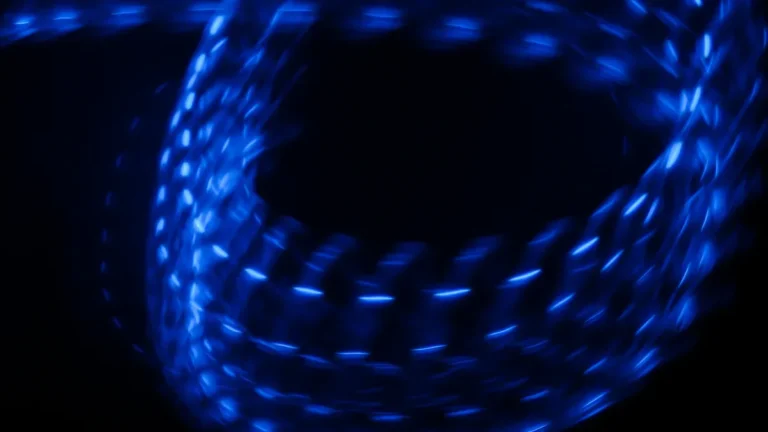
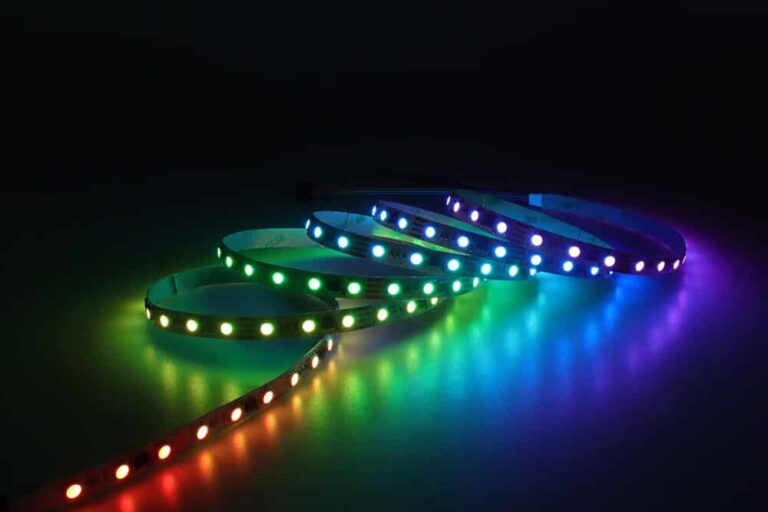
The advent of LED Flex Strips has revolutionized how we approach lighting design, offering a creative and efficient way to brighten our living or workspaces. With their versatility, these flexible LED strips can fit into tight spaces and follow intricate shapes, providing a perfect solution for complex and artistic lighting designs. The simplicity of installing these strips further adds to their appeal, and anyone from lighting enthusiasts to DIY homeowners can harness their potential with relative ease.
Mounting techniques refer to the strategies used to attach the LED strip securely to a surface. Correct mounting guarantees firm adherence and an even distribution of light. Three primary mounting techniques exist for installing LED strips: adhesive, clip, and channel mounting. The chosen technique will depend on the particular application.
This guide aims to delve into the specifics of mounting these innovative lighting strips effectively. Whether you plan to illuminate your kitchen under cabinets, line your hallway, or accentuate the architectural features of your home or workspace, we will explore various techniques to ensure your project’s success. Armed with this knowledge, you can enhance your space’s aesthetics and functionality, shedding light—quite literally—on areas that can benefit from added brightness.
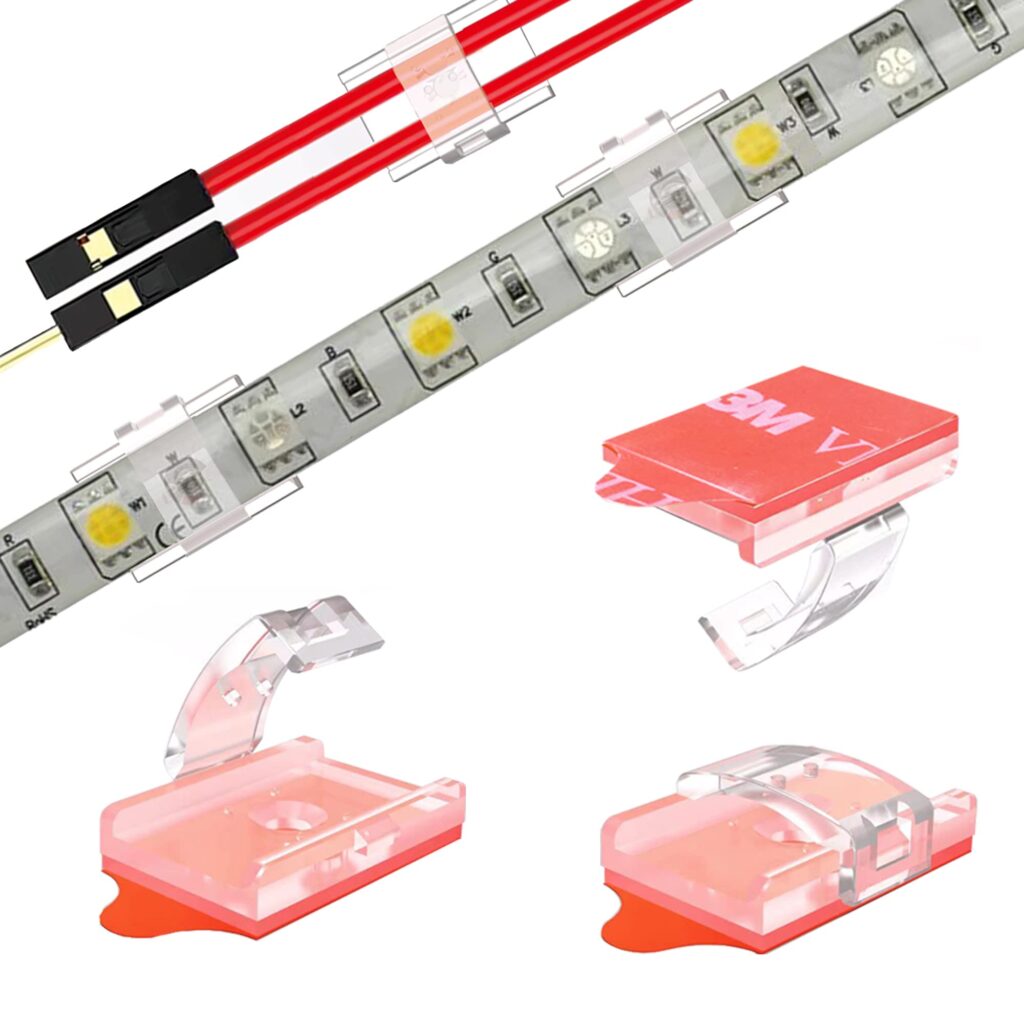
Table of contents
Hide
What Does the Mounting Technique for LED Strips Involve?
The mounting technique for LED strips securely attaches them to a surface such as a wall or ceiling, ensuring they remain stable.
Various mounting techniques are available, but not every method suits all installation scenarios. For instance, installing a temporary LED strip by drilling is unwise as it causes permanent damage to the wall. In such cases, using adhesives would be a better choice. Therefore, selecting the right mounting technique is crucial to avoid improper installations. To start, let’s delve into the different types of mounting techniques.
Types of Mounting Techniques
The following are the different methods for mounting LED strips:
A. Adhesive Mounting
Adhesive mounting involves attaching LED strips to the surface using double-sided adhesive tapes. Here we discuss the types, advantages, and disadvantages of adhesive mounting:
Varieties of adhesive for LED strips
Double-sided tape is the most widely used adhesive for mounting LED strips due to its ease and speed of application. There are, however, various types of double-sided tapes, including:
- 3M 200MP
- 3M 300MP
- 3M 9080
- 3M VHB 5608N
- Tesa 4965
- Blue Thermal Tape
Among these, the 3M VHB tape is the most robust.
Advantages and Disadvantages of adhesive mounting
While adhesive mounting is the quickest and easiest of all the techniques, it does have certain drawbacks. Let’s delve into the pros and cons of the adhesive mounting technique:
| Pros | Cons |
| Quick installation requires no drilling, screwing, or other instruments for installation time-saving method. Removable Cost-effective | Have chances to get loose may damage the wall while removing the tapes |
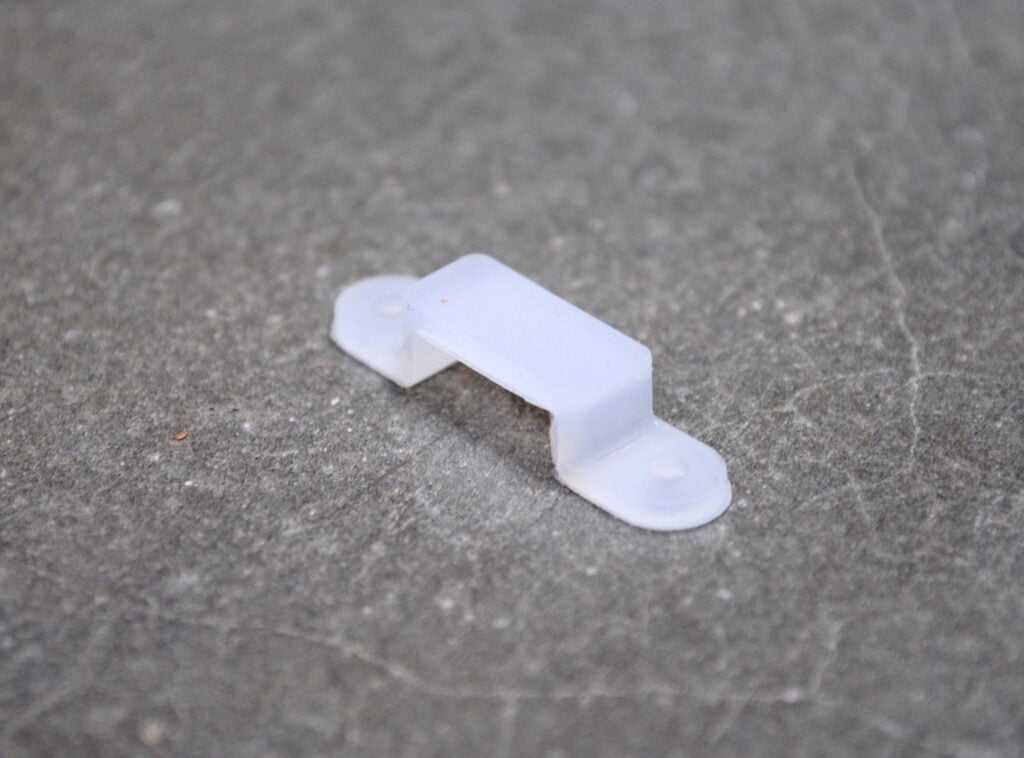
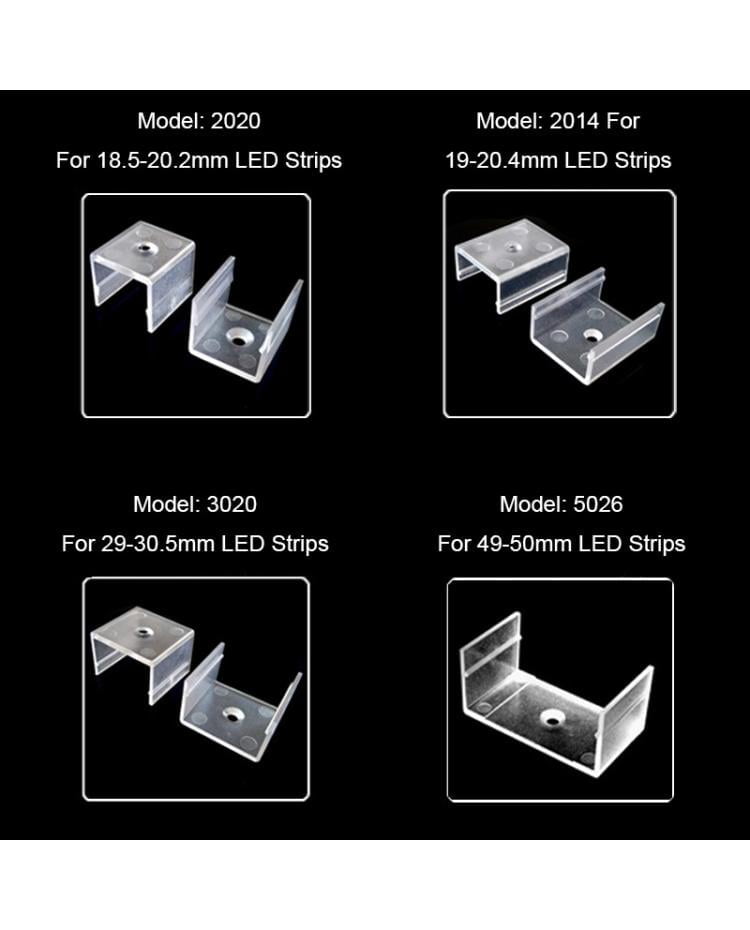
B. Attaching via Clips
The clip attachment method involves installing LED strips on a surface using various types of clips, which could be metal or plastic. This form of attachment offers greater stability compared to adhesive methods. The process may entail actions such as drilling, nailing, and screwing. Different styles of clips are commercially available, which include:
Selection of Clip s for LED Strip Attachment
There are many choices when selecting clips for attaching LED strips. Among the multitude, the most prevalent and functional clips for strip attachment include:
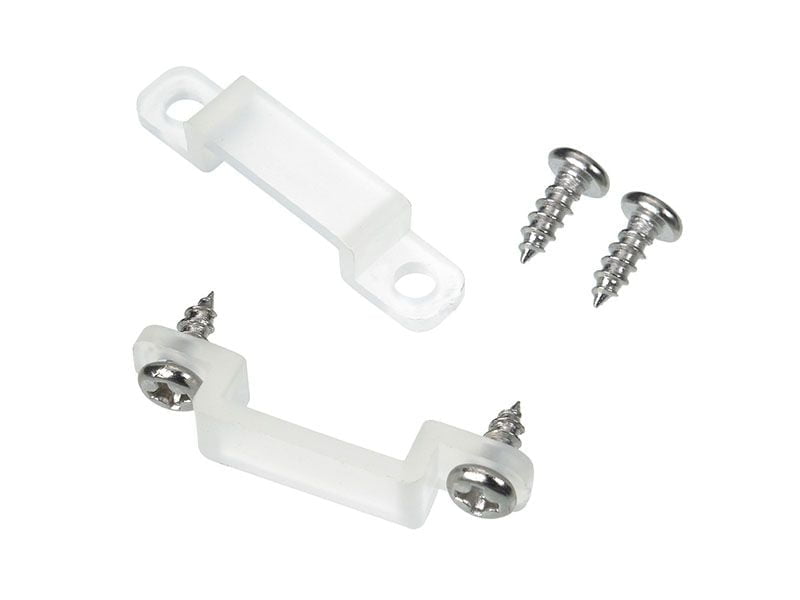
Single-side bracket fastening clip
For these clips, the bracket-like structure of the clip secures the strip, while the single-sided screw is driven into the surface. Single-sided bracket clips are most commonly utilized for LED strip attachment and are affordable and easily accessible.

Angle adjustable clips
If you’re considering a custom LED strip installation, angle adjustable clips are an excellent choice. These clips allow you to modify the beam angle of your LED fixture.
Adhesive-backed clips
Adhesive-backed clips work well for LED strip attachments. The clips preserve the shape of the strips, while the adhesive backing guarantees firm adherence to the surface. With these clips, there’s no need for drilling or screwing.
E-Clips
E-clips are the best bet if you plan to install LED strips in aluminum profiles. They can be made of either metal or plastic. These clips’ ‘E’ shape ensures the strips align perfectly with the surface to deliver a smooth lighting effect.
In addition to these, other clip varieties are available in the market. You can choose the one that best suits your installation requirements.
Advantages and Disadvantages of Clip Attachment
Like any other technique, clip attachment comes with its own set of pros and cons, as detailed below:
| Pros | Cons |
| Ensures proper securing of the strips, excellent for outdoor installation. Shaping the strip is more manageable using clips Best option for permanent solutions. | Requires time-consuming drilling installation method |
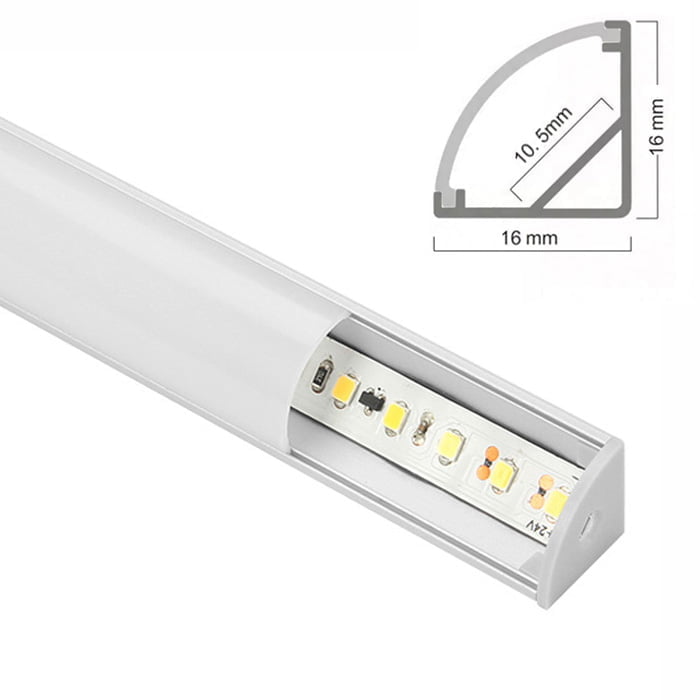
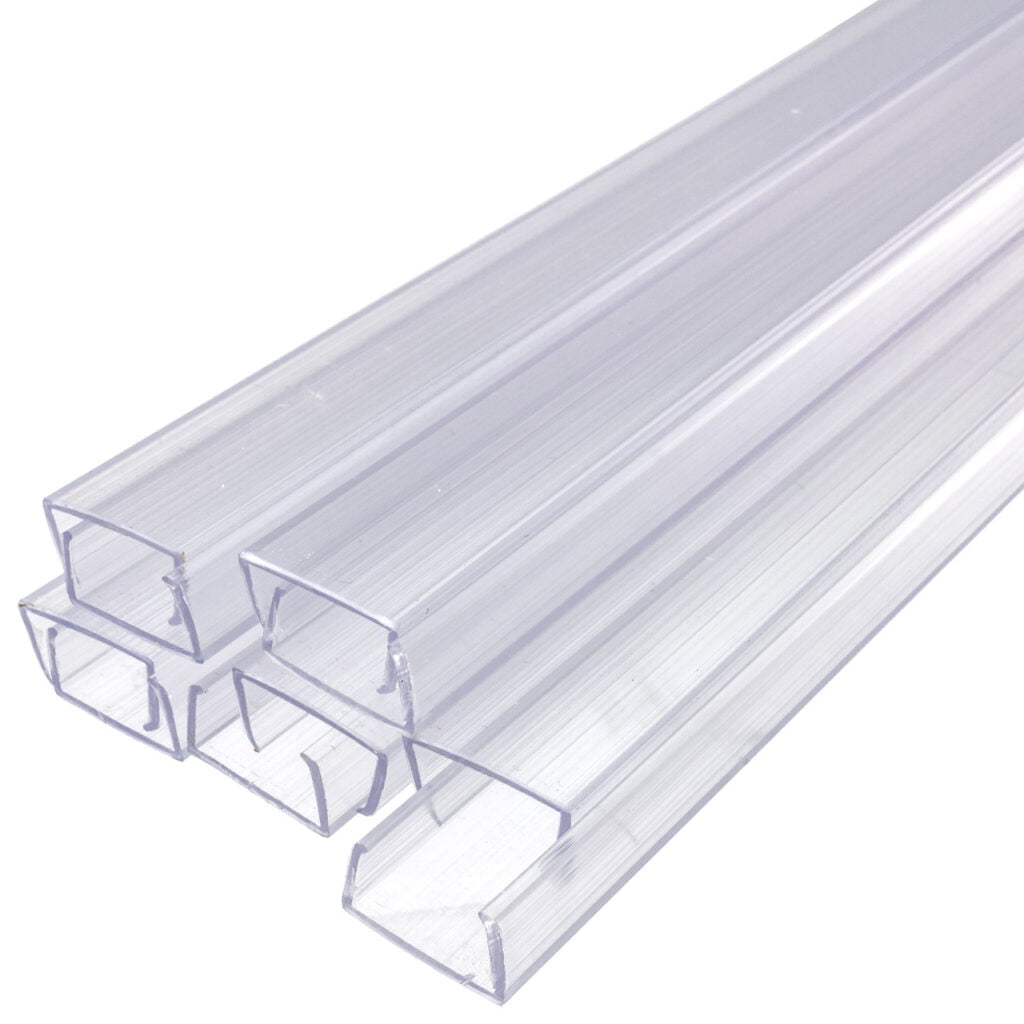
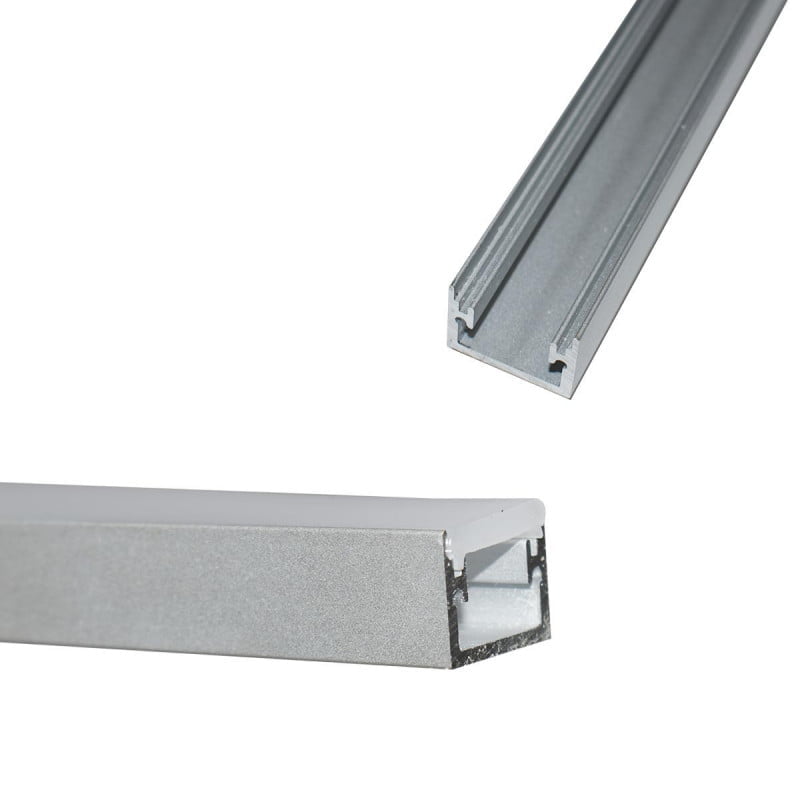
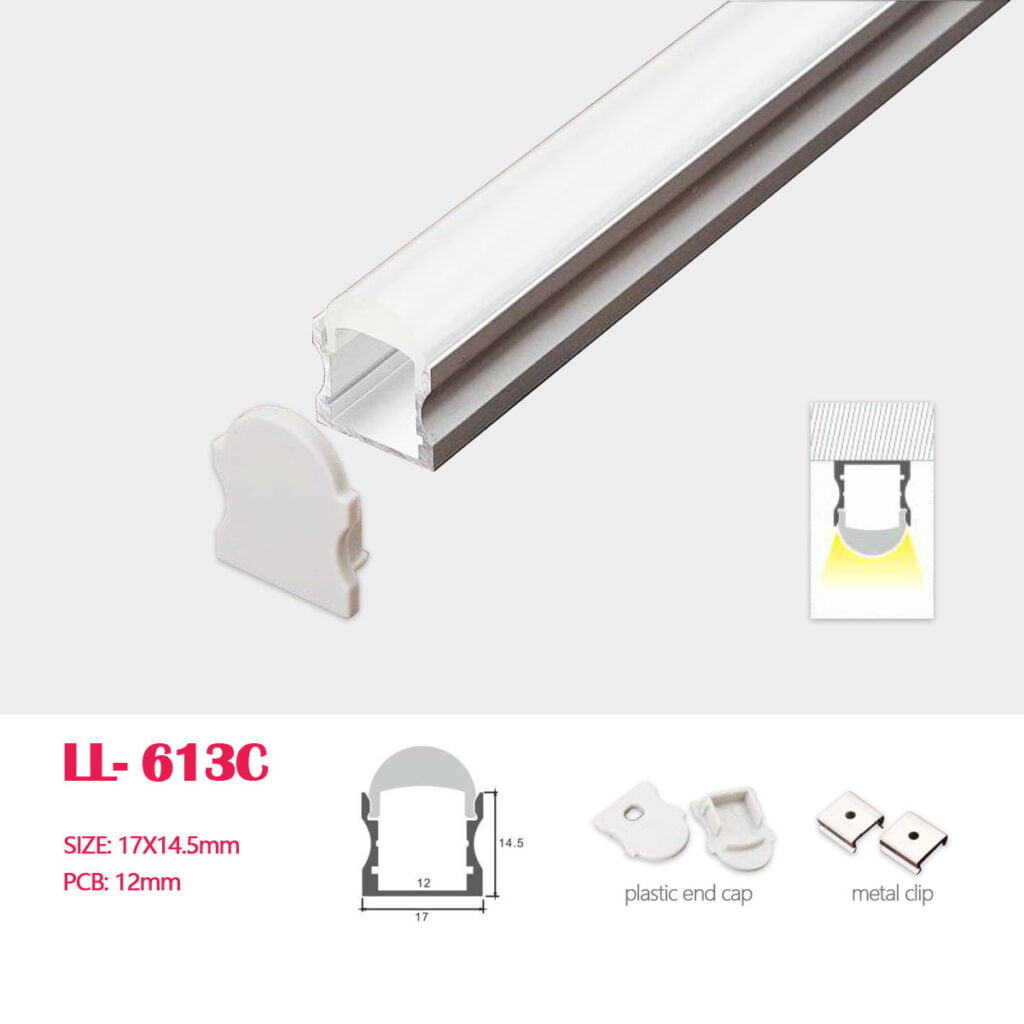
C. Implementing Channel Mounting
Opting for channel mounting offers an efficient approach to installing LED strips. Such channels guard the LED strips against impurities like dust, dirt, and other unforeseen elements, extending their lifespan. However, there are several different categories of channels to consider when mounting LED strips, detailed below:
Categories of Channel Mounting
The materials used for LED channels can range from plastic to aluminum or steel. Of these options, aluminum channels are especially favored for LED strip mounting due to their extreme lightness. Here are some prevalent types of channels for mounting LED strips:
These are the most frequently used channels for mounting LED strips due to their fundamental design, robustness, resistance to fracture, and affordability.
This type of channel includes a transparent cap atop the aluminum channel, creating a diffused lighting ambiance. Three types of diffusers offer different lighting illusions: clear, frosted, and opal. They also come in a range of sizes and heights. The closer the diffuser is to the LED strips, the more intense and less diffused the light will appear. Therefore, the height of these channels should be considered before purchase.

Serrated aluminum channels are a premier choice for mounting ceiling-suspended LED strips. They are equipped with internal elastic racks to firmly secure the strips and shield them from potential friction or damage from falls.
4. Bendable Channel
These channels are the ideal solution for ultimate adaptability, accommodating vertical and horizontal bending strips.
In addition to these channels, others include the flange aluminum profile, thickened plastic channel, 316 stainless steel channel, hybrid channel, etc. Aluminum channels, however, surpass plastic or steel channels in terms of being lightweight and corrosion-resistant.
Pros and Cons of Channel Mounting
While channel mounting provides numerous benefits, there are also a few setbacks. The following are the pros and cons associated with channel mounting:
| Pros | Cons |
| Protects LED strips from dust & dirtiest for submerged installation and provides seamless lighting. Effective the flexible LED strips a proper shape hides the LED strips so it looks fine even when the lights are turned off | Expensive, Time-consuming installation process |
Deciding on the Best Technique to Mount LED Strips

The multitude of mounting techniques for LED strips might leave you in a dilemma about which one to employ. The perfect technique depends on several factors outlined below:
A. Type of Surface
The choice of LED strip mounting technique should depend on the surface material. Clipping and screwing, for example, work well with plaster or brick walls and paper-printed walls because they don’t ruin the design and texture of these surfaces. Alternatively, an adhesive method works best for tiled surfaces without causing permanent damage, provided the surface is smooth. Otherwise, different methods are recommended.
B. Surrounding Conditions
The surrounding environment is pivotal in determining the ideal mounting technique for LED strips. Thanks to the aluminum channels, the channel technique is preferred in outdoor settings because it protects the LED strips from elements like dust and rain. But make sure the LED strips are waterproof for added protection.
C. Simplicity of Installation
For first-time installers or those who find clipping, screwing, and drilling challenging, the simplest installation method, like the adhesive technique, is advised. You only need to attach double-sided tape to the back of the strips and press it onto the surface.
D. Visual Appeal
Consider a creative installation method to enhance your lighting’s aesthetic appeal. Using channel mounting techniques, for instance, can add a touch of sophistication to your lighting setup. Try suspending LED strips from the ceiling for a touch of elegance.

Guide to Installing LED Flex Strips Via Various Mounting Techniques
There are several mounting options for LED strips. Here’s a step-by-step guide to installing LED strips using these methods:
A. Adhesive Mounting Technique
This involves using an adhesive to fix LED fixtures on surfaces. Follow these steps for an easy and quick installation:
Preparing the Surface
Clean the surface and ensure it’s free from dust, debris, or oils before installing the LED flex strip. The adhesive will stick better on a clean, dry surface.
Applying Adhesive
Apply adhesive to the back of the LED flex strip. Most LED strips come with an adhesive backing; you only need to remove the protective layer and stick it onto the surface. If the strips lack an adhesive backing, use double-sided tape.
Installing the LED Flex Strip
Align the LED flex strip with the surface and press it down firmly. Cut the strip to the desired length, then connect the power supply to test the LED lights.
B. Clips Mounting Techniques
LED Clips offer a neat, secure way to mount LED strip lights, allowing customization. Here’s how to use them:
Preparing the Base
Ensure the mounting surface is clean and level. Measure and mark the location of the LED clips.
Installing the Clips
Choose suitable LED clips, align them with the marks on the surface, and secure them using screws, adhesive tape, or other hardware.
Inserting the LED Flex Strip into Clips
Align the clean LED strip with the clips, press the strip into the clips, and connect them to the power source.
C. Channel Mounting Technique
This technique protects LED lights from dust and dirt and offers a seamless lighting effect. Here’s how to do it:
Measuring and Cutting the Channel
Determine the length of the LED strip and size the channel accordingly.
Placing the Flex Strip in the Channel
Insert the LED strip inside the channel after removing the adhesive backing. Fix the strip properly in the channel and close it with a diffuser of your choice.
Mounting the Channel
Mount the channel onto the surface using clips and screws or double-sided tape. Connect the power source, and you’re done!
Creating a Seamless Lighting Effect with Mounted LED Flex Strips
For a seamless lighting effect, measure and plan carefully. Cut the strips to size, connect them to create a continuous line of light using connectors, mount them onto a surface, and connect all the strips to a power source. This will help you create a seamless lighting effect with mounted LED flex strips.
Why Proper Mounting Techniques for LED Strips Matter
- Proper mounting techniques ensure your LED strips adhere securely to the surface and save Time by enabling systematic installation.
- They protect the LED from environmental factors and improve their thermal efficiency by facilitating better heat dissipation, thus enhancing performance and longevity.
- Before installing your LED strip, familiarize yourself with different mounting techniques and choose the most suitable one for your project.
Final Remarks
In essence, mounting LED flex strips is a straightforward task requiring minimal expertise or tools. Employing the correct installation method, your LED strip setup can exude a professional appearance and stand the test of Time. Start by determining the spot and extent of your LED strip placement. Utilize proper mounting equipment and strategies to ensure your lights are securely fixed and aesthetically pleasing. These guidelines will enable you to craft radiant illumination in any area effortlessly.
MyLikeLed is a trusted provider of top-notch LED strips and LED neon flex. Our products are subjected to rigorous testing in state-of-the-art labs to guarantee superior quality. Moreover, we cater to individual needs with customizable features on our LED strips and neon flex. So, for unrivaled quality in LED strips and neon flex, reach out to MyLikeLed immediately!
FAQs
How do I prepare the surface before installing LED flex strips?
You should clean the surface thoroughly before installing.
Use a dry cloth or mild cleaner to remove dust, oil, and dirt so the adhesive backing sticks properly and your strips stay secure over time.
What is the best way to mount LED flex strips?
The best way is to use the adhesive backing or mounting clips.
Peel off the adhesive liner and press the strip firmly onto the surface, or use mounting clips every few feet for extra support, especially in areas with heat or moisture.
Can LED flex strips be installed on uneven or rough surfaces?
Yes, but you’ll need extra support.
For rough or bumpy surfaces, it’s recommended to use mounting brackets, aluminum channels, or additional adhesive like double-sided tape for a secure fit.
Do I need special tools to install LED flex strips?
No, basic tools are usually enough.
You might only need scissors (for cutting at marked points), a ruler for measuring, and possibly a screwdriver if you are using mounting clips.
How do I cut LED flex strips to fit my space?
Cut only at the marked cutting points on the strip.
These are usually indicated with a small line or scissor icon; cutting elsewhere could damage the strip and cause it not to light up properly.
Can I bend LED flex strips around corners?
Yes, but bend gently along the designed flexible sections.
Avoid folding or sharply creasing the strip; use gradual curves or special corner connectors to maintain performance and avoid damage.

Hi, I’m Xylia Xiong, a sales professional with 14 years of experience in the LED strip light industry. I specialize in providing tailored solutions, leveraging my expertise in LED products and the latest industry trends. Known for effective communication and problem-solving, I’m dedicated to helping lighting manufacturers, importers, and distributors achieve their goals.
Let’s work together to create customized solutions that exceed expectations.