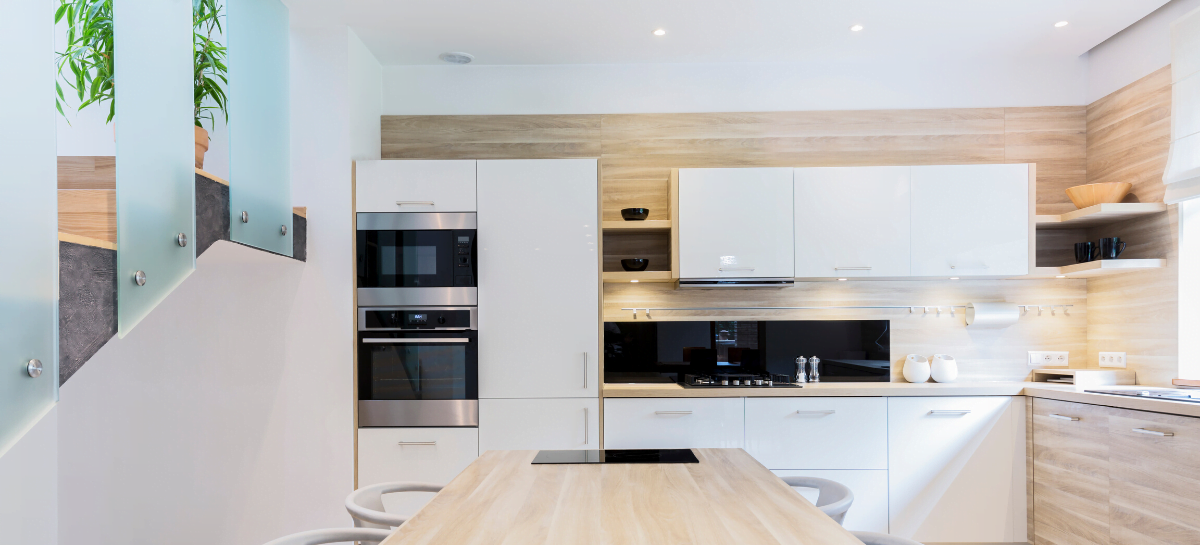
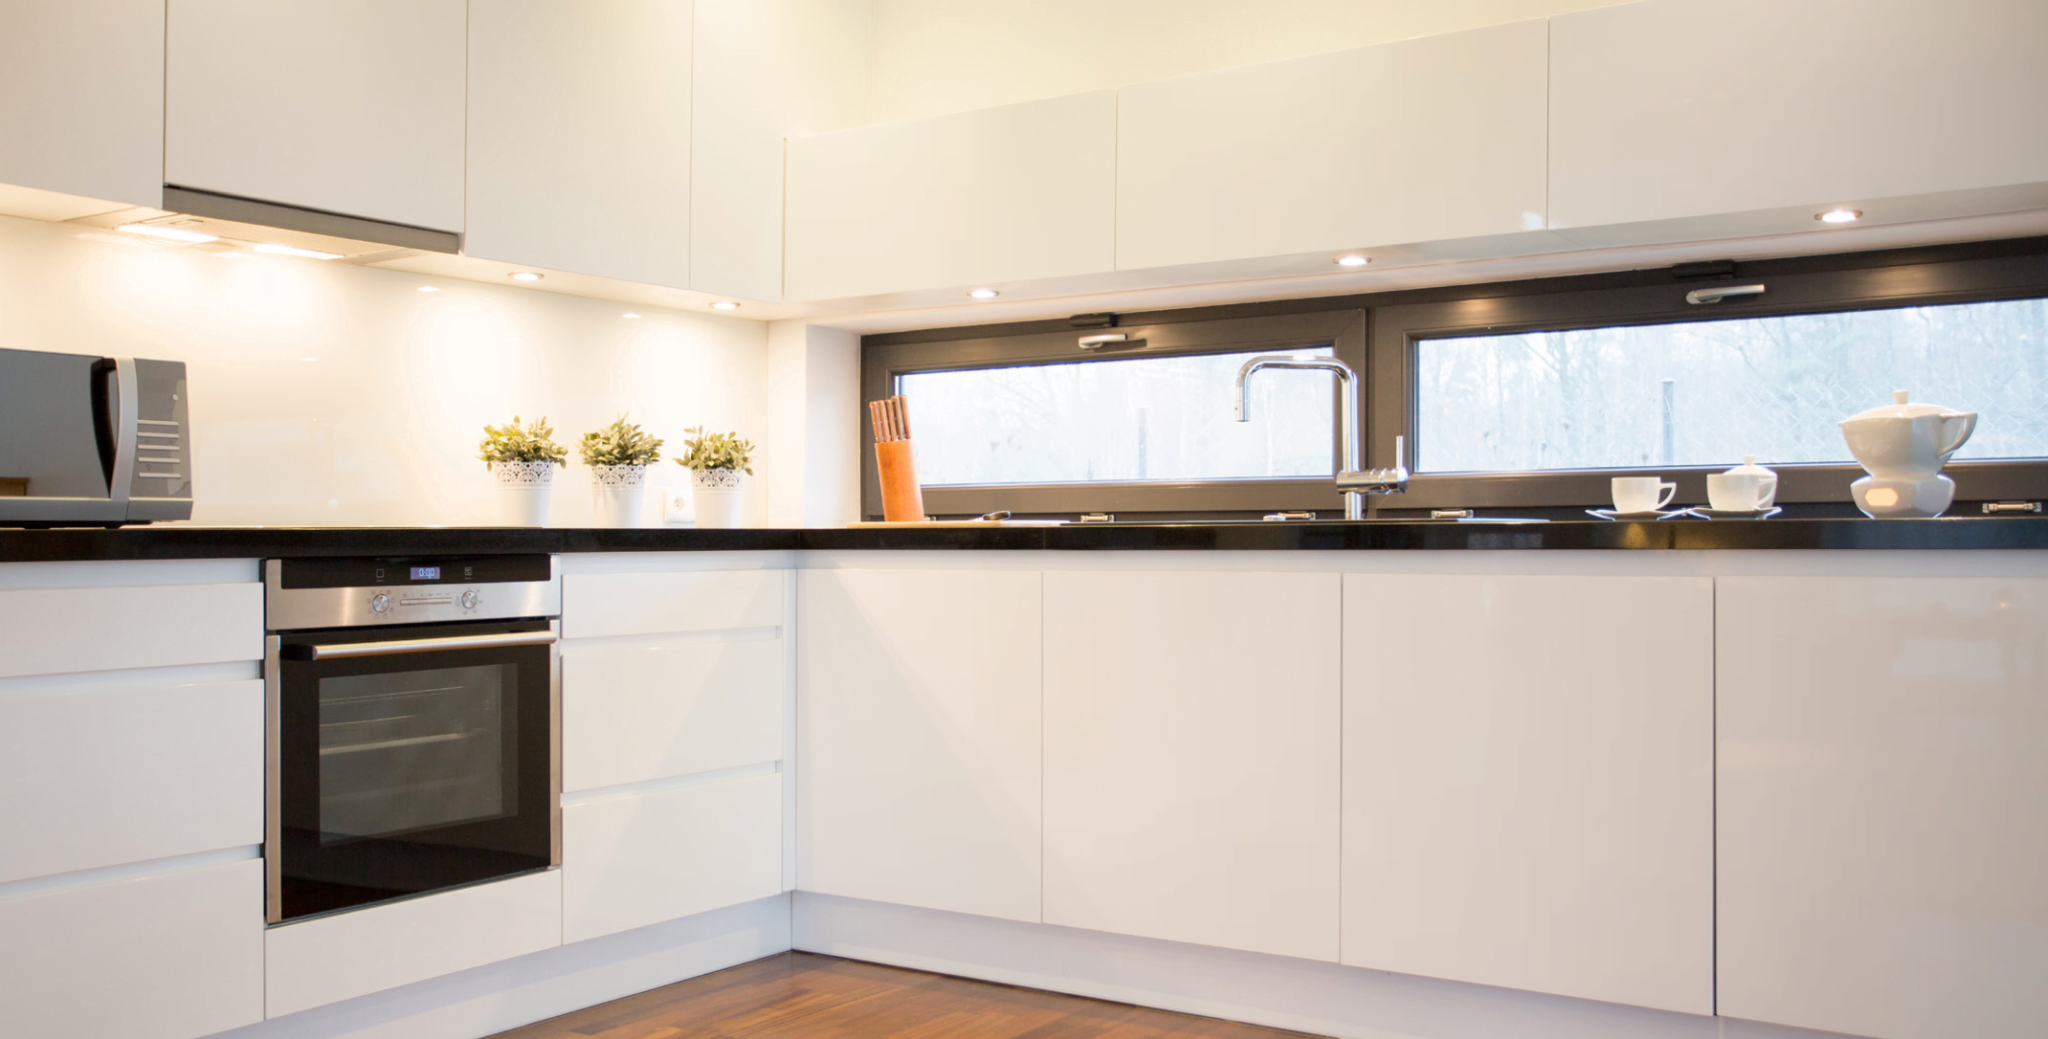
The kitchen is often considered the heart of the home, where family and friends gather, meals are prepared, and memories are made. As such, the importance of good lighting in kitchen design cannot be overstated. Proper lighting enhances the space’s functionality and adds to the overall aesthetic appeal, creating a warm and inviting atmosphere.
Among the various lighting options available, under-cabinet LED strip lighting stands out as one of the most effective and versatile solutions. These lights provide the necessary illumination for tasks like chopping and cooking and add a stylish touch to your kitchen design. In this blog post, we’ll explore the benefits of under-cabinet LED strip lighting and offer tips to help you upgrade your kitchen with this modern lighting solution.

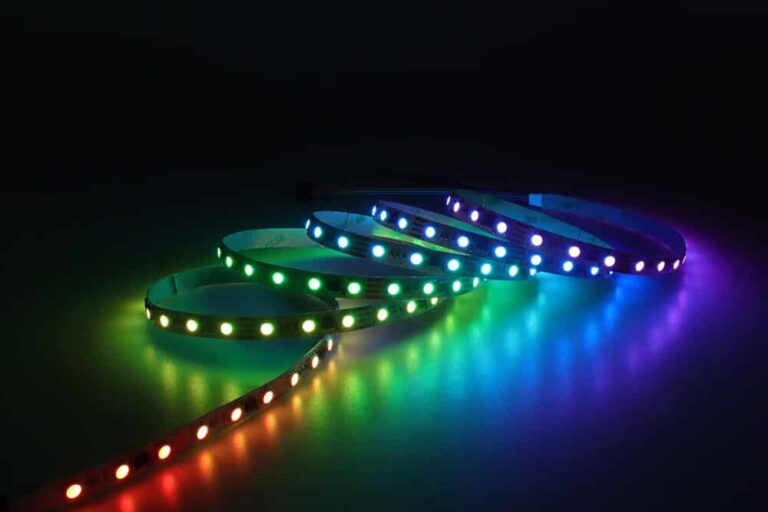
The Benefits of Under-Cabinet LED Strip Lighting
1. Enhanced Task Lighting
One of the primary benefits of under-cabinet LED strip lighting is its ability to provide direct, focused light on your countertops. Precision and visibility are key in this task, and lighting is crucial in the kitchen. Whether chopping vegetables, reading a recipe, or cleaning up, under-cabinet LED strips offer the bright, even light needed to perform these tasks safely and efficiently.
2. Energy Efficiency
Under-cabinet LED strip lighting is an energy-efficient option, significantly reducing your kitchen’s energy consumption. LED lights use a fraction of the energy compared to traditional incandescent or fluorescent bulbs while providing the same if not better, brightness level. This means keeping your kitchen well-lit without worrying about high electricity bills.
3. Sleek and Modern Aesthetic
LED strip lighting is discreet and stylish, adding a sleek, modern touch to your kitchen design. The strips are thin and can be easily hidden beneath cabinets, providing a seamless look that enhances the overall aesthetic of your kitchen. With various color temperatures and dimmable options available, you can customize the lighting to match your kitchen’s style, whether warm and cozy or cool and contemporary.
4. Easy Installation and Customization
Under-cabinet LED strip lighting is easy to install, making it a great DIY project for homeowners. Most LED strips come with an adhesive backing, allowing for quick and hassle-free installation. Additionally, these strips can be cut to the exact length needed and are available in various brightness levels, allowing you to tailor the lighting to your specific needs and preferences.
5. Long Lifespan and Low Maintenance
LED strip lights are known for their long lifespan, often lasting up to 50,000 hours or more. This durability means you won’t need to replace the lights frequently, saving you time and money in the long run. Moreover, LED lights require minimal maintenance, making them a convenient lighting solution for busy kitchens.
Choosing the Right LED Strip for Your Kitchen
When upgrading your kitchen with LED strip lighting, selecting the right type of strip is crucial to achieving the desired look and functionality. With various options available, several factors must be considered to ensure you choose the best LED strip for your space. Here’s a guide to help you make an informed decision.
Factors to Consider
Brightness (Lumens per Meter):
- Task Lighting: If your primary goal is to enhance task lighting under cabinets or countertops, you’ll want an LED strip with higher brightness. Look for strips that offer around 1,500 to 2,000 lumens per meter. This brightness level provides ample light for tasks like chopping, cooking, and reading recipes.
- Accent Lighting: A lower brightness level of 600 to 1,200 lumens per meter is sufficient for accent lighting that adds a soft glow to your kitchen. This will create a warm ambiance without being overpowering.
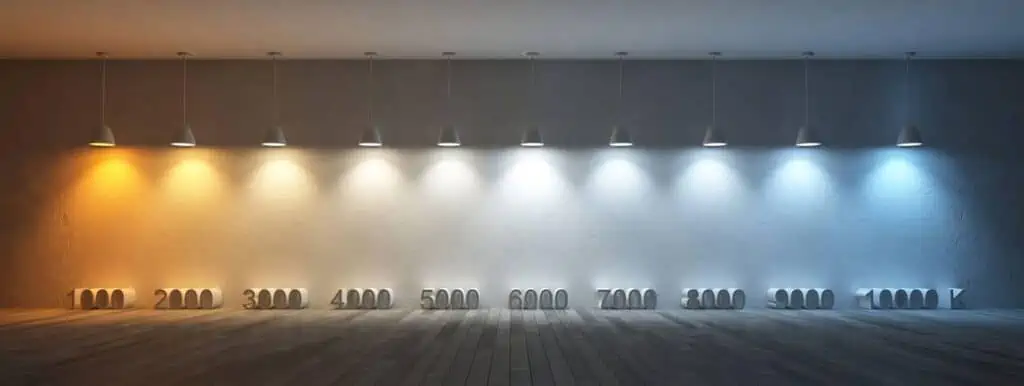
Color Temperature (Kelvin):
- Warm White (2700K – 3000K): Ideal for creating a cozy and inviting atmosphere, warm white LED strips are perfect for traditional or rustic kitchen designs. They emit a soft, yellowish light that enhances the warmth of wood cabinets and natural tones.
- Neutral White (3500K—4500K): For a balanced look that’s neither too warm nor too cool, neutral white LED strips offer a versatile option. This colour temperature works well in both modern and classic kitchens, providing clean, natural light that suits various styles.
- Cool White (5000K – 6000K): Cool white LED strips are best for contemporary kitchens with a sleek, modern aesthetic. They emit a bright, bluish-white light that complements stainless steel appliances and glossy finishes, creating a crisp, clean look.
Size and Fit:
- Length and Width: Measure the length of the area where you plan to install the LED strips. Most LED strips can be cut to size, but it’s important to choose a strip that fits the width of the installation area. Some strips are wider and may not fit under narrow cabinets, so check the dimensions before purchasing.
- Waterproofing: If your LED strips will be installed near sinks or areas prone to moisture, consider waterproof strips. These are coated with a protective layer that shields them from water and humidity, ensuring longevity and safety.
Comparing Different LED Strip Types for Kitchen Use
Standard LED Strips:
- Best for: General task lighting and accent lighting.
- Features: Available in various brightness levels and color temperatures, these strips are versatile and suitable for most kitchen applications. They are typically non-waterproof but can be used with diffusers for a softer light.
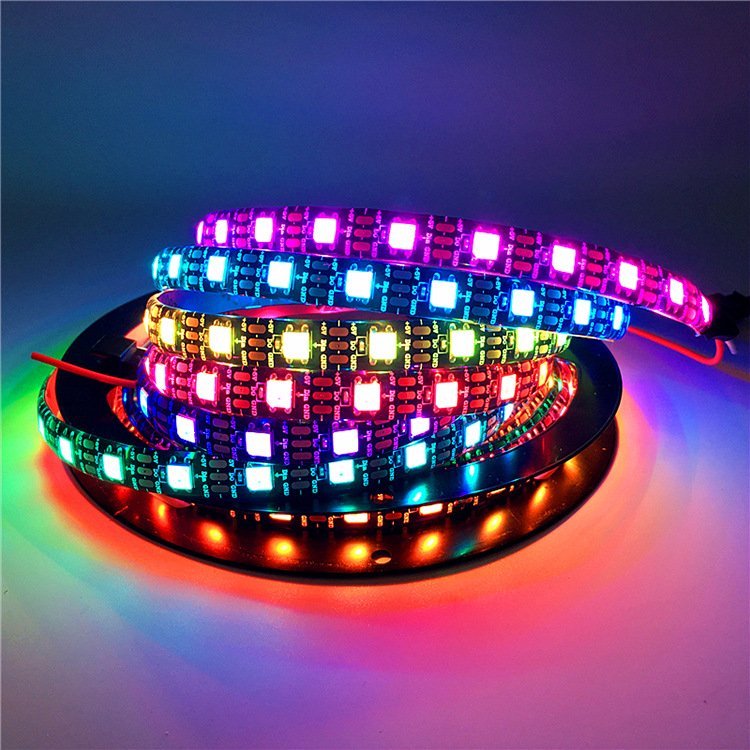
RGB LED Strips:
- Best for: Adding dynamic color effects to your kitchen.
- Features: RGB strips can be controlled using a remote or smart device to change colours. While they’re more commonly used for accent lighting, they can also serve as task lighting when set to white. These strips create a fun, vibrant atmosphere in contemporary kitchens.
High CRI LED Strips:
- Best for: Kitchens where color accuracy is important.
- Features: High Colour Rendering Index (CRI) strips accurately represent colors, making them ideal for kitchens where food presentation and decor are important. A CRI of 90 or higher is recommended for areas with critical color distinction.
Dimmable LED Strips:
- Best for: Adjustable lighting for different times of day or activities.
- Features: Dimmable LED strips allow you to control the brightness level, making them versatile for both task and ambient lighting. They can be paired with a dimmer switch for easy adjustment based on the time of day or the specific task.
Waterproof LED Strips:
- Best for Areas exposed to moisture, such as near sinks or outdoor kitchens.
- Features: These LED strips are coated with a waterproof material, making them resistant to water and humidity. They are ideal for installation in wet areas where standard LED strips might be compromised.
Installation Guide
Upgrading your kitchen with under-cabinet LED strip lighting can dramatically enhance its functionality and aesthetics. To help you achieve a professional-looking installation, here’s a step-by-step guide and important wiring and power considerations.
Step-by-Step Instructions for Under-Cabinet LED Installation
Step 1: Plan Your Installation
- Measure the Area: Begin by measuring the length of the cabinet where you plan to install the LED strips. This will help you determine the required length of the LED strips.
- Determine the Power Source: Identify a convenient power outlet to connect your LED strips. Consider the location of the power supply and how you’ll route the cables to maintain a clean look.
- Choose the Right LED Strips: Select LED strips based on your kitchen’s needs, considering factors like brightness, color temperature, and whether you need waterproof strips for areas near the sink.
Step 2: Gather Your Materials
- LED strip lights
- Power supply (transformer)
- LED dimmer (optional)
- Adhesive backing (if not pre-applied)
- Mounting clips or channels (for additional security)
- Connector cables (if needed for multiple strips)
- Wire cutter/stripper
- Electrical tape
- Screwdriver
Step 3: Prepare the Surface
- Clean the Surface: Wipe down the underside of the cabinets where the LED strips will be installed. The surface should be free of dust, grease, and moisture to ensure the adhesive backing sticks properly.
- Test the Lights: Before installation, plug in the LED strips to the power supply to ensure they work correctly.
Step 4: Cut the LED Strips (if necessary)
- Locate the Cutting Points: Most LED strips have designated cutting points, usually marked with a line or scissors icon. These are the only places where the strip can be safely cut without damaging the circuitry.
- Cut to Length: Use sharp scissors to cut the strip at the designated point. If joining multiple strips, ensure each piece is cut accurately to fit the space.
Step 5: Install the LED Strips
- Apply the Strips: Peel off the adhesive backing and carefully press the LED strip onto the cleaned surface under the cabinet. Start at one end and work your way across, applying even pressure to ensure the strip adheres properly.
- Secure with Mounting Clips: For added security, especially in areas prone to moisture or movement, use mounting clips or channels to secure the LED strips. These can be screwed into the underside of the cabinet.
Step 6: Connect to Power
- Wiring the Strips: Connect the LED strips to the power supply using the provided connector cables. If your setup includes multiple strips, connect them in series using appropriate connectors. Ensure that the polarity (+ and -) matches on both the strip and the connector.
- Install the Dimmer (optional): If you’re using a dimmer, connect it between the power supply and the LED strips according to the manufacturer’s instructions. This will allow you to adjust the brightness as needed.
- Plug into Power: Once all connections are secure, plug the power supply into the nearest outlet. If hardwiring is required, you may consult a licensed electrician to ensure safe and code-compliant installation.
Step 7: Test the Installation
- Power On: Turn on the power supply and test the LED strips. Check for even lighting and ensure there are no flickering or dim areas.
- Adjust as Needed: If you notice any issues, such as loose connections or uneven lighting, make the necessary adjustments before finalizing the installation.
Wiring and Power Considerations
1. Power Supply Selection:
- Match Voltage: Ensure that the power supply matches the voltage requirements of your LED strips. Most LED strips operate on 12V or 24V DC, so you’ll need a compatible transformer.
- Wattage Calculation: Calculate the total wattage required by multiplying the wattage per meter of the LED strip by the length of the strip. Choose a power supply with a wattage rating at least 20% higher than the total wattage to ensure efficient operation and avoid overloading.
2. Wiring Layout:
- Parallel vs. Series Wiring: When connecting multiple LED strips, decide whether to wire them in series (end-to-end) or parallel (separate connections to the power source). Parallel wiring is often recommended for maintaining consistent brightness across all strips.
- Cable Management: Use cable clips or channels to neatly route the wiring and keep it hidden from view. This improves the installation’s appearance and reduces the risk of damage to the wires.
3. Dimmer Compatibility:
- LED-Compatible Dimmer: If you plan to use a dimmer, ensure it’s compatible with LED lights. Using a standard dimmer with LED strips can cause flickering or uneven dimming.
- Wiring the Dimmer: Follow the manufacturer’s instructions for wiring the dimmer. Typically, the dimmer is installed between the power supply and the LED strips, allowing you to control the brightness without affecting the overall power supply.
Design Ideas
Under-cabinet LED strip lighting can dramatically transform your kitchen by adding functional and decorative elements. The design possibilities are endless, whether you want to create a warm, inviting atmosphere or a bright, focused workspace. Here are some ideas and tips to help you achieve the perfect lighting design for your kitchen.
Creating Ambient vs. Task Lighting
Ambient Lighting:
- Purpose: Ambient lighting serves as the overall illumination for the room, providing a soft, even glow that enhances the atmosphere without being too harsh. Under-cabinet LED strip lighting can create this effect by providing a subtle light source that complements the main overhead lighting.
- How to Achieve: To create ambient lighting, choose LED strips with a lower brightness level and a warm color temperature (2700K-3000K). Install the strips along the back edge of the underside of the cabinets to create a soft wash of light across the countertops. This type of lighting works well in kitchens where you want to establish a cozy, inviting feel, perfect for entertaining or relaxing.
Task Lighting:
- Purpose: Task lighting is focused, bright lighting that illuminates specific areas where activities such as cooking, chopping, or reading recipes take place. Effective task lighting reduces shadows and glare, making your kitchen safer and more functional.
- How to Achieve: Opt for LED strips with higher brightness levels (1500-2000 lumens per meter) and a neutral to cool color temperature (3500K-5000K) for task lighting. Install the LED strips closer to the front edge of the cabinets, directly above the work surfaces. This positioning ensures the light is directed onto the countertops, providing clear, bright illumination where you need it most.
Tips for Achieving a Modern and Sleek Kitchen Look
Choose a Cool Colour Temperature:
- A cool white color temperature (5000K-6000K) gives your kitchen a clean, contemporary look that pairs well with modern design elements such as stainless steel appliances, glass splash backs, and minimalist cabinetry. Cool white light enhances the brightness of the space, making it feel open and airy.
Opt for Thin, Discreet LED Strips:
- For a sleek, modern appearance, select slim and discreet LED strips. These strips can be easily hidden under the cabinets, providing illumination without drawing attention to the light source itself. The result is a seamless, streamlined look that complements modern kitchen designs.
Use Diffusers for a Polished Finish:
- Installing diffusers or LED channels over your LED strips helps to evenly distribute the light, eliminating visible hotspots and creating a smooth, continuous line of light. Diffusers also protect the strips from dust and moisture, extending their lifespan and maintaining their sleek appearance.
Integrate Dimming Controls:
- Incorporating a dimmer switch allows you to adjust the brightness of your under-cabinet lighting, adding versatility to your kitchen design. Dimming controls enable you to transition from bright task lighting during meal prep to softer ambient lighting for dining or entertaining. This flexibility enhances both the functionality and aesthetic appeal of your kitchen.
Coordinate with Other Lighting Elements:
- To achieve a cohesive look, coordinate your under-cabinet LED strip lighting with other lighting fixtures in your kitchen. This could include a pendant, recessed ceiling, or accent lighting inside cabinets or along the kickboards. By matching the color temperature and style, you create a unified lighting scheme that enhances the overall design.
Consider Smart Lighting Options:
- For the ultimate modern convenience, consider smart LED strips that can be controlled via a smartphone app or voice assistant. Smart lighting allows you to change the color, brightness, and timing of your under-cabinet lights, adding an extra layer of sophistication to your kitchen design.
Maintenance and Troubleshooting

Maintaining your under-cabinet LED strip lighting is essential to ensure it remains bright and functional for years. While LED strips are generally low-maintenance, occasional issues may arise that require troubleshooting. Here’s a guide to help you keep your LED strips in top condition and address common problems effectively.
How to Maintain Your LED Strips
Regular Cleaning:
- Dust and Debris: Over time, dust and kitchen grease can accumulate on your LED strips, which may reduce their brightness. Wipe the strips down regularly with a soft, dry cloth to keep them shining brightly. A slightly damp microfiber cloth can be used for stubborn grease, but ensure the strips are turned off and cool before cleaning.
- Check for Loose Connections: Inspect the connections between the LED strips, connectors, and power supply. Loose connections can lead to flickering or intermittent lighting. Ensure all connectors are secure and make adjustments if necessary.
Ventilation and Heat Management:
- Avoid Overheating: LED strips are more energy-efficient and produce less heat than traditional bulbs; they can still overheat if not properly ventilated. Ensure the strips are not installed too close to heat sources like stovetops or ovens. Adequate airflow around the strips will help maintain their longevity.
- Use of Diffusers: If you’ve installed diffusers or LED channels, keep them clean to ensure proper heat dissipation. Dust or debris inside the channels can trap heat, affecting the performance of the LED strips.
Inspect for Wear and Tear:
- Check the Adhesive Backing: Over time, the adhesive backing of LED strips may lose its stickiness, especially in high-humidity areas like kitchens. If you notice any sections peeling off, you can reapply using strong, double-sided tape or mounting clips to secure the strips.
- Inspect the Strip Housing: For waterproof or water-resistant LED strips, check the protective housing for any wear or damage, especially if installed near sinks or in areas prone to moisture.
Common Issues and How to Fix Them
Flickering Lights:
- Possible Causes: Flickering can occur due to loose connections, incompatible dimmers, or power supply issues. It may also happen if the LED strips are overloaded or if there’s a voltage drop along the strip.
- How to Fix: Check all connections, including the power supply, connectors, and dimmer switch, to ensure they are secure. If you’re using a dimmer, make sure it’s LED-compatible. If the flickering persists, consider upgrading the power supply to one with a higher wattage rating or using shorter lengths of LED strips to prevent voltage drop.
Dim or Uneven Lighting:
- Possible Causes: Dim lighting can result from a failing power supply, poor-quality LED strips, or a voltage drop, especially if you have a long run of LED strips.
- How to Fix: Ensure the power supply is functioning correctly and adequate for the LED strips’ length. If the strips are dim towards the end of a long run, you may need to install additional power supplies or split the run into shorter sections to maintain consistent brightness.
LED Strips Not Turning On:
- Possible Causes: This issue can stem from a power supply failure, loose or incorrect wiring, or a faulty LED strip.
- How to Fix: First, check the power supply to ensure it’s working and properly connected. Verify that all wiring is correct and secure. If everything is connected correctly and the power supply is functional, the issue may lie with the LED strip itself. In this case, replacing the strip may be necessary.
Discoloration or Colour Shifting:
- Possible Causes: Discoloration or color shifting can occur due to overheating, poor-quality LEDs, or excessive voltage drop.
- How to Fix: Ensure the LED strips have proper ventilation and are not exposed to excessive heat. If the issue is due to a voltage drop, consider shortening the length of the strips or adding a power supply. If the strips are discolored due to poor quality, replacing them with higher-quality LEDs may be the best solution.
Sections of the Strip Not Working:
- Possible Causes: If parts of the LED strip are not working, it could be due to a break in the circuit, a damaged LED, or a faulty connection.
- How to Fix: Inspect the strip carefully for any visible damage, such as cuts or kinks, that may have broken the circuit. If a specific section is not working, you may be able to cut out the damaged part and rejoin the strip using connectors. Ensure all connections are secure, and if necessary, replace the damaged section of the strip.
Conclusion
Enhancing your kitchen with under-cabinet LED strip lighting is a simple yet powerful way to elevate its functionality and aesthetics. Whether you want to create a warm, inviting ambiance or need bright, focused task lighting, LED strips offer the versatility and efficiency needed to transform your kitchen into a modern, stylish hub.
With easy installation, low maintenance, and endless customization options, there’s no better time to upgrade your kitchen lighting. By investing in high-quality LED strips, you’ll enjoy a brighter, more efficient kitchen that meets your practical needs and adds a touch of sophistication to your home.
Ready to get started? Explore our wide range of under-cabinet LED strip lighting at MyLikeLed and discover how this simple upgrade can transform your kitchen. Lighting your space with style and efficiency, and enjoy the benefits for years! Contact us for best LED strips for your kitchen!

Hi, I’m Xylia Xiong, a sales professional with 14 years of experience in the LED strip light industry. I specialize in providing tailored solutions, leveraging my expertise in LED products and the latest industry trends. Known for effective communication and problem-solving, I’m dedicated to helping lighting manufacturers, importers, and distributors achieve their goals.
Let’s work together to create customized solutions that exceed expectations.