Programmable or addressable LED strips changed the face of lighting. Programmable LED strips offer limitless options for color, patterns, and effects. But there’s more. You need to learn so many things before using these LED strips.
In this article, I’ll cover everything you should know about programmable LED strips. You will learn about installation, programming, and choosing the right LED strip lights. This article is a must-read if you pick this type of light. Let’s get started.

What is a Programmable LED Strip Light?
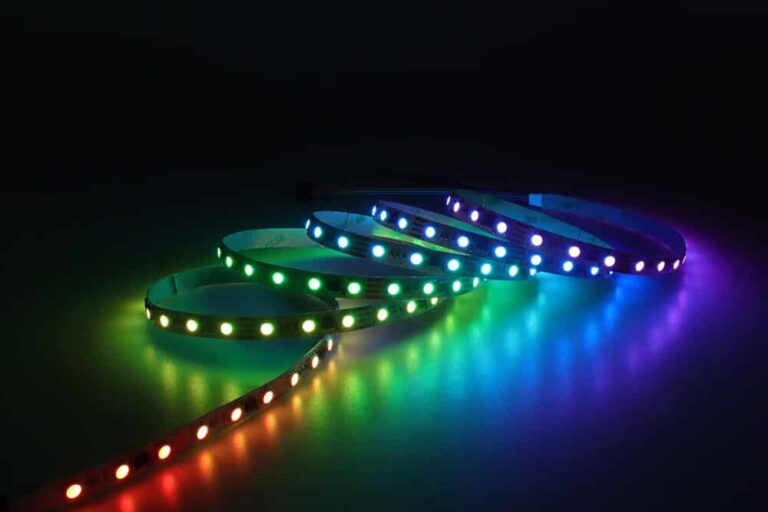
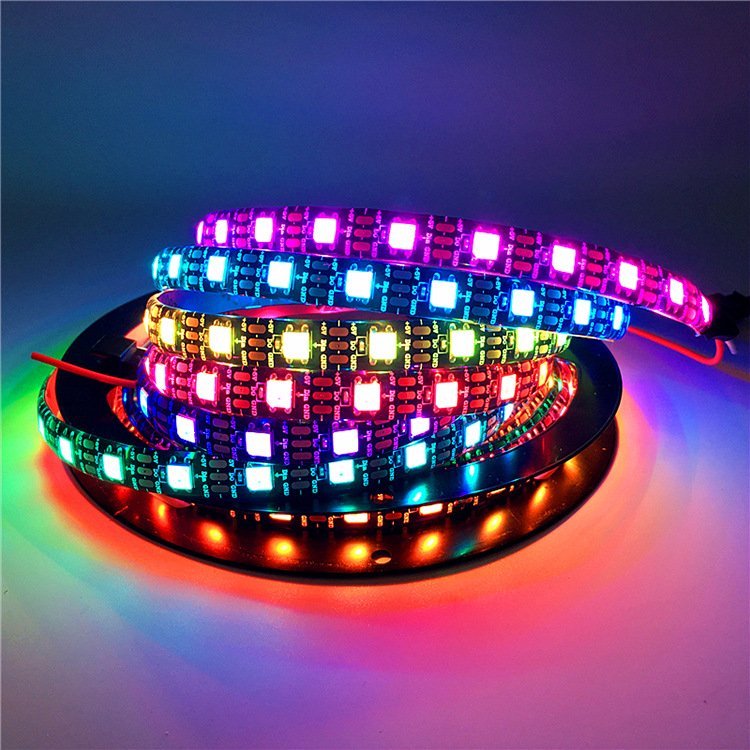
Programmable LED strip lights, also known as digital LED strips, pixel LED strips, magic LED strips, or dream color strips, are not your typical lighting strips. Unlike standard LEDs, these have built-in integrated circuits. They allow you to operate each LED (or group of LEDs) independently. That means you can accurately design eye-catching lighting effects, bespoke patterns, and stunning color transitions.
These smart strips can communicate with a control circuit. This helps you completely control the color and brightness of each pixel. It also provides limitless creative possibilities. This includes, but is not limited to, ambient lighting for your home, enhancing a stage performance, creating a spectacular shop display, or working on a DIY project.
4 Types of Programmable LED Strips Based on IC Chip
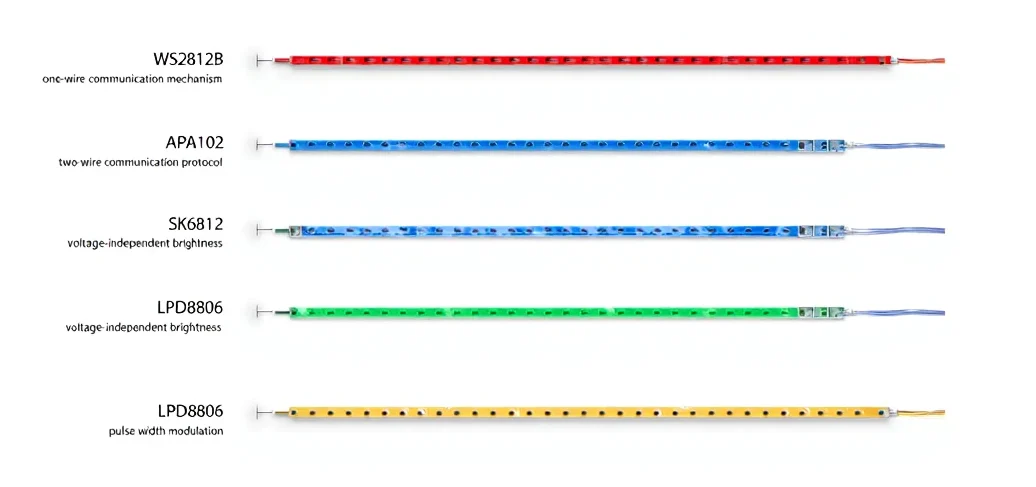
01. WS2812B
The WS2812B supports a one-wire communication mechanism and multiple color selection. It can also be driven by popular microcontrollers such as the Raspberry Pi and Arduino. Hobbyists and enthusiasts will find it affordable and accessible.
02. APA102
The APA102 addressable LED strip supports a two-wire communication protocol. This protocol offers a better refresh rate and smoother animations, lighting shows, and transitions.
03. SK6812
SK6812 has voltage-independent brightness and colors. Thus, the voltage drop does not affect the colors of the LED strip. It also provides a better color spectrum and accuracy.
04. LPD8806
The LPD8806 addressable LED strip has a better refresh rate (RR) and pulse width modulation (PWM). It allows it to offer the best color resolution and transitions.
Types of Programmable LED Strips Based on Signal Protocols
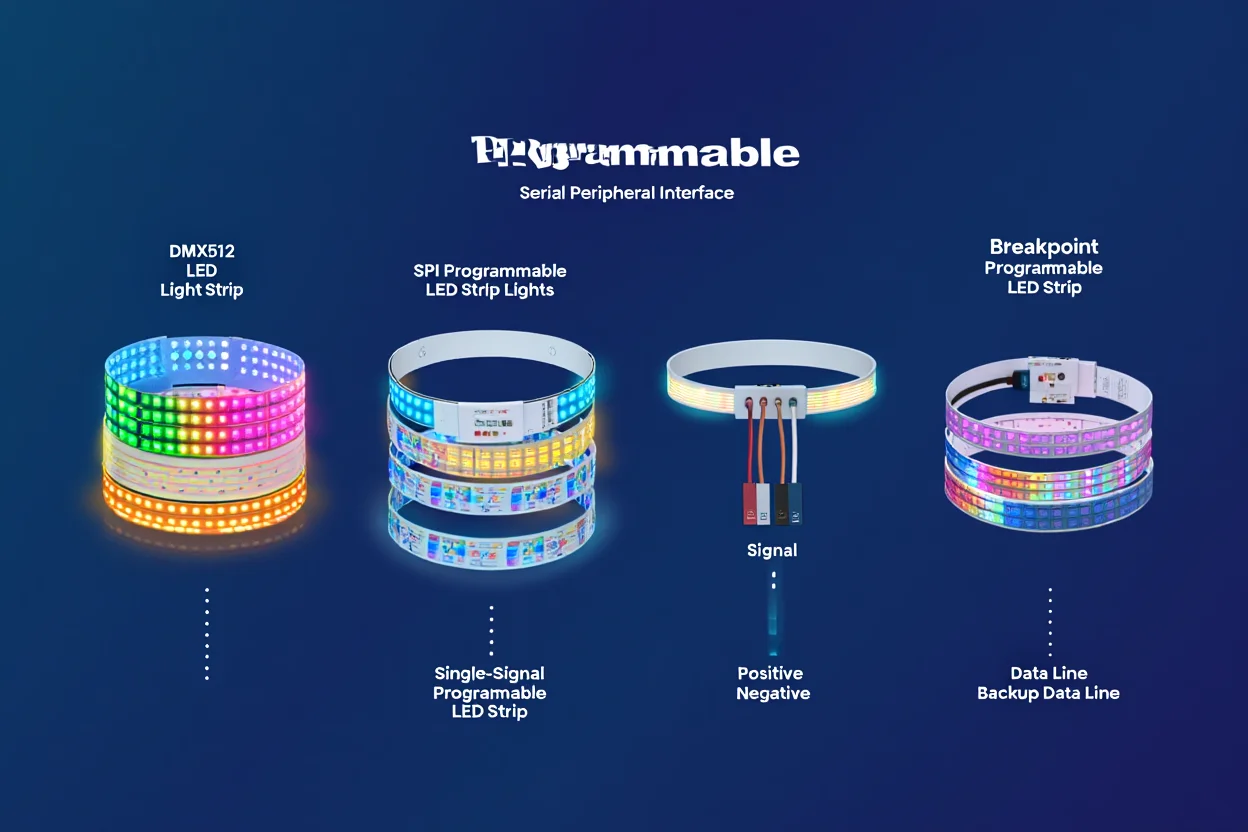
DMX512 LED Light Strip
The DMX512 LED strip is bright and can be wired into a DMX system. It can control a series of stunts. This includes horse racing, running water, chases, and animation. You can also freely mix the pattern and show any color. The fun fact is that signal transmission will not be affected even if a pixel is broken. So, you can use regular pixels.
SPI Programmable LED Strip Lights
SPI, or serial peripheral interface, communicates using the synchronous serial communication protocol. It differs from DMX512, which uses a synchronous parallel interface. So, you can design more advanced lighting displays. The SPI strip is straightforward and provides a wide array of preset lighting options. You can also select them for minor undertakings that do not need lighting. The most common types of SPI programmable LED Strip lights are,
01. Single-Signal Programmable LED Strips
This type of LED strip can only send a signal to a single addressable LED strip. A pixel is a unit of control on an integrated circuit. When one of the pixels is spoiled, the remaining pixels become unusable. Its connecting points are a positive wire, a negative wire, and a signal wire.
02. Dual Signal Programmable LED Strips
Like the previous one, it uses a data signal that moves through the dual signal addressable LED strip. In addition, it has a clock function. You can schedule the time to turn on the LED light.
03. Breakpoint Programmable LED Strips
The Breakpoint resume series is a more complex version of the single addressable LED strip. It has a four-channel dual data line. The LED driver control circuit includes a data line and a backup data line. If a single data line fails, the backup data line will immediately replace it. As a result, no signal disruption occurs.
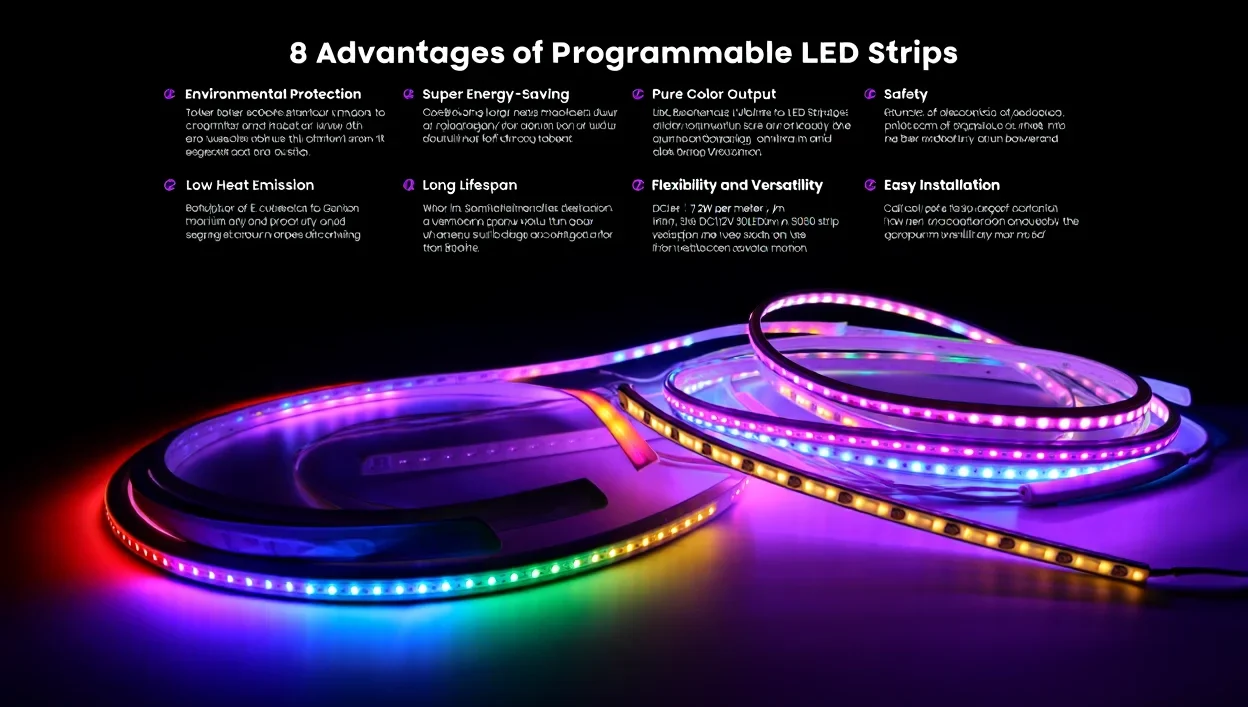
8 Advantages of Programmable LED Strips
Safety
Low-voltage DC power supplies like 5V or 12V typically power programmable LED strips. This reduces the risk of electric shock, short circuits, and fire. So, they are safe indoors with children, pets, and older people. They also do not get as hot as incandescent lighting.
Environmental Protection
As energy-efficient, RoHS-compatible units, programmable LED strips are an eco-friendly choice. Also, LED strips are made from green raw materials like FPC boards and are free of toxins. So, they are recyclable and reusable.
Super Energy-Saving
Programmable LED strips consume less power than incandescent or halogen lamps. A DC12V 30LEDs/m /m 5050 strip consumes 7.2W per meter. They also offer high energy conversion efficiency. So you can easily use them for wide-range decorative lighting.
Pure Color Output
Addressable LED strips use high-brightness Surface-Mounted Device LEDs. It helps create rich, saturated, and stable colors. Their RGB or RGBW features allow dynamic color changes. So, you can opt for them for mood lighting, stage backgrounds, television backlights, and theme decorations.
Low Heat Emission
Each of the LED chips produces a low amount of heat when active. This reduced heat emission allows the LED strips not to raise temperatures. It also allows them to be used in sensitive environments. For example, you can use them in aquariums and behind electronic equipment and artwork.
Long Lifespan
Programmable LED strips have an 80,000- to 100,000-hour lifespan under regular working conditions. It is equivalent to nearly 10 years of constant usage. They last longer than standard lighting and even small fluorescents. It makes them useful when used commercially or architecturally.
Flexibility and Versatility
LED programmable strips are bendable, twistable, or curvable to any surface or design concept. So you can install them in tight corners, curved edges, signs, and creative advertising displays. They can also smoothly adapt to any configuration. So you can use them even with intricately complex architectural features.
Easy Installation
LED strips are very simple to install. They are generally provided with pre-soldered connectors or plug-and-play user interfaces. Thus, they offer convenience and artistic freedom. So, they can spontaneously enrich the residential decorators and DIY buffs.
Waterproof Options for Various Environments
Programmable LED strips are available in multiple Ingress Protection (IP) ratings:
- IP20: Non-waterproof, suitable for indoor dry locations.
- IP65: Coated with surface glue, suitable for damp indoor spaces.
- IP67: Encased in silicone tubing, suitable for outdoor or wet environments.
- IP68: Fully enclosed for submersion in water.
5 Top Applications of Programmable LED Strips
Programmable LED strips are endless. Here are just a few motivational examples of how people are leveraging them:
Bringing Life to Home Interiors
Addressable LED strips can quickly change a room’s mood. You can use them for warm under-cabinet lighting in the kitchen, lighting behind the TV, or color effects on the ceiling.
Elevating Commercial Spaces
Programmable LED strips control the mood of shops, restaurants, and nightclubs. Companies use them to accentuate products, direct attention towards displays, or create an alternative mood.
Adding Spark to Celebrations
From weddings and birthdays to festivals and concerts, addressable LEDs bring energy and sophistication to every occasion. You can also synchronize them with music, pre-programmed to add to a color scheme. You can even use them to lead guests through an event with changing colors.
Enhancing Gaming and Streaming Zones
Lighting is an experience for gamers and content creators. Using addressable LED strips, rigs are brought to life through reactive lighting that reacts to gameplay or connects to sound. It also adds immersion, personality, and visual zap to every session or stream.
Powering Creative and Artistic Projects
Artists, makers, and DIYers use addressable LEDs to push creative boundaries. Here, they offer control and precision that enable innovative, ever-changing designs.
How To Choose The Right Programmable LED Strip?
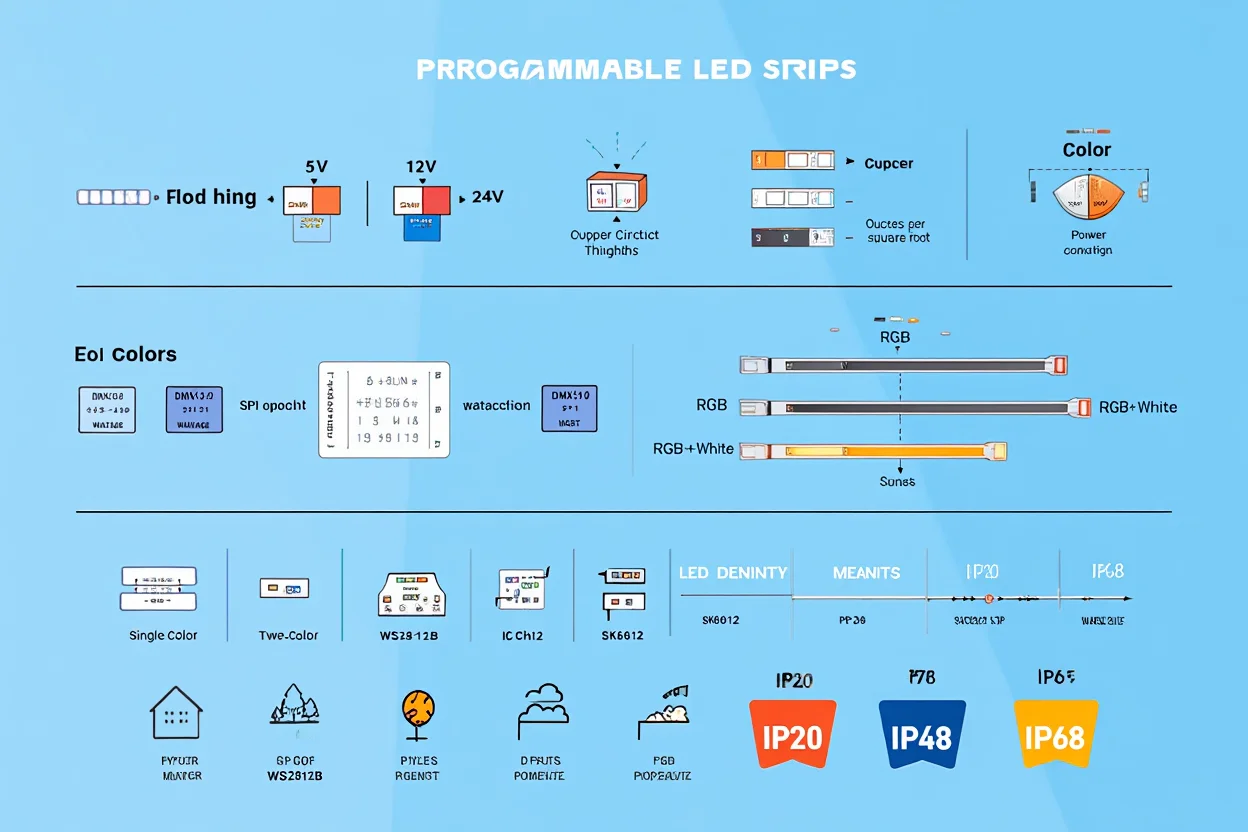
Voltage
Addressable LED strips are available in 5V, 12V, and 24V. Use 12V or 24V for large installations to prevent voltage drop and uneven lighting, especially for long strips. For small or intricate projects, use 5V or 12V strips. They support shorter cut intervals for more precise customizations. For big projects, choose the powerful voltages.
Copper Circuit Thickness
Copper thickness is often expressed in ounces per square foot. Higher copper thickness lowers electrical resistance and ensures voltage consistency. This level of detail may not be necessary for smaller projects. However, you will need the strip’s hardy copper content for large installations.
Power Consumption
Knowing the power demands of your LED strip is necessary. Each strip indicates a wattage per meter. Calculate the total power demand by multiplying this by the length you plan to use. Make sure your power source can handle this total wattage, with 10–20% added to avoid overloading. This ensures the safety and longevity of the power source and LED strip.
Type of Colors
Addressable LED strips are available in various color schemes to address varied needs. Single-color types like white, red, green, or blue are best for uncomplicated uses. On the other hand, two-color strips combine warm white and cool white or red and blue for enhanced depth. Likewise, RGB strips provide a full range of colors for use in dynamic displays. Lastly, RGB+White or RGB+Warm White+White variants provide more lighting flexibility where tone control of colors is the focus.
DMX512 vs. SPI
DMX512 is a professional-grade, international standard for complex installations like stage lighting or building installations. It’s highly reliable over distance. SPI is better for hobbyists and DIY use. It’s easier to work with and microcontroller-friendly, like Arduino or Raspberry Pi. Also, SPI protocols are manufacturer-specific. So, you have to match the strip with the correct model controller.
Type of Integrated Circuit Chips (ICs)
The IC chip controls how an individual LED reacts to the controller. DMX512 strips normally contain ICs like UCS512 or SM17512. They are universal for all DMX controllers. SPI strips have either a built-in IC or an external IC. Built-in models include WS2812B, WS2813, SK6812, APA102, and similar chips. On the other hand, External IC models include WS2801, WS2811, UCS1903, TM1814, and similar.
LED Density
LED density refers to the number of LEDs placed per meter of the strip. A higher density means a brighter, more even light output and smoother transitions between colors or effects. However, increased density also means greater power consumption. So, it is essential to balance performance with efficiency, depending on your project’s needs.
Pixels Per Meter
More pixels allow you to produce smoother animations, more exact color transitions, and more complex lighting sequences. Increased pixel density will help you get your desired result if your design relies on precise visual effects or animations.
IP Grade
The IP (Ingress Protection) rating shows how resistant your LED strip is to dust and moisture. For indoor use, a low rating of IP20 is sufficient. Choose a strip with at least an IP65 rating for outdoor use to protect against rain and dust. For instance, if the strip gets wet in a garden or pool setting, you’ll need IP67 or IP68 for added protection.
PCB Width
A bigger PCB provides more heat dissipation and performance, but takes up more space. Always measure your installation space and ensure that the strip width has enough room for some bend and air movement to prevent overheating.
How to install Programmable LED strips?
Here are some easy installation methods for Programmable LED strips:
Adhesives
Double-sided tape or adhesive backing is one of the easiest and fastest ways of sticking LED strips onto surfaces. It’s ideal for small indoor projects like lighting a bedroom or setting up a music studio. Make sure the surface is smooth and clean before sticking. Remember, adhesives do not stick well on rough and dusty surfaces. Also, you should not use them for outdoor use.
Aluminum Channels
Aluminum channels are slim metal rails that hold LED strips and usually have a diffuser. They produce a soft, uniform light and make your room look professional. Aluminum channels are perfect for modern decor and are easy to install by screwing them into any surface. They also hide ugly cables, giving your setup a clean, neat look.
Buckles
Clips or mounted buckles are better than adhesives for outdoor installation. The weather may weaken sticky tape and cause it to lose grip, but clips provide a tight grip. They are reusable, durable, and best for long-term outdoor usage.
How do you connect Programmable LED strips?
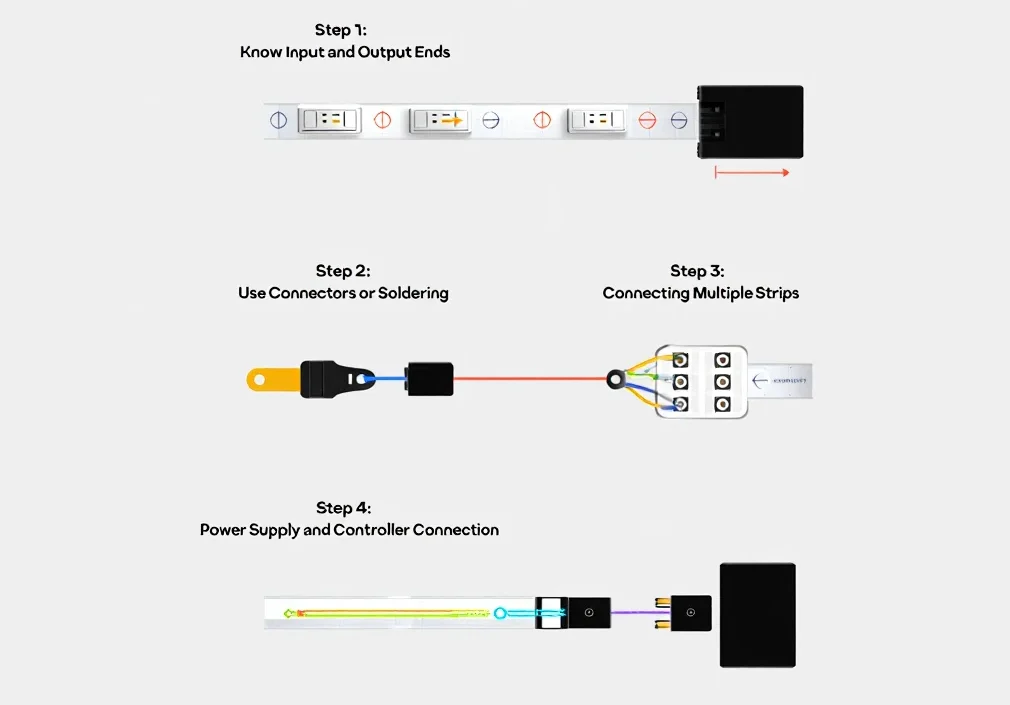
1. Know about the Input and Output Ends
Addressable LED strips also possess a direction when data flow is considered. The input side is where you install your power supply and controller. This is where the signal is accepted and the LEDs are powered. Inserting the strip incorrectly can stop the LEDs from lighting up properly. So, search for arrows or markings on the strip to determine which direction is correct.
2. Use Connectors or Soldering
Soldering or connectors are two popular means to power and link addressable LED strips together. Make quick installations using clip-on connectors. You will need no tools and less hassle in implementation, with easy user maintenance. Soldering is more effective for carrying a heavy and stable form of connection. But you will need more wiring, ground, and data for the strips’ pads, with more labor. However, it is stronger and enduring in its longevity.
3. Connecting Multiple Strips
You can merge multiple strips if you need more length for your application. Ensure that the power, ground, and data lines match each strip. You can do this using connectors or by soldering the wires.
4. Power Supply and Controller Connection
Once your strips are connected, attach the input end to a controller. A controller lets you program and customize your lighting effects. Plug the controller into a power supply that matches your LED setup’s power and voltage requirements. Now they are ready to light up your premises
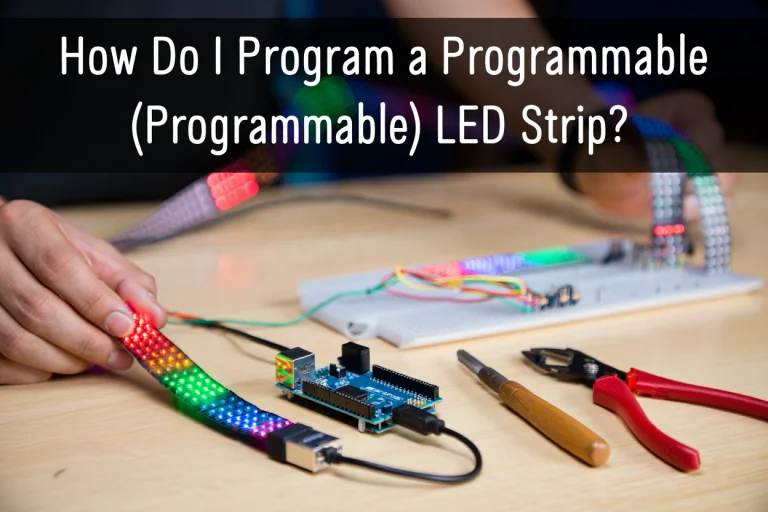
How Do I Program a Programmable (Programmable) LED Strip?
Here’s a beginner-friendly path to turning your LED strip into a glowing masterpiece using an Arduino.
Step 1: Set Up Your Workspace
First, install the Arduino IDE on your computer. This is where you’ll write and upload your code. It’s free, beginner-friendly, and works with most Arduino boards. Ensure any necessary drivers are also installed.
Step 2: Wire It Up
Second, link your LED strip to the Arduino. The strip’s data input is attached to one of the Arduino’s digital I/O pins (D6 is a typical example). Then, attach the strip’s power (V+) and ground (GND) to a suitable power source. Set the strip’s voltage rating so your power source can handle the current.
Step 3: Install the Magic – Libraries
Now let’s bring in some coding magic. If you’re using a strip with WS2812B or similar chips, the Adafruit NeoPixel library is your best friend. It makes programming effects much easier. Open the Arduino IDE, go to the Library Manager, and install “Adafruit NeoPixel” with just a few clicks.
Step 4: Start Writing Your Code
Open a new sketch in the Arduino IDE. At the top, include the NeoPixel library. Then tell the Arduino how many LEDs you have, which pin you’ve connected the strip to, and what type of strip it is. In the setup function, initialize the LED strip and optionally a brightness level so things are visually soft (and don’t blow your eyes out).
Step 5: Create Your Light Show
This is where the magic begins! Using NeoPixel functions, you can get your LEDs to light up in any color, pulse in a rainbow, flicker like embers, or even mimic a sunrise. Start with something basic—turn on one red LED. Later, add animations like fading, chasing lights, or cycles of color. You can loop effects in the loop function or create functions to bundle different patterns.
Step 6: Upload and Watch the Magic
Plug your Arduino into your computer with a USB cable. In the Arduino IDE, choose your type of board and port. Then click Upload. Your strip should be lit up with your code now. If not, re-examine your code and wiring.
Step 7: Test, Tweak, Repeat
Programming LED strips is the time to experiment. Experiment with the code to adjust timing, color, brightness, or patterns. With each upload, you learn something new to enhance the light and make it look even more beautiful. You can transform any space into something beautiful with a few lines of code and some imagination. And once you are comfortable with the basics, the world is your oyster.
How Do You Control Programmable LED Strips?
1. Pick Your Control Style
Before diving in, decide the degree of hands-on control you prefer. You can take it easy with plug-and-play controllers. You can work with microcontrollers and custom code as well. Your choice will depend on how much tweaking you want to do and how technologically adept you are.
2. Use Standalone LED Controllers
Employ standalone LED controllers if you want a straightforward, simple setup. They typically come with pre-programmed effects and remote controls so that you can play with the light immediately. They’re perfect for small projects where ease is the key.
3. Dive Into Microcontrollers
For ultimate freedom, employ a microcontroller like an Arduino or Raspberry Pi. They will help you with the program to manage all the details. It can include brightness, movement, and interactivity. For that “wow” factor, you can get your lights to react to music, movement, or temperature.
4. Try Software Control
Need something to see and play with? There are some PC or smartphone-compatible LED strips available. They will help you create effects with drag-and-drop interfaces. They are perfect if you do not enjoy coding but want nice, hand-crafted animation.
5. Get the Wiring Right
No matter how you do it, pay attention to wiring. Properly secure the data, power, and ground wires. Also, use an LED strip voltage that will work with your controller and power source.
6. Customize the Show
If you’re coding or have software, this is where you can be creative. Get lights to blink, fade, swirl, or twinkle in your custom patterns. You can even sync effects to music, holidays, or your mood.
7. Test Before You Tidy
Once it’s all in, test your strip. Look for flickers, dark spots, or dead spots. Next, debug any bugs in your wiring or code before final installation. A little testing now saves a lot of frustration later.

How to Customize Programmable LED Strips for Your Lighting Projects?
Start With a Vision
Before you do anything, you need to know your goal. Do you want a relaxing bedroom atmosphere? A strobe light wall for your home recording studio? Or interactive, full-color artwork? Establish the mood, functionality, and beauty. This will decide the tone of your entire project.
Choose the Right LED Strip
Not all LEDs are equal. Pick one that fits your concept. RGB strips provide millions of colors, while RGBW adds an actual white. Check out the voltage (like 5V or 12V), LED density for intensity, and waterproofing if you’re moving it outdoors.
Map Out Your Space
Take out a pencil and mark where your strips go. Measure everything—walls, furniture edges, frames. Plan out where you’ll cut the strip and put connectors. Don’t forget the controller and power supply space.
Pick a Smart Controller
A plug-and-play, simple, or custom LED controller is quick and effortless. Or, use a microcontroller for complete liberty.
Create Custom Lighting Effects
If you’re coding, use libraries like FastLED (for Arduino) or rpi_ws281x (for Raspberry Pi). Let them do the hard work. Play with color fades, brightness shifts, and time-varying patterns.
Test As You Go
Don’t wait until you’re done testing. Test your effects and connections step by step. Fix any flickering, misbehaving LEDs, or timing problems.
Install with Style
Once it’s all working, lock it down. Install your strips correctly. Conceal the wires for a clean finish. Use aluminum channels or diffusers for a pro, polished look. Darken the room afterwards and enjoy your handcrafted light show.
Troubleshooting Programmable LED Strips
Here’s how to troubleshoot common issues and get your strip shining bright again.
1. Nothing’s Lighting Up
If your entire strip stays dark, start with the basics:
- Ensure your power supply matches the LED strip’s requirements.
- Look over the power, ground, and data lines. Are they tight and connected in the right direction? If not, fix it.
- Make sure that the data wire is connected to the correct pin on your microcontroller or controller board.
2. Only Partially Lit?
- Use a power supply with a slightly higher current rating.
- Use thicker wires or power injection at multiple points to avoid voltage drop in long strips.
- Keep data wires as short as possible to preserve signal quality.
3. Flickering Lights
Flickering or unstable LEDs can be caused by unstable power or poor signal integrity:
- Add a capacitor (1000µF, 6.3V or higher) between the power and ground close to the strip.
- Long or flimsy data wires can corrupt the signal. Keep them short, or add a signal booster or logic level shifter if needed.
4. Inconsistent or Wrong Colors
- Ensure you’ve assigned the correct colors and brightness levels across the strip.
- Some strips use GRB instead of RGB. If colors look “off,” try adjusting the order in your code.
- Keep color values consistent throughout your sketch. You can also use a program to avoid visual glitches.
5. Dead or Glitchy Sections
If one part of the strip works fine but the rest doesn’t, look for:
- A cut, kink, or break in the strip can stop the signal cold. Inspect closely and bypass or replace damaged sections.
- Ensure that the solder joints and connectors are solid. A loose data line can prevent everything downstream from working.
6. Overheating
If your strip is getting hot to the touch:
- Don’t Overdrive: Avoid running the LEDs at full brightness for long periods.
- Ensure Ventilation: Allow airflow around the strip in case of enclosures or tight spaces.
Programmable LED Strip VS Non-Programmable LED Strip
Here is a chart to understand the fundamental differences between Programmable and Non-Programmable LED Strips
| Feature | Addressable (Programmable) LED Strip | Non-Addressable (Regular Analog) LED Strip |
| Control | You can control each LED individually | There is no individual control. All strips act the same way |
| Color Capability | Multi-color per LED (RGB/RGBW/Effects) | Single color or RGB across the entire strip |
| Lighting Effects | Dynamic effects like chasing, cycling, and animations | Fundamental color changes with brightness dimming |
| Wiring Needs | Power, Ground, and Data line | Power and Ground only |
| Control System | It requires a controller like Arduino, Raspberry Pi, etc. | It needs a basic power supply or a dimmer |
| Programming Required | For custom patterns and animations | Just plug and play |
| Complexity | Medium to High | Very Low |
| Application Suitability | Interactive displays, ambient mood lighting, and gaming setups | Under-cabinet lighting, signage, and basic accent lighting |
| Distance Limitations | Moderate | Minimal signal needs |
| Signal Type | Single-ended digital signal | None (no data line) |
| Cost | Higher for components and control | Lower and budget-friendly |
| Best For | Creative lighting projects, Responsive lighting, and high customization | Basic, consistent lighting with Low cost |
Conclusion
You now know everything about programmable LED strip lights. We’ve guided you through their features, selected the right one, and installed it correctly. This will help you choose the best LED strip for your next project.
Addressable LED strips will effectively create stunning effects, animations, and patterns based on your needs. Ready to bring your lighting ideas to life? Explore our products, tutorials, and tips to start creating your own vibrant, dynamic LED lighting experience today! Contact us right now!
FAQs
Can you cut Programmable LED strips?
Programmable (addressable) LED strips can be cut at specific marked positions. After cutting, you will need to create new solder connections or attach connectors to reuse the strips. However, be cautious when handling the strip and consider power limitations when cutting.
How do you know if an LED strip light is programmable?
Check for several wires and small integrated circuits (ICs) to determine whether an LED strip is programmable. Addressable strips can also contain lower-density LEDs for better heat dissipation. The most conclusive evidence is found in product documentation. It includes “individually addressable” descriptions or protocols like WS2812B and APA102.
Why do programmable LED strips have so many IC types?
Programmable LED strips provide several ICs to accommodate improved control protocols, performance, and features. This ensures that they can accommodate various customizations and uses. Some ICs also include internal circuitry (built-in) or an external design, which affects maintenance and flexibility.
How can I control LED strip lights with a remote instead of coding programs?
To make LED strip lights work without coding, you must use pre-programmed controllers included with the strip. These controllers usually use infrared (IR) technology to transmit signals. The controller will help you control the brightness, colors, and effects through the remote. Some controllers also have smartphone apps for further control.
Where to Buy Programmable LED Strips?
You can buy programmable LED strips from online stores like Amazon. Amazon offers a wide range of brands. If you want to try out the highest quality product of a reputable brand, you can try MYLIKELED. They specialize in addressable strips at competitive wholesale prices.
Can I connect an SPI-programmable LED strip to a DMX512 Controller?
Of course. A DMX512 controller can be connected to an SPI-controllable LED strip. But you need an intermediary device like a DMX512 to SPI decoder. First, connect your SPI-controllable LED strip to the DMX512 to SPI decoder. Then, link the DMX controller to the decoder.

Hi, I’m Xylia Xiong, a sales professional with 14 years of experience in the LED strip light industry. I specialize in providing tailored solutions, leveraging my expertise in LED products and the latest industry trends. Known for effective communication and problem-solving, I’m dedicated to helping lighting manufacturers, importers, and distributors achieve their goals.
Let’s work together to create customized solutions that exceed expectations.