Do you intend to adorn your boat with lighting that will make it look more appealing and improve its performance? LED strip lights are a fantastic option for illuminating any part of your boat, whether the interior, exterior, or submerged portions. However, how do you go about installing these lights on your boat?
The procedure might look complicated at first, but it can become an easy and satisfying undertaking if you have the correct equipment and someone to walk you through each step. When planning to put LED strip lights on your yacht, one of the most important considerations is whether they are waterproof or not. You can guarantee that your LED strip lights are protected from water damage by ensuring they have an IP certification, which is crucial. Additionally, you will be responsible for selecting the appropriate connector, controller, and driver for the installation.
Learn how to install professional-looking LED strip lights on your boat by following the instructions in this article. This tutorial will cover all aspects of working with LED strips, from selecting the right one through size, connecting, mounting, and powering it up. In addition, we will provide you with some valuable instructions and ideas to make the most of your LED strip lights. Now that we’ve gotten everything out, we can install the LED strip lights inside your boat.
6 Simple Steps To Install LED Strips On Boat
It doesn’t take an astronaut to put LED strips on a boat. You don’t need a pro to assist you in setting them up if you follow these simple instructions:
Step-1: Purchase Suitable LED Strips For Boat Lighting
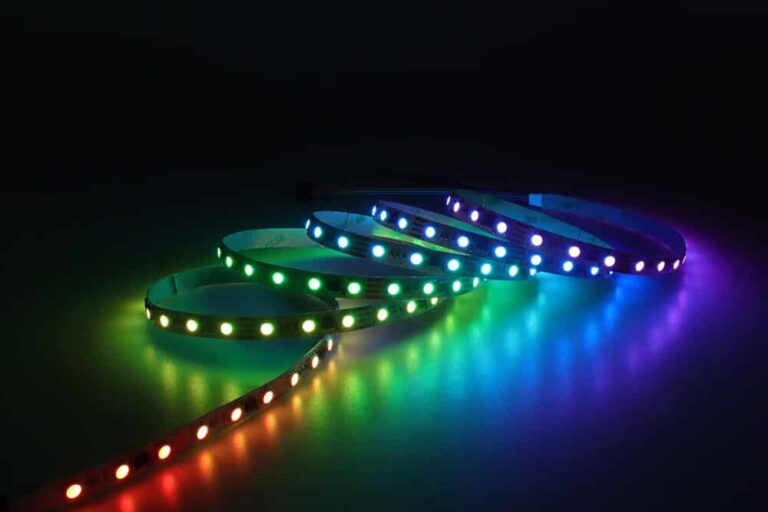
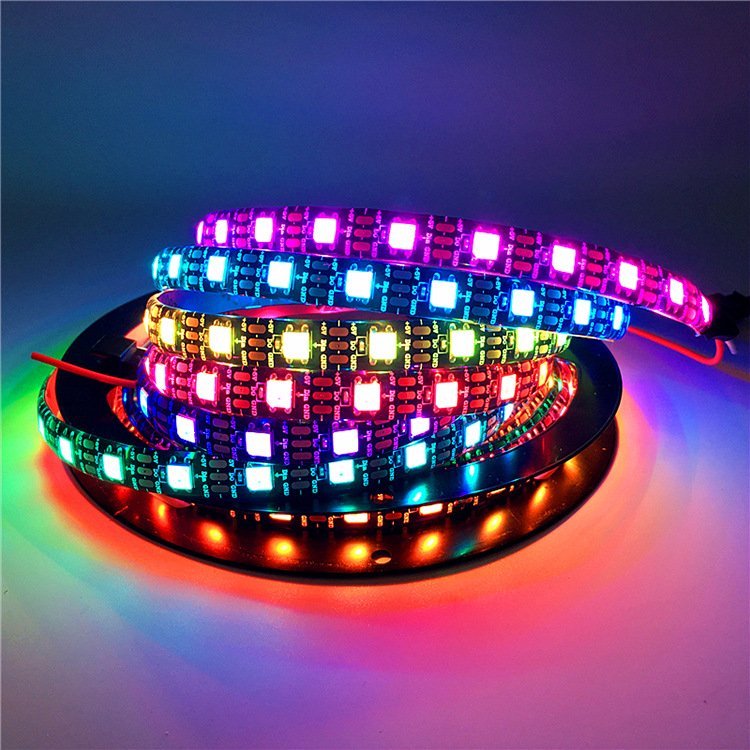
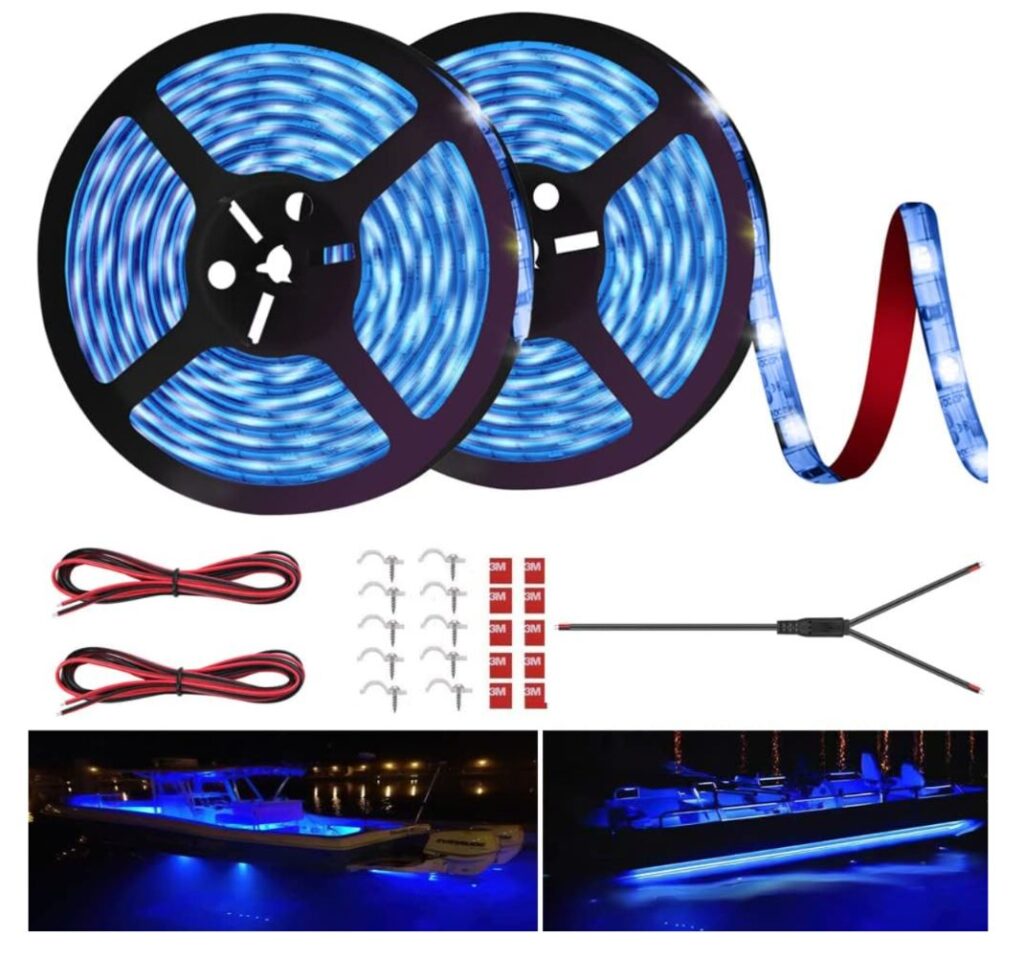
The IP rating of LED strips is more important than their color or pattern regarding boat illumination. If you want to make sure the safety of your light fixture if it comes into contact with water, you must choose a higher IP rating. Colorful RGB LED strips are the way to go for boat illumination. The boat’s interior can be decorated with either white or color-temperature-adjustable strips. The second half of this essay is a comprehensive guide on picking out suitable strips for boats. So if you want to obtain the finest offer, read the whole post.
Step-2: Select & Prepare The Installation Location
Boats have different lighting requirements for different areas. For example, the boat’s bow requires red and green stripes for proper illumination. Therefore, it’s essential to consider the lighting needs of each area before mounting the LED strips.
Once you’ve identified the areas that require lighting, choose a suitable location and prepare the surface for installation. It’s essential to ensure the surface is clean and free from any dirt or dust that could prevent the strip’s adhesive from sticking properly. Use a moist cloth and alcohol to wipe the surface, and make sure it is totally dry before installing the fixtures.
Step-3: LED Strip Size Calculation
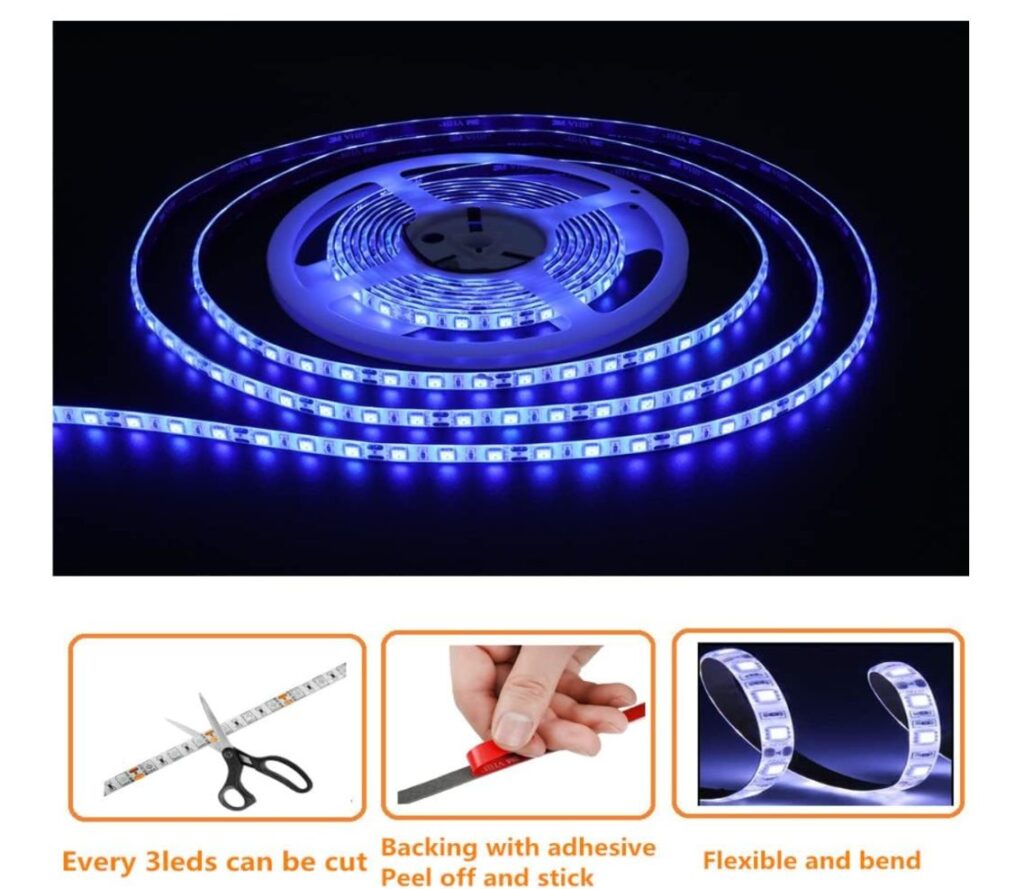
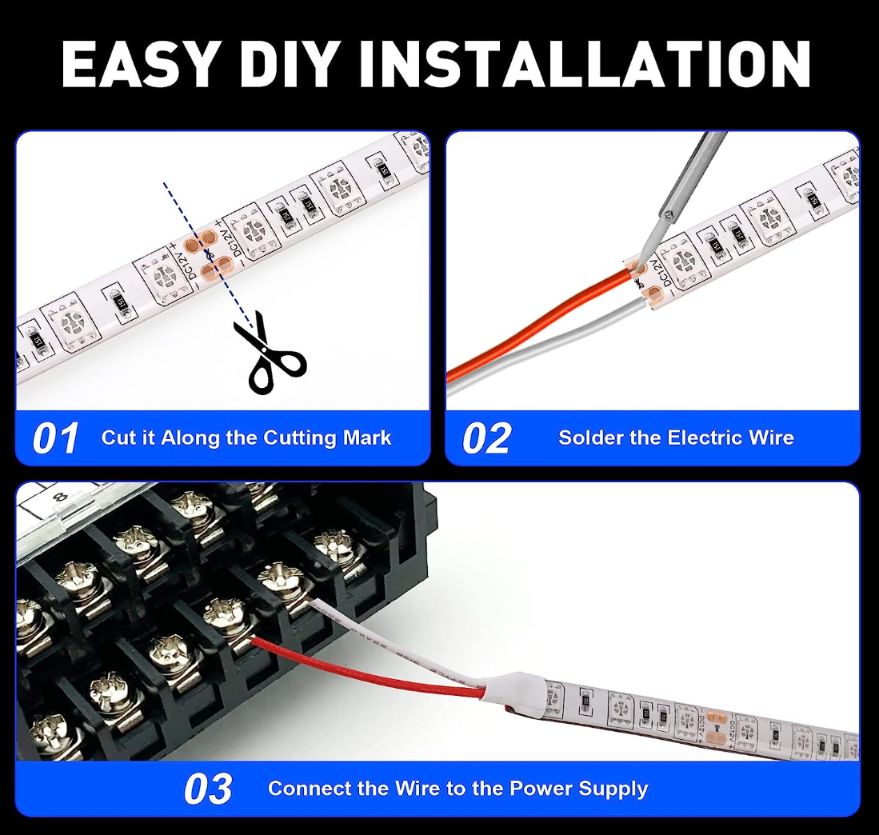
Find out how many LED strips you’ll need by measuring the area you plan to cover. After figuring out how long the LED strips need to be, trim them to size. Simple scissors are all that’s needed to cut the strips to size.
If any cuts are made incorrectly, the strips can be quickly reconnected with an LED strip connector or soldering. Refer to the manufacturer’s instructions or get expert advice on cutting LED strips properly.

Step-4: Installing the Strips
After determining the appropriate length for the LED strips, you may proceed with the setup. To apply the strips, you must peel off the adhesive backing and then push the strips firmly into place. For adding stability, screws or clips may be employed during installation. However, because drilling into the surface of a boat might cause serious damage, it’s preferable to avoid screwing in boat lighting.
Step-5: Powering The LED Strip
To power up the LED strips, you’ll need a compatible connector wire and a driver that connects the strip to the power source. Follow the steps below:
- Take the connector wire and insert the red wire to the positive ‘+’ marking and the black wire to the negative ‘-‘ marking on the LED strip.
- Remove the adhesive backing from the strips and press the connecting clips to close the claps.
- Connect the other end of the connecting clip to the LED driver.
- Plug the LED driver into the main power supply. Make sure to match the LED strip’s low voltage rating (12V or 24V) with the driver and power source.
Step-6: Examine the Connections
After the driver has been plugged into the wall outlet, the LED strips can be turned on. To turn on the lights, flip the main switch. However, if the lights aren’t turning on, you should definitely double-check the wiring. Verify proper polarity and proper joining of connection points. If there are problems, resolve them and give them another shot. If everything is wired together correctly, the lights should shine brilliantly.

Where on a Boat to Put LED Strips?
Here are some lighting ideas for the different areas of a boat’s interior, typically including sleeping quarters, a washroom, a kitchen, a wheelhouse, and surrounding spaces.
Boat Interior Lighting
Some ways that LED lighting can be used to improve a light boat’s interior are discussed below.
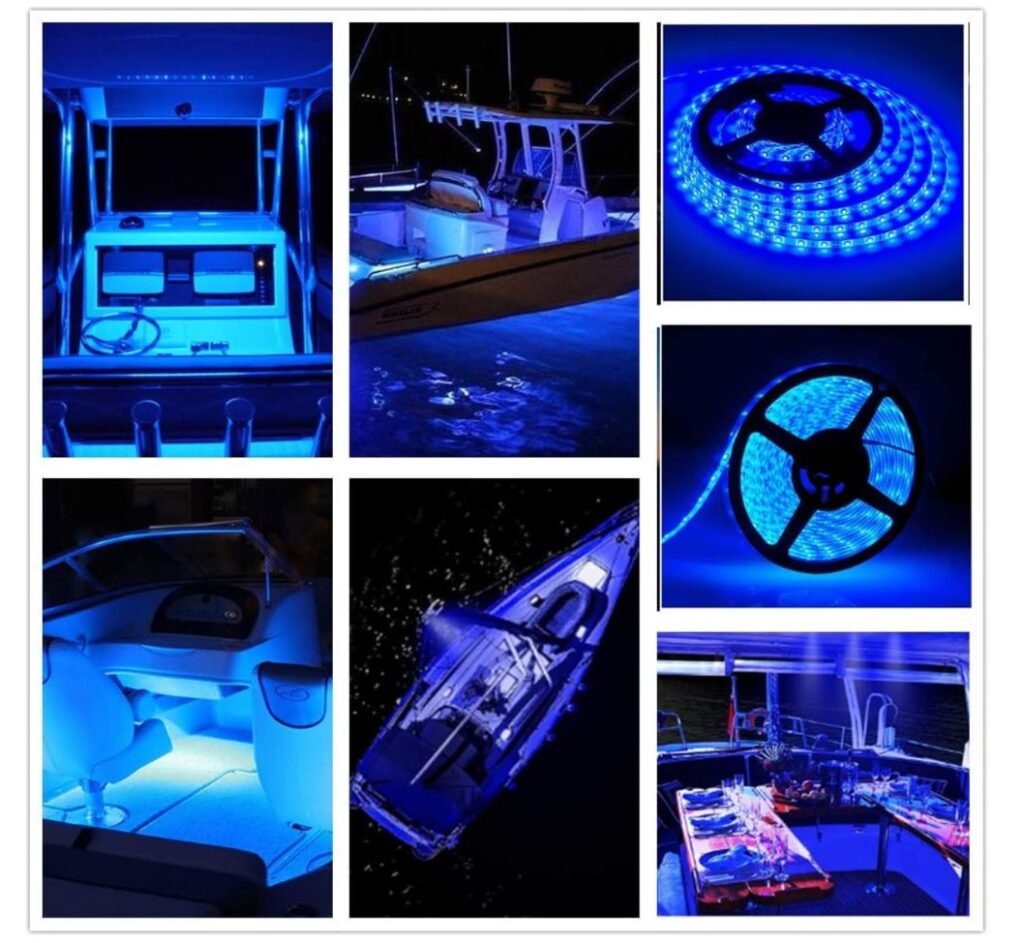
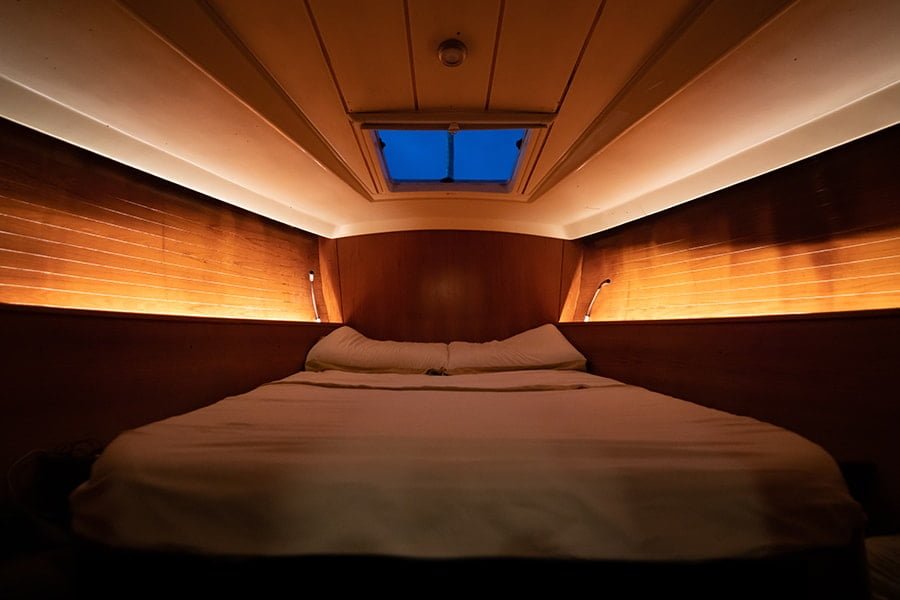
- Cabin Lighting: To provide general lighting to the cabin, you can add LED strips to the ceiling. Cove lighting is an excellent option for indirect lighting effects. For accent lighting, install the strips underneath cabin furnishings or counters, which works well for task lighting.
- Wheelhouse Lighting: Installing LED strips along the steering and seat of the boat captain can create a unique atmosphere in the wheelhouse. You can experiment with adding strips to outline the front glass of the chamber.
- Storage Lighting: Installing LED strips inside the storage bay can help you find essentials like boating rods, nets, etc.
- Galley Lighting: LED strip lights can also be used to improve your onboard cooking experience in the kitchen area of the boat, known as the galley.
- Stair Lighting: Elevate the boat’s interior by adding LED strips along stairs and ladders. This will provide accent lighting to the stairs and help you avoid unexpected accidents.
- Washroom Lighting: As the boat’s washroom is a small space, adding LED strips along the ceiling or around the bathroom vanity mirror is the best option to keep the area minimal.
Outside Boat Lighting
The concave surface of the boat is considered part of the outside space. Excellent locations for LED strips to be installed in order to illuminate the boat’s outside are:
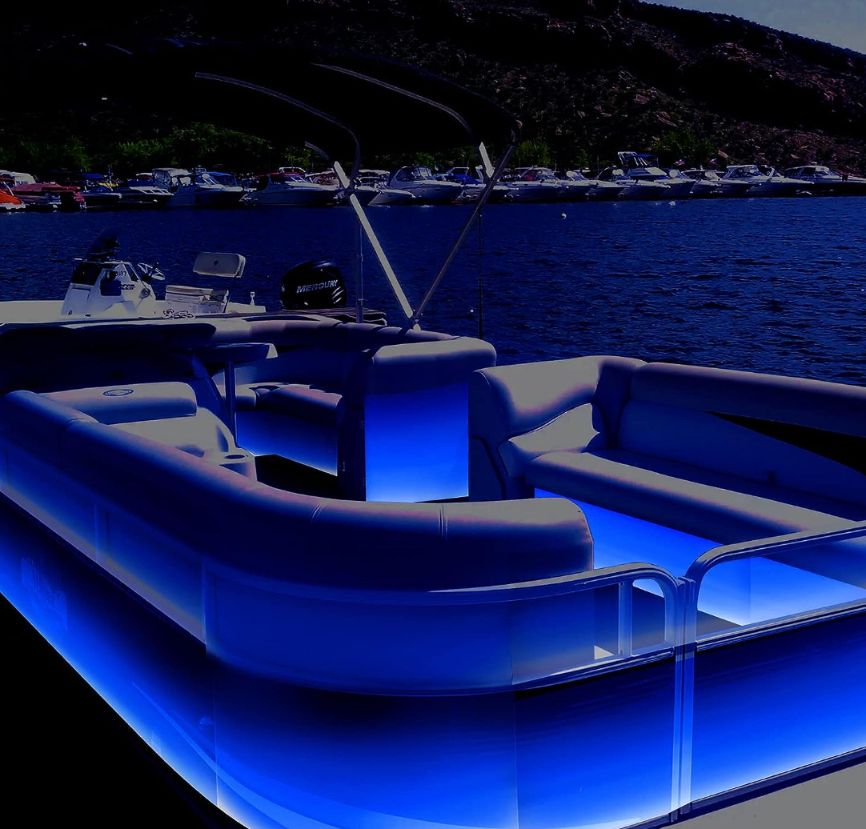
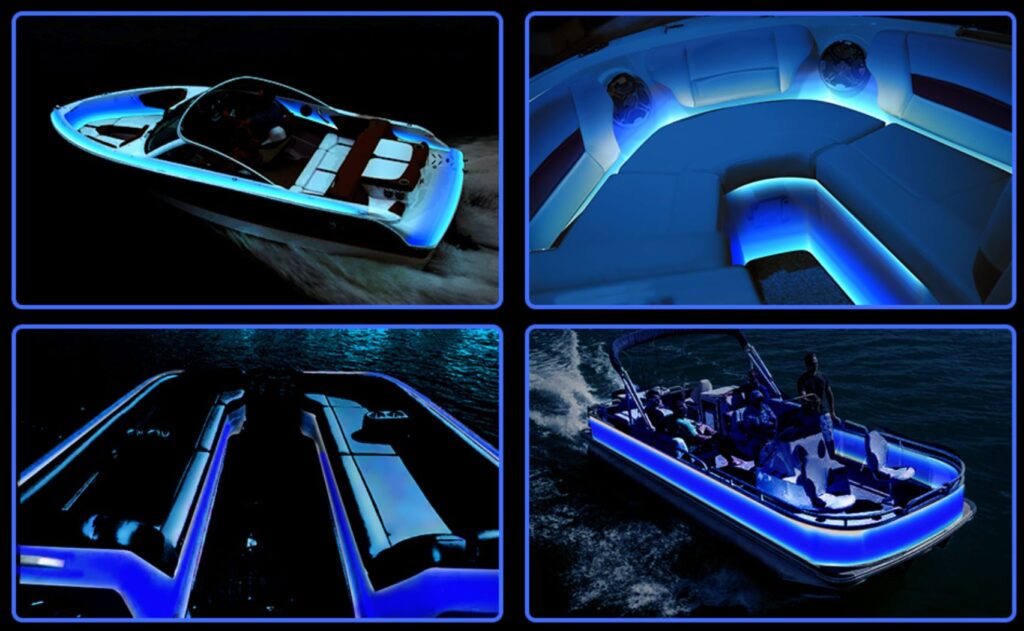
- Deck Lighting: Adding LED strips under the boat’s rails or outlining the surface can highlight the deck area and create accent lighting for a mesmerizing look at night.
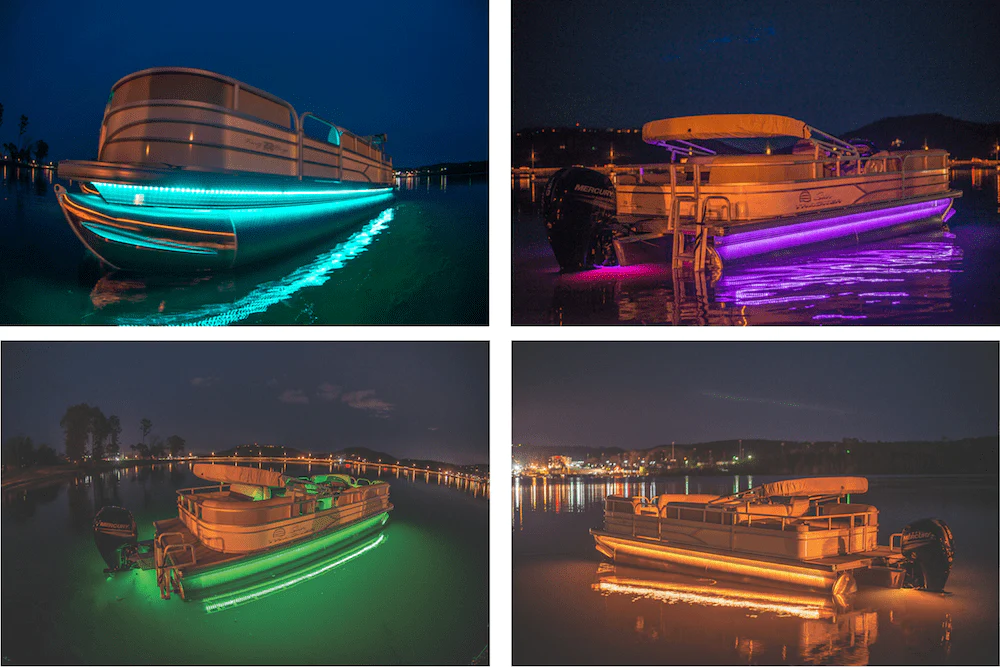
- Hull Lighting: The hull is the watertight enclosure of the boat that protects machinery, cargo, and passenger accommodations. You can focus on this area by adding bright LED strips to the hull. Color-changing RGB strips can give your boat a playful appearance.
- Signage Lighting: If you have a private boat or yacht, backlighting your boat’s name can highlight its signature style. For this purpose, LED neon flex works best.
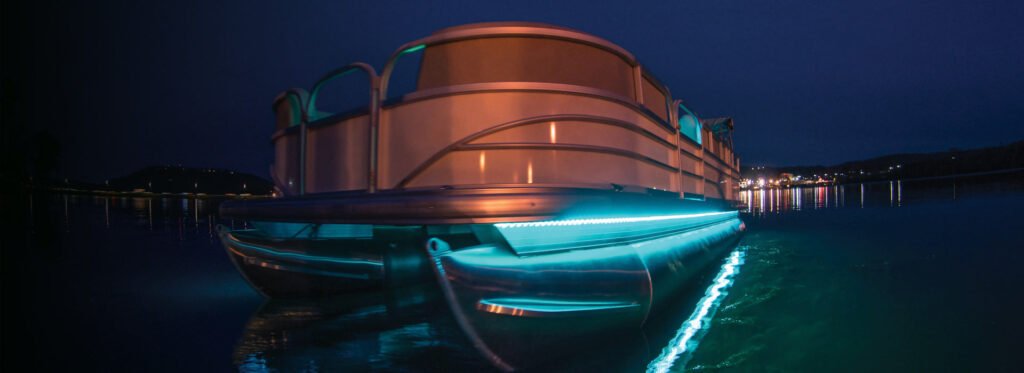
Underwater Boat Lighting
If you want to give your boat a little magic, you could put underwater lights in it. To get the desired effect, the LED strips should be set up such that their light penetrates the water by at least six inches. IP68-rated LED strips are ideal because they are completely waterproof and may be submerged in water without any risk of damage.
Underwater LED strips come in various hues, although blue, green, and purple are the most common. However, you can try out other hues based on your best preference. The LED strips must be designed for use in such conditions to protect the lights and the boat from water damage.
Navigation Lighting
You can only go out on the water at night with proper navigation lights to help other vessels see where you are. You’ll find these beacons up front, towards the bow, in most boats. Two colors are used most frequently when lighting the bow for navigation:
- Red Light: This light is placed on the port (left) side of the boat.
- Green Light: The green light is installed on the boat’s starboard (right) side.
These colors assist other boats in the area in determining your boat’s position on the water. You can easily add these lights to your boat with RGB LED strips. It is critical to note that these lights must comply with boating standards to operate safely. It is advisable to verify with local boating authorities to confirm the necessary lighting standards for your yacht.
Pros of Using LED Strips in Boat Lighting
LED strips are an ideal lighting solution for boats due to several features and benefits that they offer, including:
- Energy Efficiency: LED strips consume 75% less energy than traditional lighting options, which makes them a cost-effective lighting solution for your boat.
- Safe Thermal System: LED strips come with a heat sink that prevents them from overheating, and they are shockproof and low voltage, making them a safe option for use on boats.
- Versatile Color Options: LED strips offer various color options, including adjustable and DIY color variants, which makes them a flexible choice for boat lighting.
- Multiple Applications: LED strips are versatile and can be used for various lighting tasks on boats, such as inside cabins, on stairs, decks, underwater boat lines, and even for navigation lighting.
- Dimmable: The dimming feature of LED strips enables you to adjust the lighting to your desired level, making them perfect for activities like fishing or creating a relaxing ambiance.
- Waterproof: LED strips are available in different IP ratings, with higher ratings offering waterproof features that can resist water splashes and even underwater usage.
- Long-Lasting: LED strips are highly durable and can last longer than traditional lighting fixtures. With proper maintenance, they can last up to a decade, making them a reliable lighting solution for your boat.
Cons Of Using LED Strips For Boat Lighting
While LED strips have many advantages for boat lighting, there are also some cons to consider:
- High Installation Cost: Installing LED strips can be more expensive than traditional light fixtures, although the cost may be offset by their maintenance, repair, and durability over time.
- Voltage Sensitivity: LED strips require precise voltage ratings to operate correctly. If the voltage is consistent throughout the entire strip, the brightness of the lights may remain the same. This can cause some parts of your boat lighting to dim over time as the strip lengthens.
- Not Suitable for Cold Weather: LED strips do not emit enough heat to melt snow, so they may become covered and unable to function correctly in cold weather conditions.
Best LED Strip Option For Boat Lighting
Here are different LED strip options that you can choose to light up your boat:
Single Color LED Strip
Monochrome or single-color LED strips are versatile and can be installed anywhere on your boat. They come in various colors: red, blue, yellow, green, pink, amber, and UV.
Color Temperature Adjustable LED Strips
You can choose tunable and dim-to-warm LED strips for boat interior or cabin lighting. Installing these strips will allow you to adjust the ambiance of your boat from warm to cool lighting tones.
RGB LED Strip
RGB LED strips are perfect for adding a playful vibe to your boat decor. They have 3-in-1 LED chips that can create about 16 million hues by mixing the three primary colors – red, green, and blue. Using an intelligent controller, you can also produce DIY light colors. These strips work great for lighting up the boat’s deck, hull, or railings.
Addressable LED Strip
For an even more advanced lighting option, consider addressable LED strips. These light fixtures can produce rainbow lighting effects and even sync with the music. They are perfect for yacht parties and taking your boat lighting to the next level.
Warnings About Buying LED Boat Lighting Strips
It’s essential to consider factors beyond brightness when deciding on LED strips for boat lighting. Here are some guidelines I’ve drafted to help you out.
IP Rating
To ensure that the boat’s lighting can withstand harsh weather conditions such as wind, heat, rain, and water exposure, it is essential to consider the level of protection provided by the lighting’s IP rating. IP stands for Ingress Protection, and a two-digit number represents it. The first digit indicates protection against solids such as dirt and dust, while the second digit indicates protection against liquids like water and rain. The higher the IP rating, the better protection the lighting provides. Below are some suggested IP ratings for lighting different areas of the boat.
| Lighting Area Of Boat | Recommended IP Rating | Protection Level |
| Boat Cabin Lighting | IP64 or IP65 | As this part of the boat doesn’t come in contact with direct water, a lower Ip rating will be enough. It will provide complete dust and light splash water protection. |
| Deck Lighting | IP66 | Full protection against dust and powerful water jets. |
| Hull & Navigation Lighting | IP67 | Complete dust protection and full immersion up to 1 meter. |
| Underwater Lighting | IP68 | Supports submersion. |
Color
The color of the lights on your boat is primarily a matter of personal taste. However, red and green LED strips are required for navigation illumination because they show the left and right sides of the boat, respectively. General and accent lighting can be any hue the user prefers; however, light-emitting colors like blue, red, and green are more effective at making their light apparent. The boat’s exterior can be given a more carefree air with color-changing strips, such as RGB or addressable LED strips. Warm hue LEDs or dimmable, tunable, or dim-to-warm light strips are recommended for boat cabins. Private boat owners may opt for white or light sea blue LED strips for a more refined and stylish appearance.
LED Density
When deciding on the best boat lighting, you must consider the density of the LED strips. A low-density LED strip can produce uneven lighting due to the possibility of dots being produced. So, if you want a more consistent and unobtrusive lighting scheme, LED strips with a high density are your best bet. Choose the ideal LED density for your boat lighting needs from the many alternatives we provide at MYLIKELED.
Length
LED strips are often available in five-meter reels that can be trimmed to size. Connecting multiple strips with an LED strip connection creates a longer strip. However, a voltage loss may occur if numerous strips are connected, necessitating additional wiring. Super long constant current LED strips are an excellent option for long strip installations since they prevent this problem from occurring. Without any trimming, these strips can span up to 50 meters.
Voltage
Because of their low power consumption, LED strips are perfect for use as boat lighting. They are often available in 12V and 24V. Since higher voltage might be unsafe near water, these values are perfect for boats.
Warranty
When trying to upgrade the overall quality of the lighting, always give careful consideration to the warranty. Because boat illumination is frequently exposed to a spray of water, the LED strips are more likely to turn off if the quality needs to be up to standard. Before you go out and buy LED strips, educating yourself on the warranty policies is vital.
Final Words
LED strips are often offered in reels that are five meters in length and can be trimmed to any size that better suits your needs. LED strips can also be purchased individually. If you desire longer strips, it is possible to connect multiple strips using an LED strip connection. Nevertheless, connecting many strips can result in a voltage loss, which can only be prevented by using additional wiring. To prevent this from occurring, a good option for long strip installations is to use LED strips with a constant current that is super long. These strips can cover distances of up to fifty meters without requiring any cutting to be done in between.

Hi, I’m Xylia Xiong, a sales professional with 14 years of experience in the LED strip light industry. I specialize in providing tailored solutions, leveraging my expertise in LED products and the latest industry trends. Known for effective communication and problem-solving, I’m dedicated to helping lighting manufacturers, importers, and distributors achieve their goals.
Let’s work together to create customized solutions that exceed expectations.