LED Flexible strips are versatile, weatherproof, and simple to set up. This adaptability makes them perfect for individual tailoring—Are you wondering how to personalize these LED strips?
By investing in high-quality LED flexible strips, aluminum casing, cables, an LED controller, and other accessories, tailoring them to your preferences becomes effortless. Moreover, personalizing LED flexible strips not only fuels your creativity but also proves to be cost-effective!
This article will walk you through tailoring your very own LED flexible strips.

What is an LED Flexible Strip?
LED flexible strips, known as LED strip lights or LED tape, are thin, flexible circuit boards populated by surface-mounted light-emitting diodes (SMD LEDs) and other components. They often come with an adhesive backing and can be cut to specific lengths based on the user’s needs. Here are some key features and aspects of LED flexible strips:
- Flexibility: One of the main advantages is their flexibility, allowing them to be curved around corners and conform to irregular shapes.
- Customizable Length: LED strips can typically be cut at designated points, allowing users to have a length that precisely fits their needs.
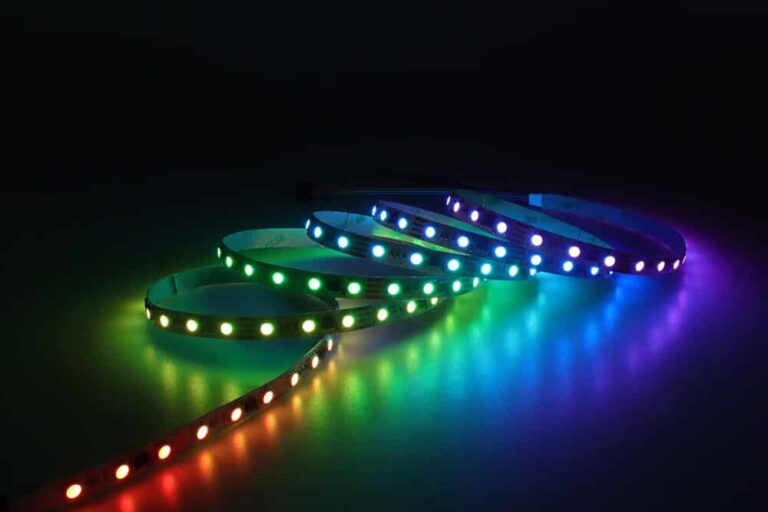
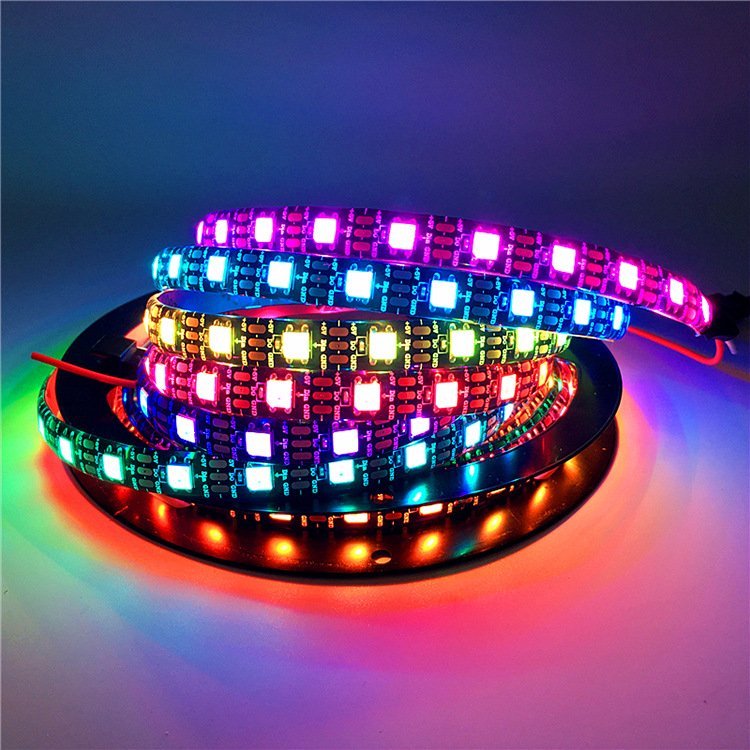
- Variety of Colors and Controls: They can come in various colors, including RGB (red, green, blue) strips that can be combined to produce a wide range of colors. There are also RGBW strips, which add a white LED to the mix. More advanced strips can change colors dynamically and be controlled using remote controls, smartphone apps, or smart home systems.
- Brightness Levels: LED strips come in different brightness levels, usually determined by the LED density (number of LEDs per meter) and the power of individual LEDs.
- Voltage: Common voltages for LED strips are 12V and 24V. The required voltage will depend on the design and intended application.
- Applications: They’re used for various purposes, such as accent lighting, under-cabinet lighting, backlighting, pathway lighting, signage, and more.
- Installation: Thanks to their adhesive backing, they can be directly stuck onto many surfaces. They can be placed within aluminum channels or profiles for more permanent or professional installations to help with heat dissipation and provide a clean look.
- Power & Drivers: LED strips require power supplies or drivers to operate. The driver’s type and capacity depend on the LED strip’s length and power consumption.
- Water Resistance: LED strips can come with different levels of water resistance, often denoted by IP ratings. For instance, IP65 might be splash-proof, while IP67 could be submersible for short durations.
- Lifespan: LED strips typically have a long lifespan, often rated at 25,000 to 50,000 hours, though the exact lifespan can vary based on usage and quality.
- Heat Dissipation: LEDs are more energy-efficient than traditional bulbs but still produce heat. Ensuring proper heat dissipation is essential to prolong the strip’s life, especially for high-brightness or high-density strips is necessary.
Remember, the quality and performance of LED flexible strips can vary significantly between manufacturers and models, so it’s a good idea to consider product reviews and specifications carefully when purchasing.
Why Customize Personalized LED Flexible Strips?
For DIY enthusiasts, customizing LED strips is a special joy. The choices in color, length, and design are vast, enabling you to create your unique LED strip lighting.
Occasionally, ready-made lighting solutions might not align with your vision or be pricey. That’s where the charm of LED flexible strips shines. Their malleability ensures they fit your desired indoor or outdoor spaces, always leaving a lasting impression.
Embracing customization satisfies your inventive cravings and offers opportunities to deck out spaces like your bedroom, workspace, or even your vehicle.
Essential Tools for Personalizing LED Flexible Strips
To begin personalizing your LED flexible strip, gather the necessary tools. Below is a comprehensive list of items you’ll require:
- LED strip reel
- Aluminum track/channel
- Protective cover
- Scissors or sharp blade
- Wire stripping tool
- Polyester loops
- Heat shrink sleeves
- End caps
- 18-gauge wire (both Black & Red)
- Soldering tool
- Double-sided adhesive tape from 3M
- LED control module.”
Guide to Customizing Your LED Flexible Strip Lights
Once you’ve gathered the necessary materials, let’s dive into the customization process. Follow these steps to customize your LED strip lights:
Step 1: Cutting the LED Strip
Begin by determining the desired length for your LED strip. Using the provided cut marks on the LED strip as a guide, cut the ribbon to your preferred size using scissors or a sharp blade.
Step 2: Affix the Strip to the Aluminum Channel
Position the cut LED strip onto the aluminum channel. Peel off the adhesive backing from the strip and firmly attach it to the track. Ensure the strip’s connectors are at the channel’s ends for optimal positioning.
Step 3: Soldering
Prepare for soldering once the strip is positioned. The LED strips have a protective plastic coating, so you’ll need to melt it away at the connectors before soldering. Use a bit of flux on your soldering iron and gently heat the connector, being cautious not to overheat. Afterward, trim your wires to the desired length. Solder the red wire to the positive side of the connector and the black wire to the opposite side. Your soldering process is now complete!
Step 4: Add Protection and Conceal Wires
Slide the soldered wires into a heat shrink protector. Then, thread the wires through a polyester loop. Secure the cables in place by applying heat from a heat gun.
Step 5: Seal the Aluminum Channel
Once your wiring is complete, close off the channel with its designated cover. Firmly press to ensure a snug fit.
Step 6: Link Channels Using Capped Ends
Seal both ends of your channel using the provided caps. These caps come with holes that not only allow the wires to pass through but also enable you to connect multiple channels seamlessly.
Step 7: Power Up the LED Strips
Bring your LED strips to life by connecting them to the LED controller. Insert the strip’s positive and negative wires into the controller box and hit the ‘On’ button to marvel at your creation!
Step 8: Secure with Double-Sided Tape
Finally, with your LED strips tested and ready, flip over the aluminum channel and apply double-sided tape to the back. You can now position and secure your custom LED strips to any desired location by peeling and sticking!
Customizing LED Flexible Strips: Key Considerations

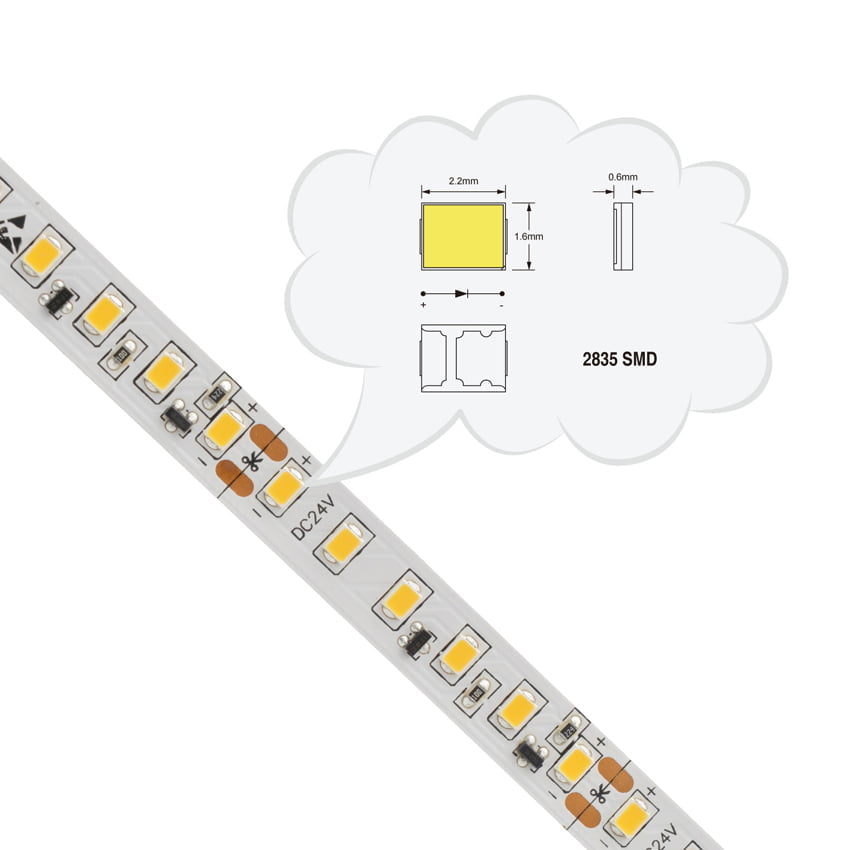
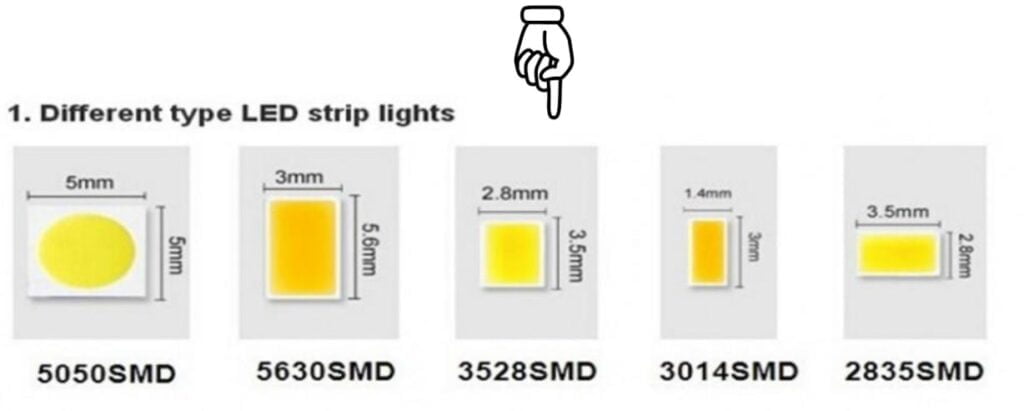
1. Chip Types: LED strips vary in shapes and sizes. For instance, the SMD 2216 LED chip is 2.2mm x 1.6mm. Other variants include SMD5050, SMD3538, SMD1808, etc. The chip size influences brightness, so choose wisely.
2. LED Strip Color: Options range from single colors to RGB, RGBW, tunable white, and more. If flexibility in color is a priority, consider programmable LED strips.
3. PCB Width: Ensure the printed circuit board (PCB) width matches the aluminum channel. A 15mm PCB, for instance, won’t fit a 10mm channel.
4. Strip Length: Typically, these strips come in 5m rolls. Measure the length needed for your project.
5. Cutting Length: Shorter cutting lengths are more flexible and work better with aluminum channels.
6. LED Density: A higher LED density per meter offers smoother light diffusion, eliminating light “dots.”
7. CRI Rating: The Color Rendering Index (CRI) measures color accuracy. Aim for a CRI above 80, with over 95 being ideal.
8. Voltage: LED strips have different voltage ratings, such as 5V, 12V, and 48V. Choose what suits your project.
9. Power Consumption: These strips are energy-efficient, with power rates ranging from 2.4w/m to 30w/m. Pick according to your requirements.
10. Adhesive Quality: Strong double-sided adhesives are vital. They ensure the strip adheres securely to surfaces. For adhesive selection, refer to related guides.
11. Wires: Wire diameters vary. However, remember that a higher gauge number indicates a thinner wire.
12. IP Rating: Higher IP ratings mean better protection from elements like water and dust. If installing outdoors, prioritize a high IP rating.
13. Controller:
You can choose a remote or manual controller to control your LED strips. Installing RGB or color-changing LED strips offers a dynamic color control experience, enhancing the visual appeal.
Before making a purchase, ensure you’ve weighed these considerations.
Cutting LED Flexible Strips:
To cut these strips, pinpoint the connectors and designated cut marks. These marks are found between pairs of connectors. Adhere to these markings, utilizing a sharp blade or scissors. However, avoid cutting anywhere other than the indicated marks.
Keep in mind that each LED on the strip has a specific circuit. Incorrect cutting can disrupt these circuits, preventing the LEDs from illuminating.
Craft Your Color with LED Flex Strips
Do you wish to design your color on an LED flex strip? Begin with a programmable RGB or RGBW LED flex strip. Typically, these strips come with a remote boasting various color options.
While each brand has its unique remote design, the core functions are pretty consistent. For standard colors, use the top section of the remote. For those who want a personalized touch, look towards the bottom part where ‘DIY1’, ‘DIY2’, and so on are marked. Press any of these buttons to craft a color and blend the green, red, and blue lights as desired. You’ll notice arrows for each hue to help adjust the blend.
For example, pressing the red and yellow buttons for 6 seconds can craft a yellow shade. Reduce the blue intensity by pressing its button for 10 seconds to refine this. Combining red and green in balanced amounts produces the yellow tint on the LED strips. To retain this, press the DIY button once more. Consequently, your yellow shade will appear every time you use that button.
With these steps, you can design countless shades on LED flex strips. And if you have a bright RGB or RGBW, managing the lights via your smartphone becomes a breeze!
Budgeting for Custom LED Flex Strips
Personalizing your LED flex strips is budget-friendly. For instance, a 5m LED strip can be acquired for roughly $10, though prices might fluctuate based on quality, size, and color. Meanwhile, an LED controller paired with a dimmer will be about $9.30. Thus, a budget of $20-$30 should cover the basics!
3M double-sided tapes of commendable quality range from $10-$14, depending on tape width. Standard tools like scissors, cables, and solder likely already exist in your toolkit. However, if needed, a 100ft, 18 gauge wire ranges between $8-$12, and a handy mini soldering tool is priced between $14-$20.
Personalizing your LED flex strips should run you just $50-$60, leaving you with spare components for future use.
Where to Find Your Custom LED Flex Strips?
Are you keen on buying a tailor-made LED flex strip? LED strip manufacturers are your go-to. They cater to various preferences, from bend type and color to size and voltage.
MyLikeLed, a front-runner among Chinese LED strip and neon flex manufacturers, has all you’d need for custom LED flex strips. They’ve covered you, whether it’s a particular color, shape, PCB width, power consumption, CRI, or IP rating.
Summary
LED flex strips offer user-friendly customization. There’s no need for expert skills to tailor them to your needs. Select the right LED strip for your project, and with the guidelines mentioned earlier, you can effortlessly create your personalized LED flex strip.
Moreover, MyLikeLed presents various customizable LED strips and LED neon flex choices. Our products are subjected to advanced lab tests to ensure the highest quality. For your LED flex strip needs, reach out to us!

Hi, I’m Xylia Xiong, a sales professional with 14 years of experience in the LED strip light industry. I specialize in providing tailored solutions, leveraging my expertise in LED products and the latest industry trends. Known for effective communication and problem-solving, I’m dedicated to helping lighting manufacturers, importers, and distributors achieve their goals.
Let’s work together to create customized solutions that exceed expectations.